BYO Data Flows
BYO (Bring Your Own) data flows move data from one file system to another using user-defined custom logic for how the files are parsed, processed, and generated. The logic is written as Python code, and Nexla handles everything around it, including reading the files from the source, running the code on a managed runtime, writing the results to the destination, and scheduling and monitoring the flow.
1. BYO Flows
In a BYO flow, users select a source folder, provide a Python process() function that receives each file and returns the output files, and select the folder where the output will be written. Nexla runs the function whenever new files arrive or according to the configured schedule.
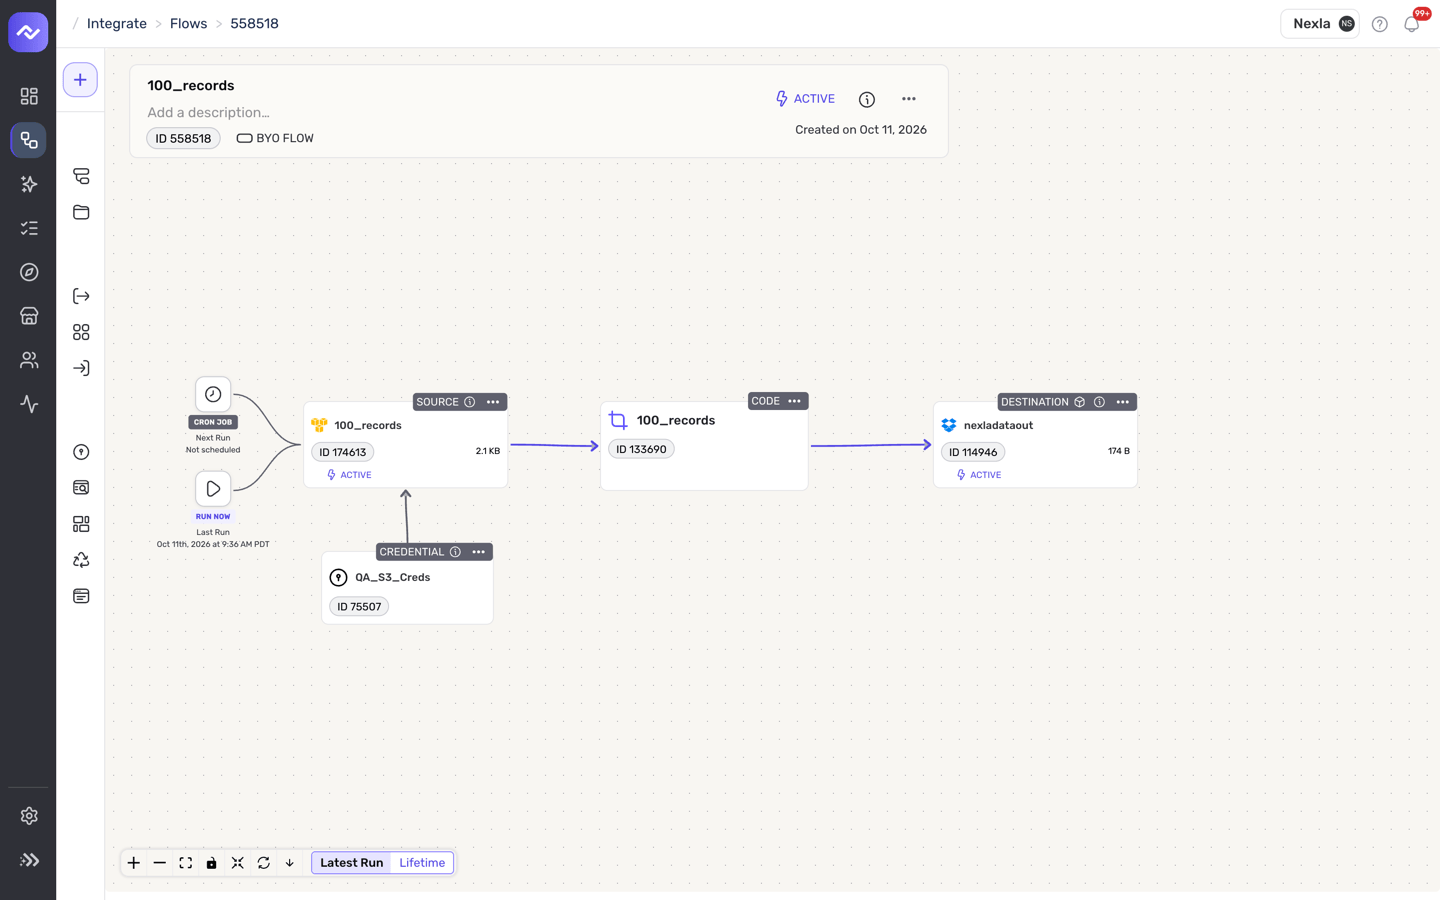
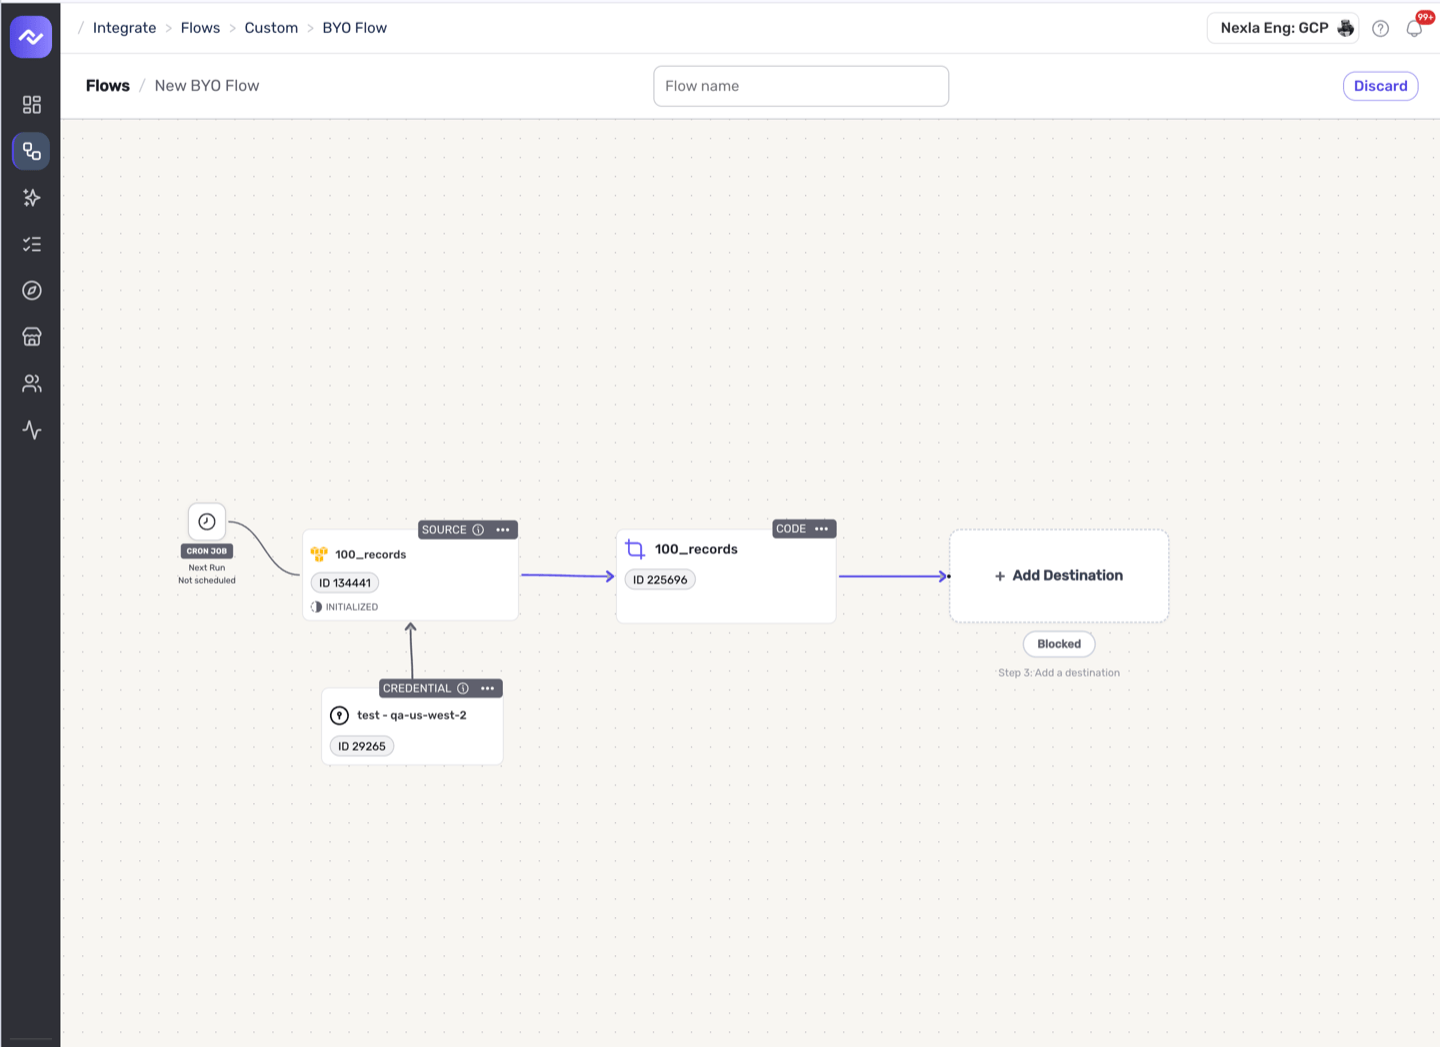
A BYO flow is built from three nodes on the flow canvas, configured in order:
| Node | What it defines |
|---|---|
| Source | Which file system and folder to read from, which files to pick up, and when to check for new files |
| Code | The Python function that processes each file, plus any packages and runtime variables it needs |
| Destination | Which file system and folder the output files are written to |
BYO Data Flow
2. Create a New BYO Data Flow
-
After logging into Nexla, navigate to the Integrate section by selecting
 from the platform menu on the left side of the screen.
-
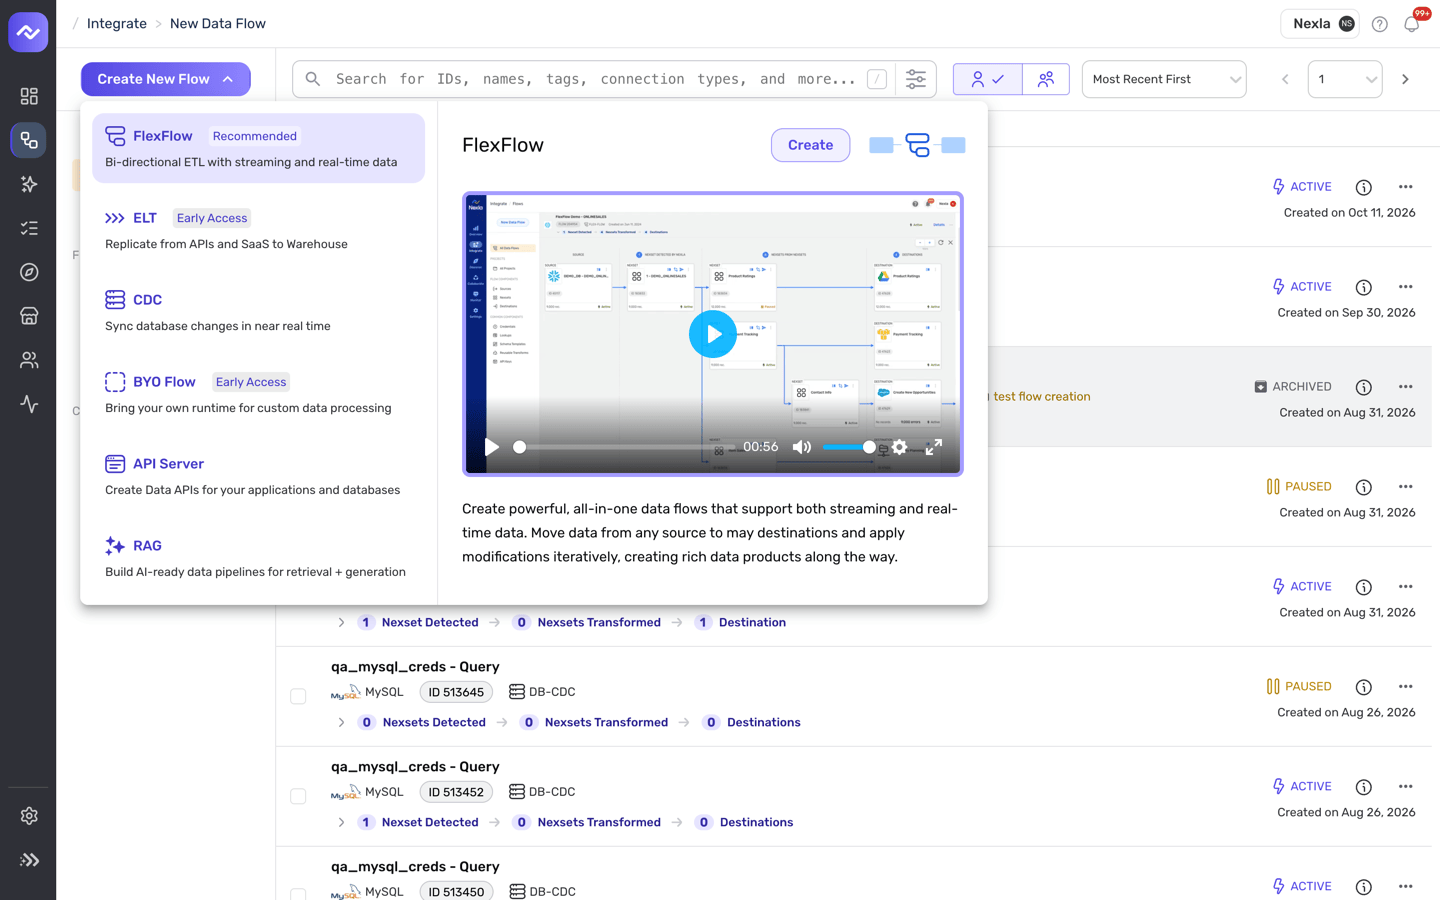
Click Create New Flow at the top of the Integrate toolbar on the left, and select BYO Flow from the list of flow types.
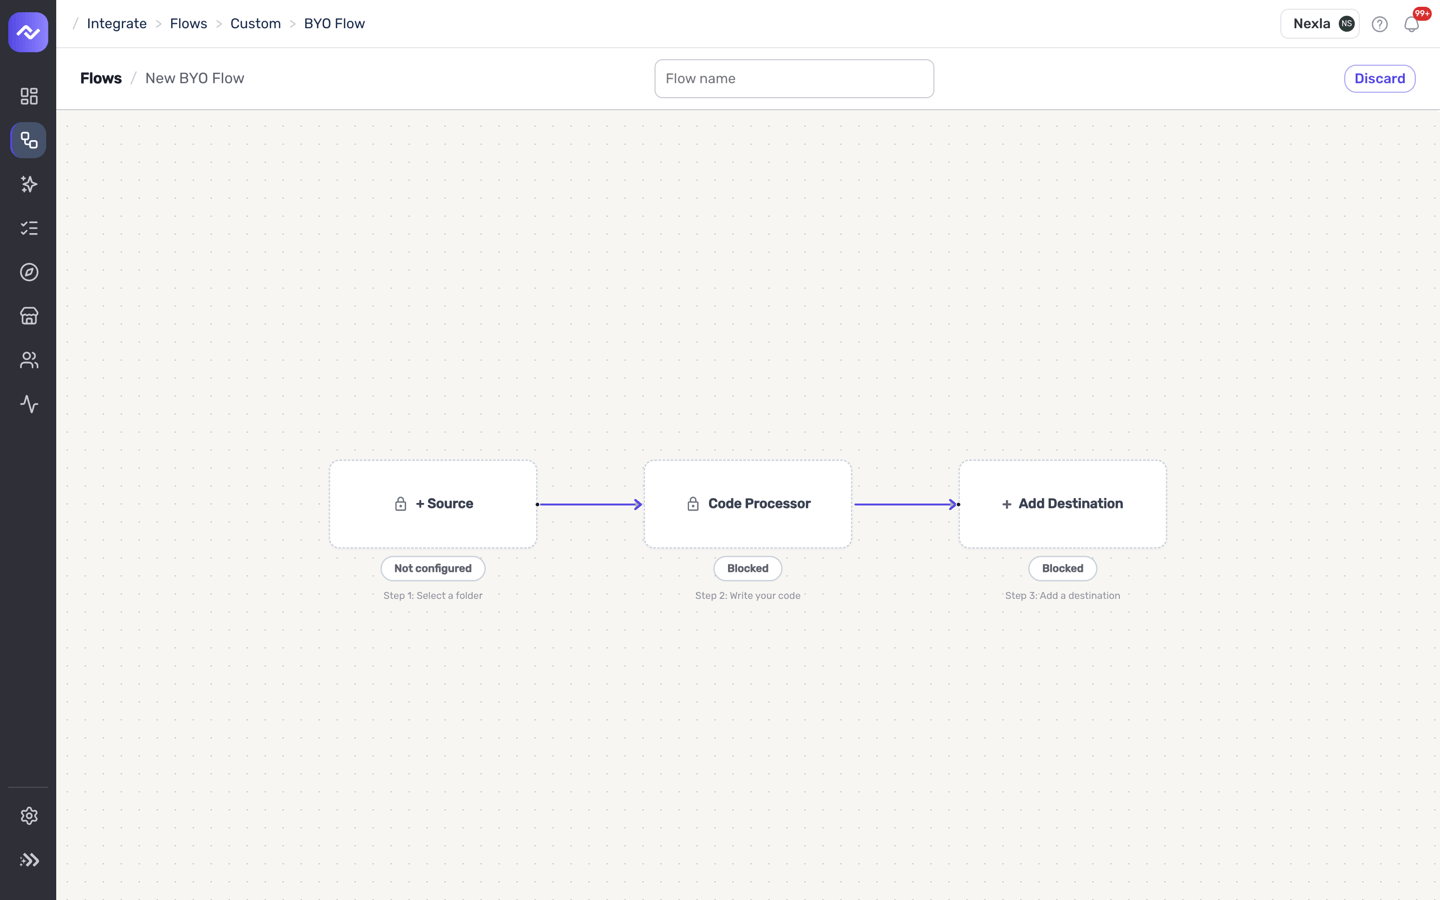
- The BYO Flow canvas opens, containing three placeholder nodes: Source, Code Processor, and Add Destination. Enter a name for the flow in the Flow name field, and then configure each node in order, as described in the following sections.
2.1 Set Up the Source
The source defines the file system and folder from which Nexla reads files, which files in the folder are processed, and when the folder is checked for new files.
Connect & Authenticate
-
Click the Source node on the canvas.
-
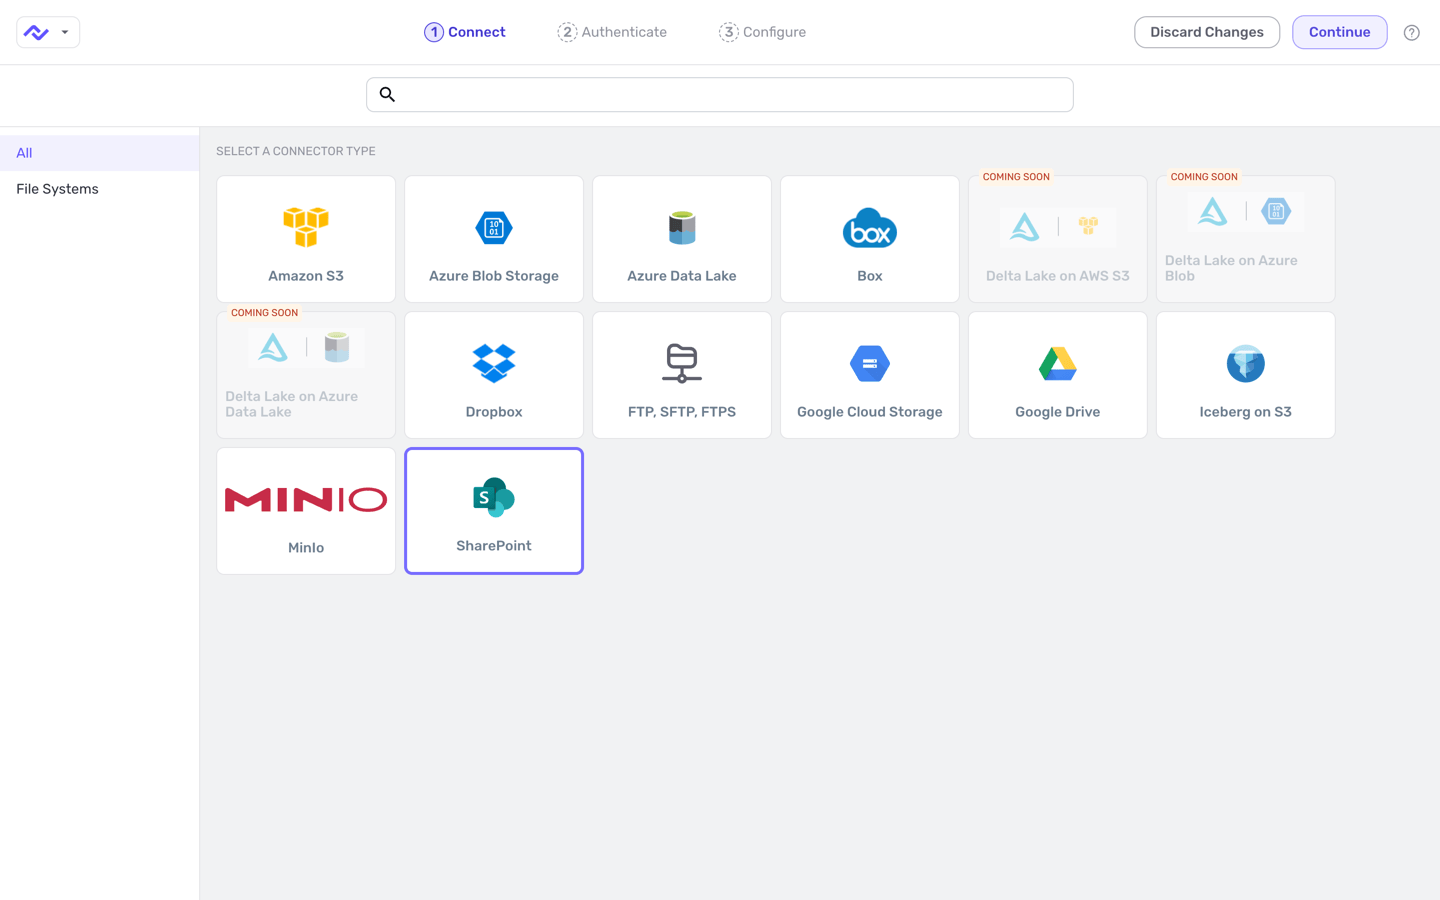
In the Connect screen, select the connector tile matching the file system where the files are stored, and click Continue. Only file-system connectors are available for BYO flows.
- In the Authenticate screen, select or create the credential that will be used to connect to the file system, and click Continue. Detailed information about credential creation for specific file systems can be found on the Connectors page.
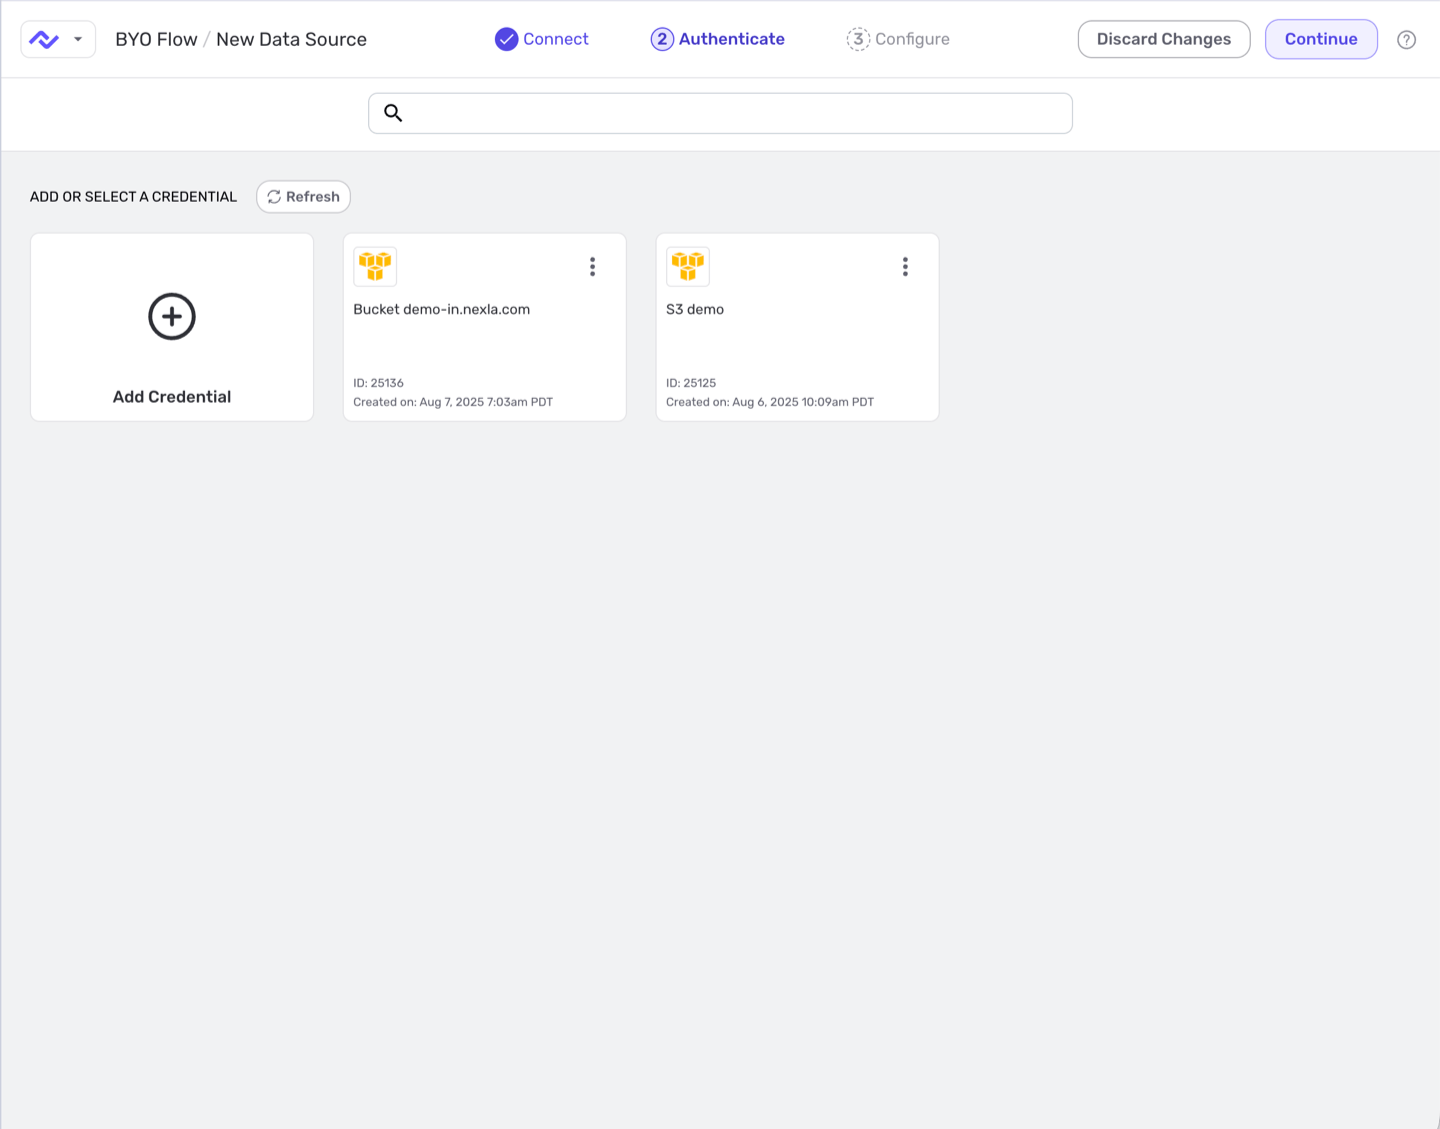
Choose the Source Folder
-
In the Configure screen, enter a name for the data source in the Name field, and optionally enter a description in the Description field.
-
Under Choose Source Folder, select the folder that Nexla will scan for files to process. Use Folder Filters to limit which files in the folder are processed, such as by file name pattern. For more information about these options, see the File-Based Systems page.
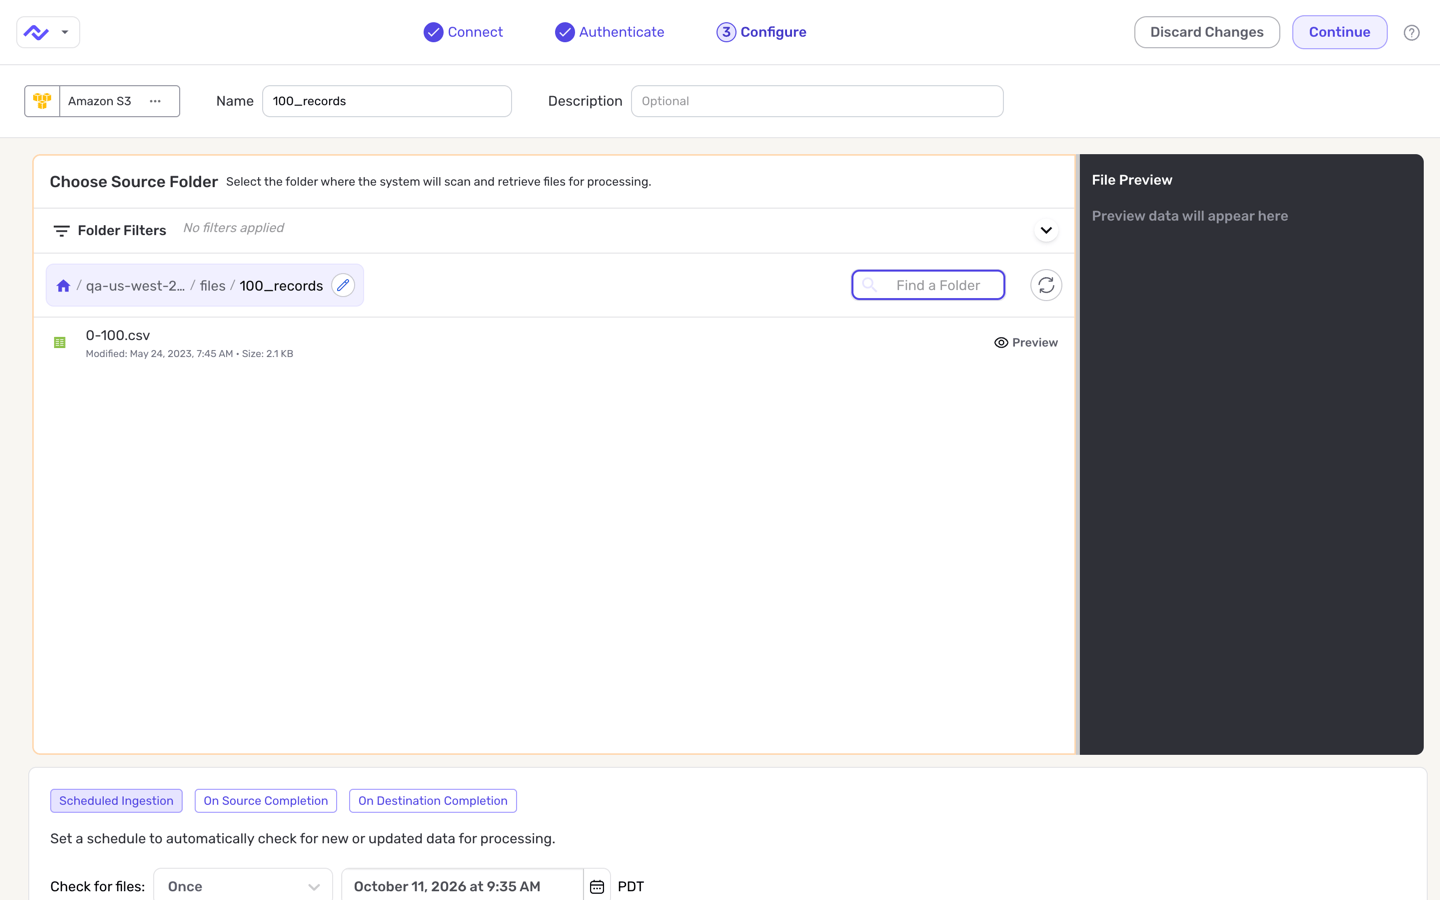
Set the Schedule
-
At the bottom of the screen, choose when Nexla should check the folder for new files: on a schedule under Scheduled Ingestion, or when another flow finishes, under On Source Completion or On Destination Completion.
-
Click Continue to create the source and return to the canvas. The Code Processor node is now unlocked.
No Data Is Read YetCreating the source does not start reading files. The flow does not run until a destination has been added and the flow runs on its schedule or with Run Now.
2.2 Write the Processing Code
The Code node opens a code workspace in which the Python function is written or selected, any required packages and variables are added, and the function is tested against a file from the source folder before the flow is run.
Choose the Function
- Click the Code Processor node on the canvas.
-
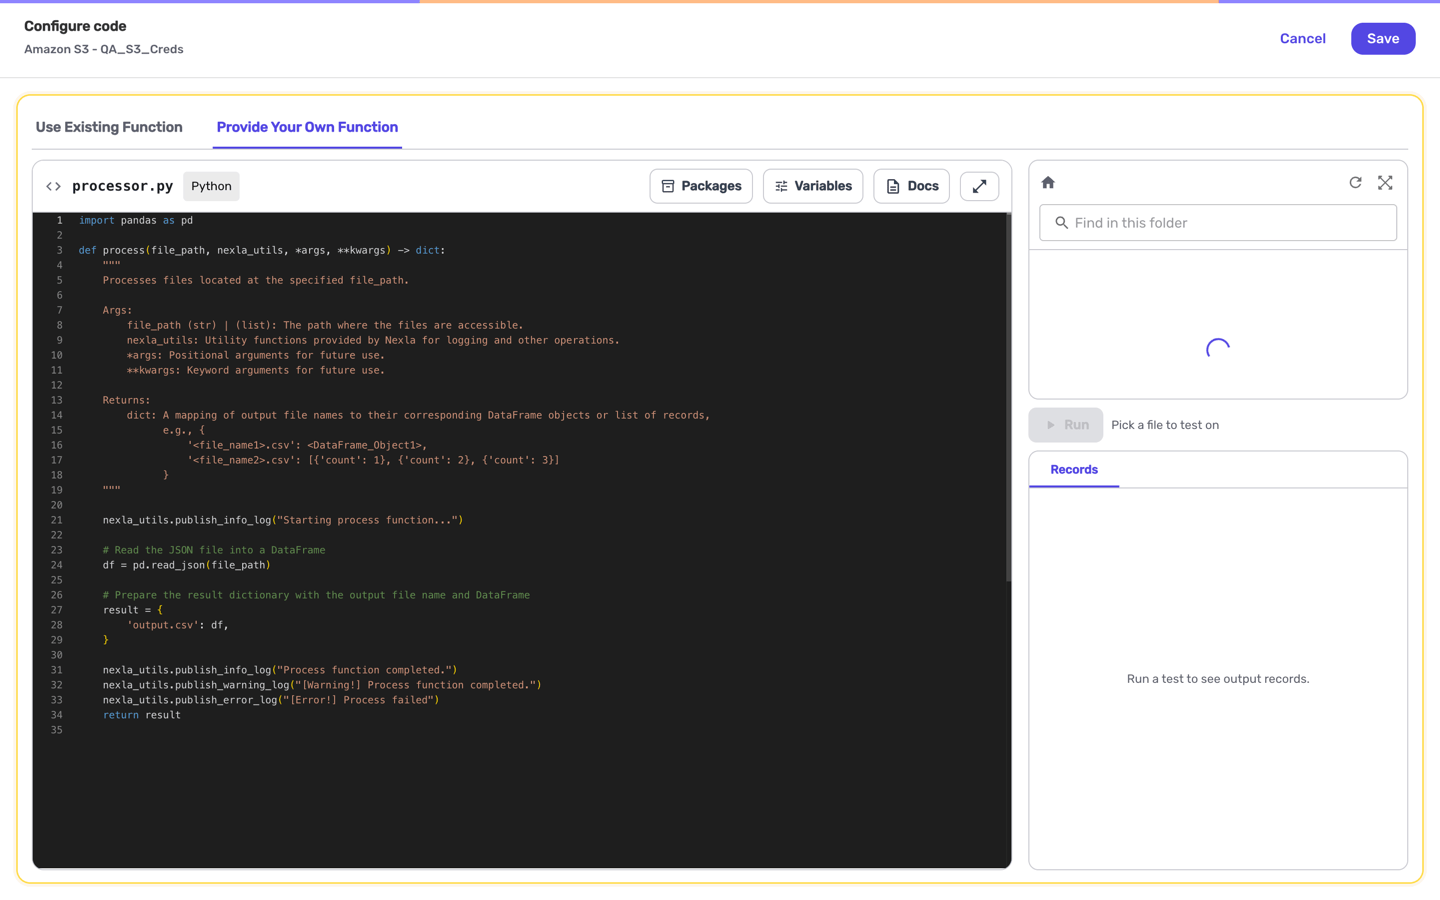
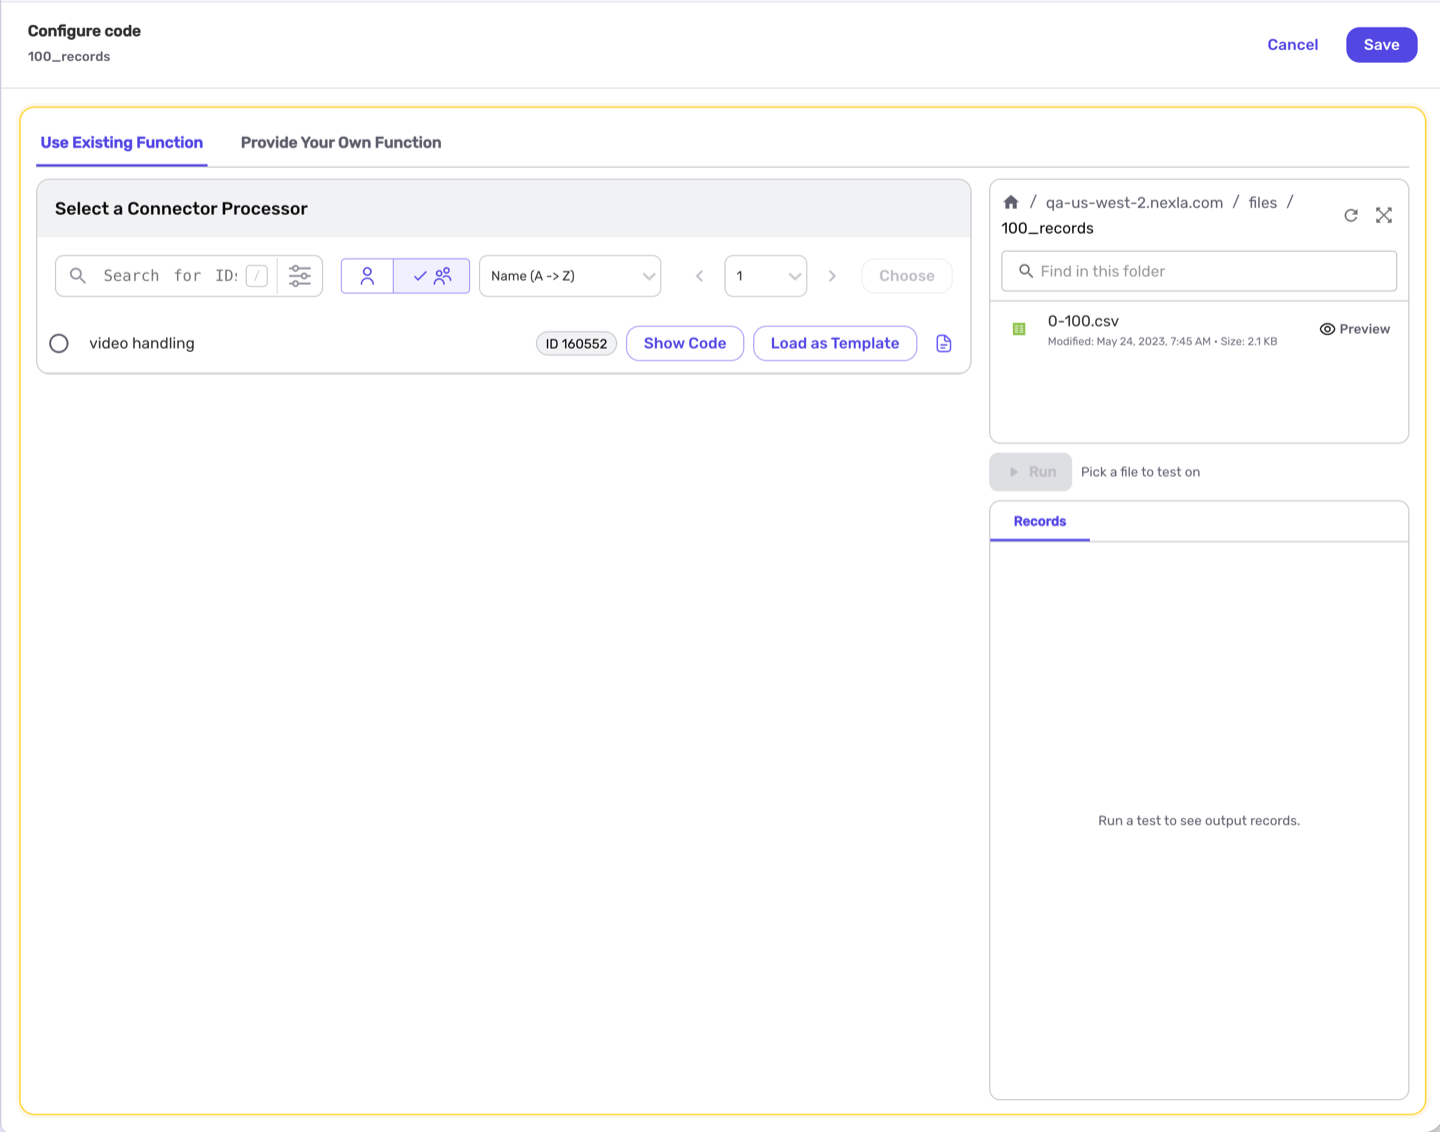
Choose how the processing function will be provided:
-
Provide Your Own Function – Write the function in the
processor.pyeditor. The editor is prefilled with a working template that can be modified as needed. -
Use Existing Function – Select a processor that has already been saved in the organization, and click Choose. Click Show Code to preview a processor before selecting it, or click Load as Template to copy its code into the editor so that it can be modified.
-
Write the Function
-
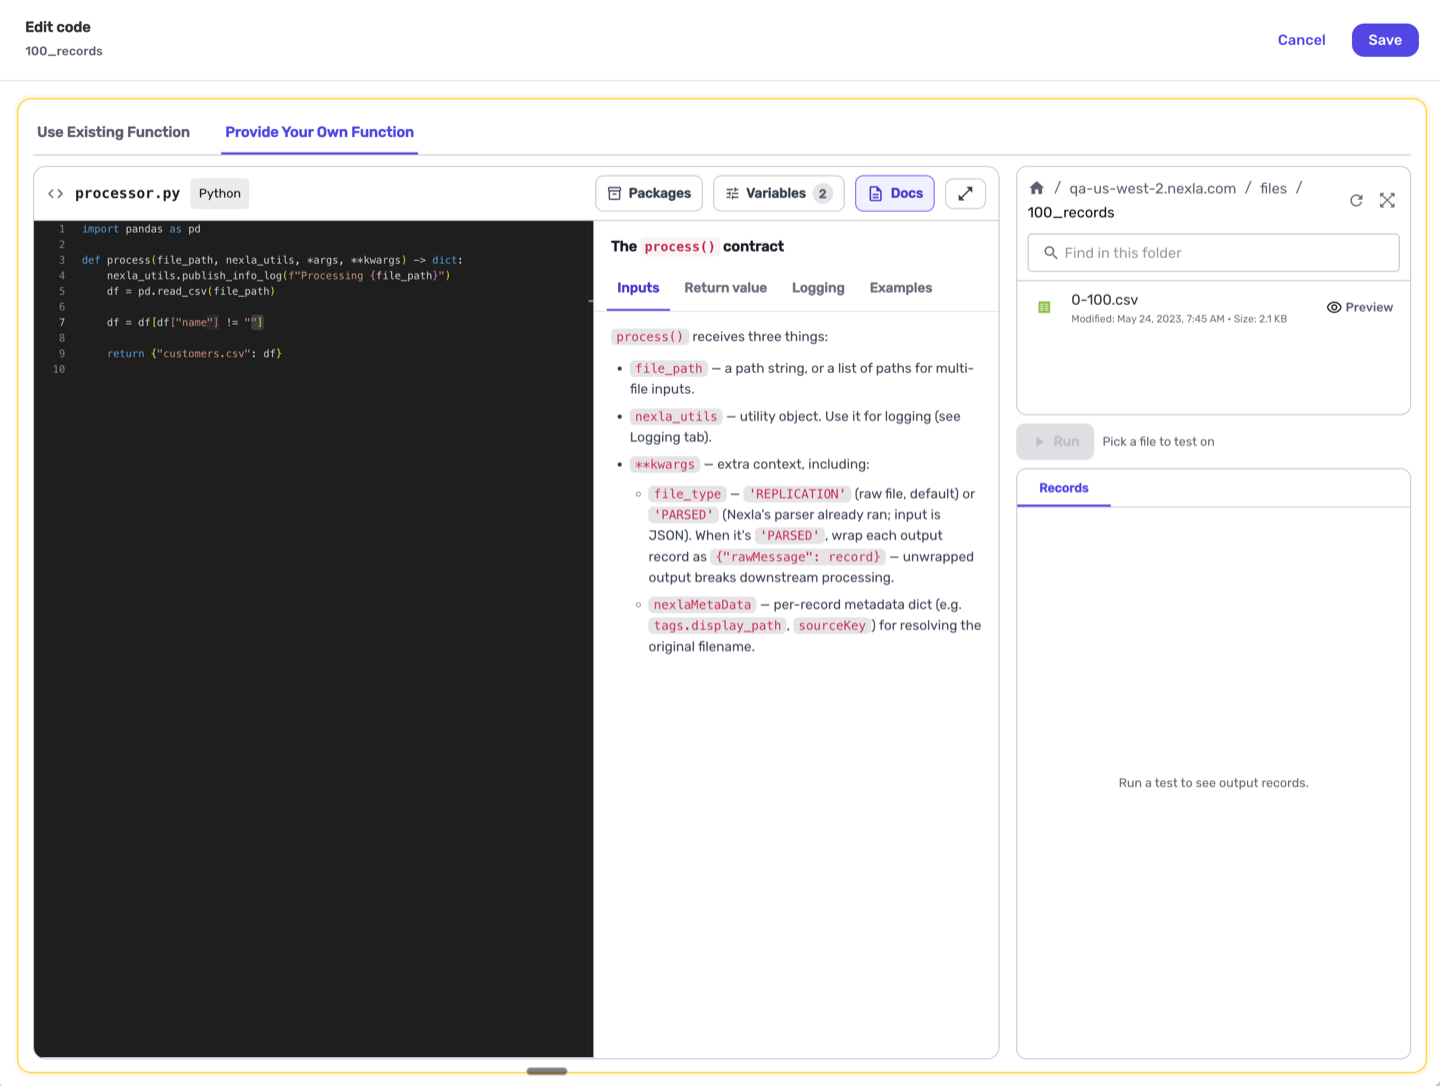
Every BYO processor is a Python function named
processthat receives the path to a file and returns the files to be written to the destination:import pandas as pd
def process(file_path, nexla_utils, *args, **kwargs) -> dict:
nexla_utils.publish_info_log(f"Processing {file_path}")
df = pd.read_csv(file_path)
df = df[df["email"] != ""]
return {"customers.csv": df}file_pathis the local path to the file being processed (or a list of paths when several files are passed together).nexla_utilsprovides the logging helperspublish_info_log,publish_warning_log, andpublish_error_log, whose output appears in the run logs.- The return value is a dictionary mapping each output file name to its contents, as a pandas DataFrame or a list of records. Each entry becomes one file in the destination.
Click Docs in the editor toolbar for the full description of the inputs, return value, and logging helpers.
Add Packages
-
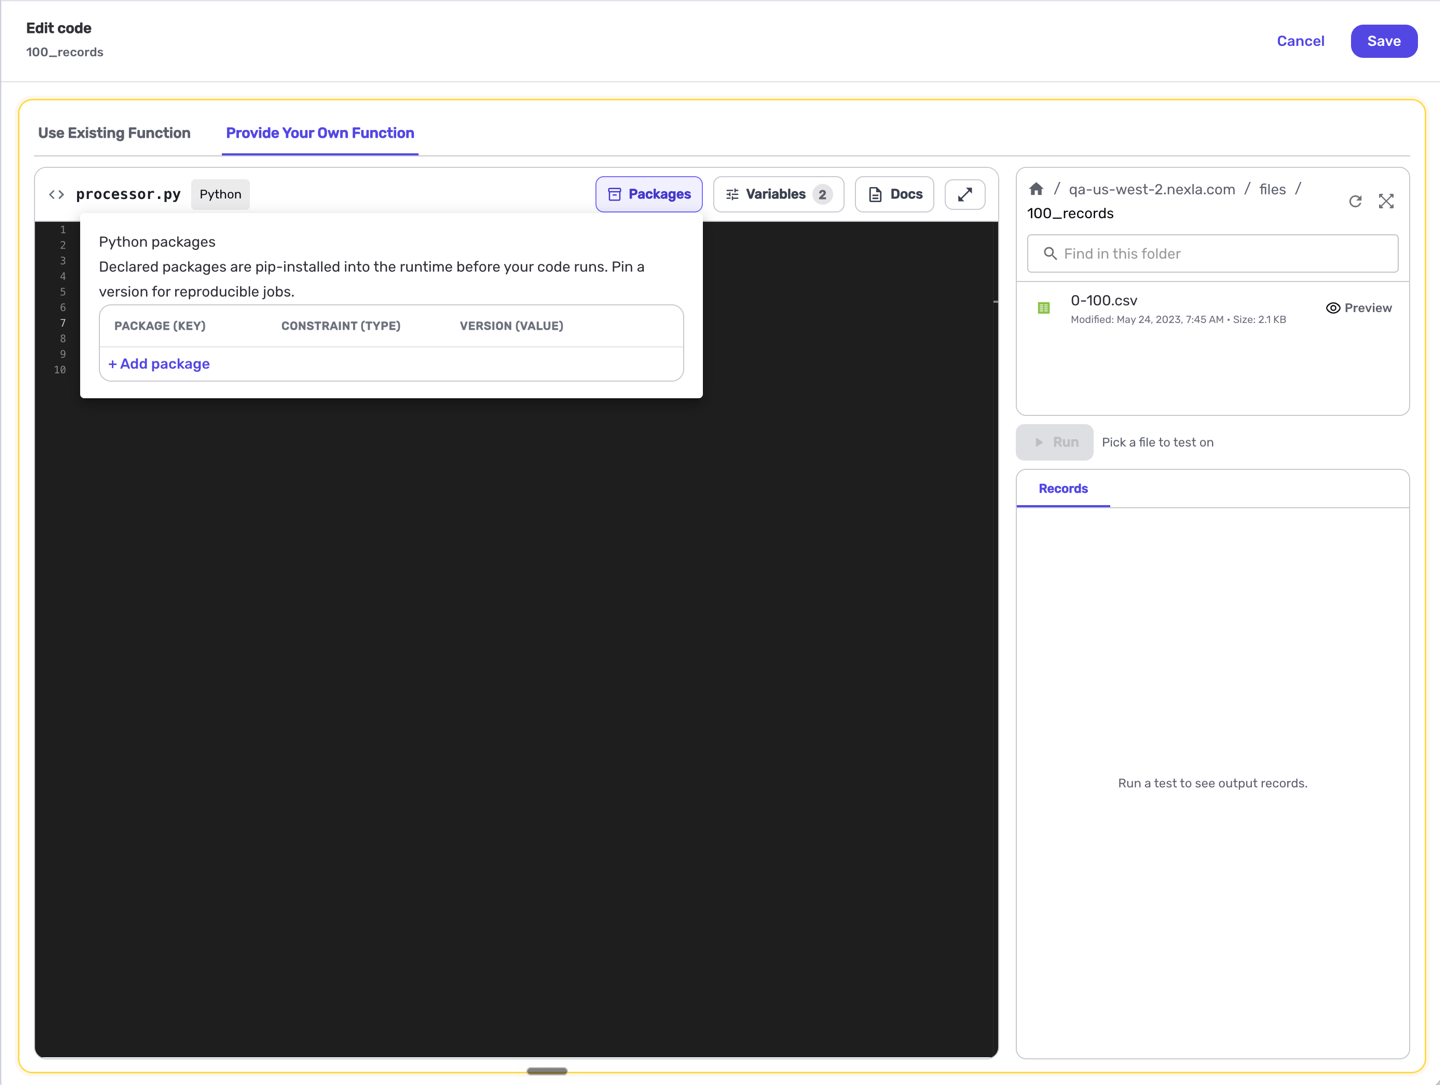
Optional: Click Packages to add Python packages required by the function, or to pin a package to a specific version. The runtime already includes common data-processing packages such as
pandas; declared packages are installed with pip before the code runs.Pin VersionsPackages added without a version install the latest release each time the flow runs. Pin a version for jobs that must be reproducible.
Add Runtime Variables
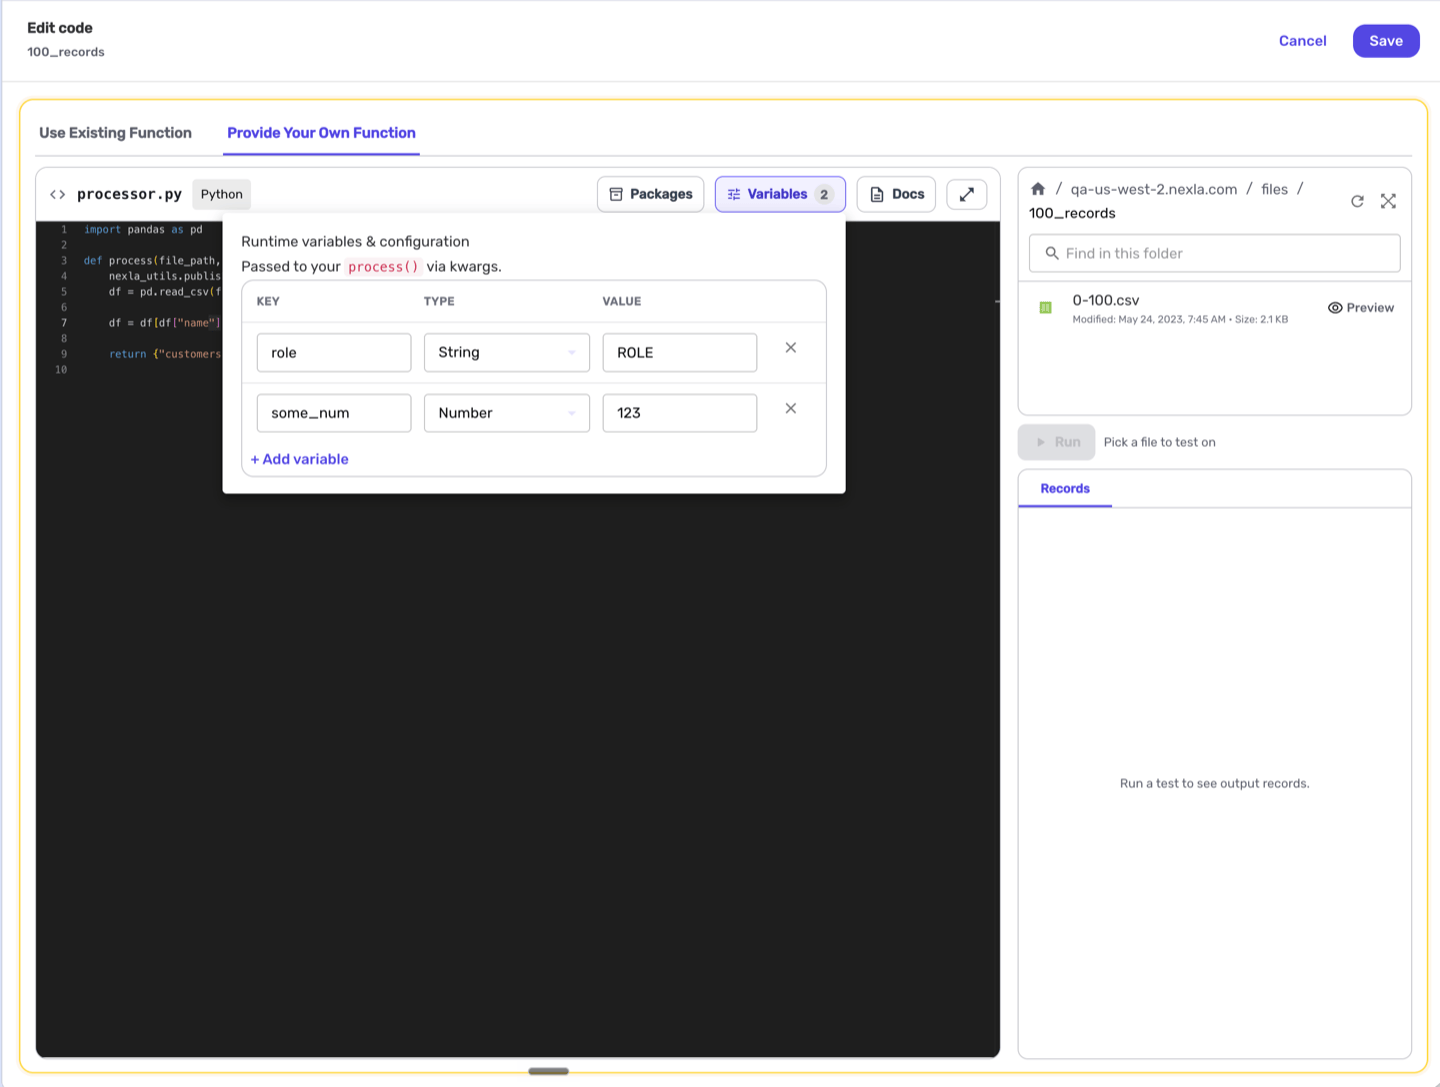
- Optional: Click Variables to pass configuration values to the function without changing its code, such as a threshold, an output file prefix, or an API key. Each variable has a Key, a Type (String, Number, or Secret, which is masked in the interface), and a Value, and is read in the code as
kwargs["KEY"].
Test & Save
- In the Test panel on the right, select a file from the source folder, and click Run. The Records tab shows the output the function produced for that file, and any error raised by the code is shown above it. Tests use the current code, packages, and variables, and do not write anything to the destination.
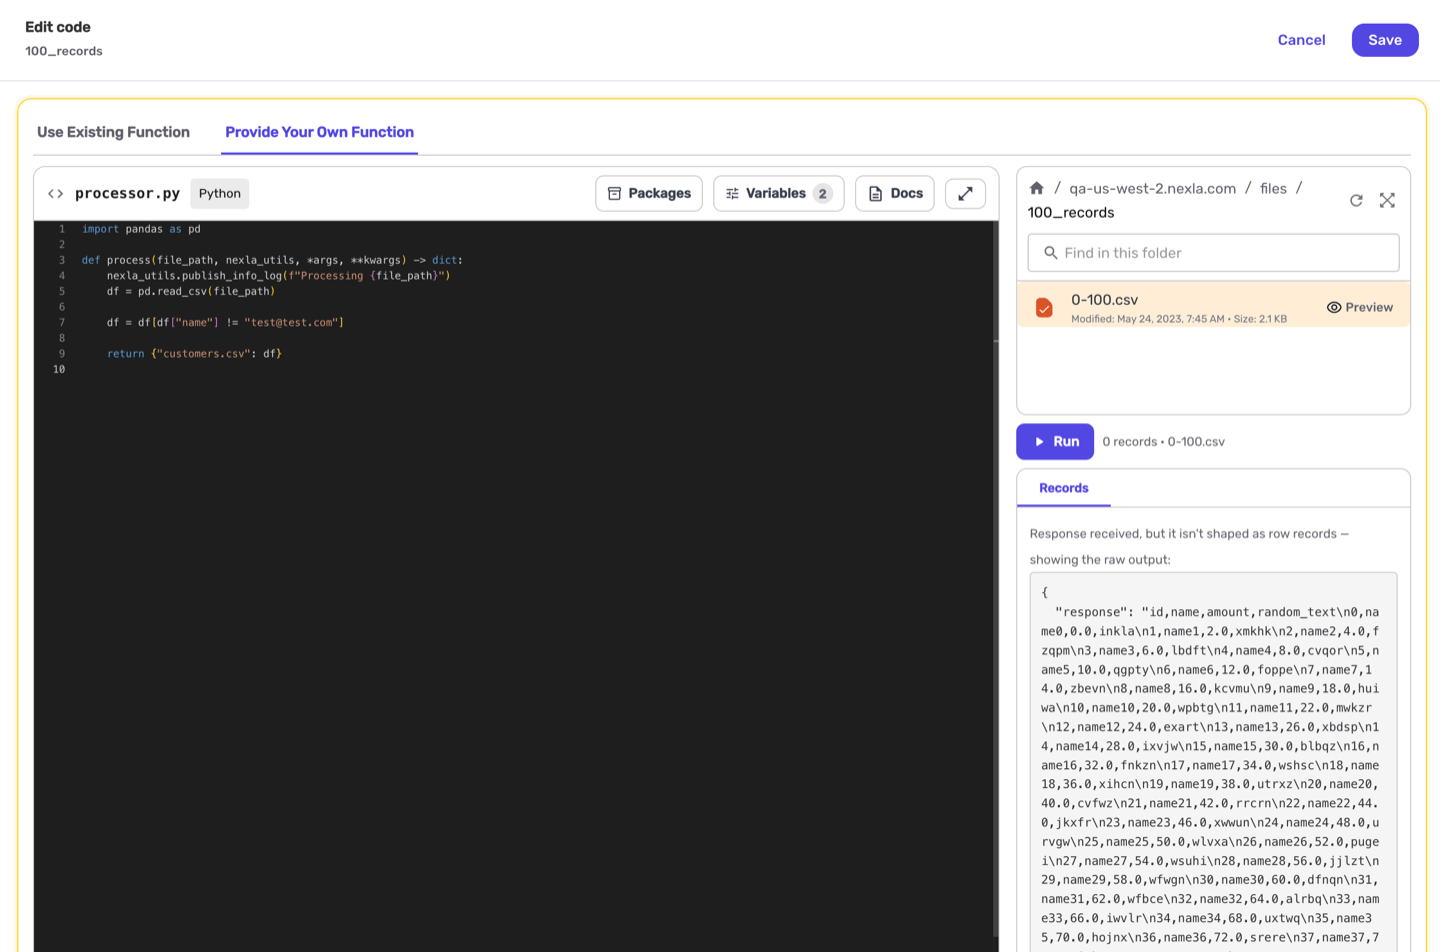
- Once the output is as expected, click Save to return to the canvas. The Add Destination node is now unlocked.
2.3 Add the Destination
The destination defines the file system and folder to which the output files returned by process() are written.
Connect to the Output File System
-
Click the Add Destination node on the canvas.
-
In the Connect and Authenticate screens, select the file-system connector and credential for the location where the output files should be written, clicking Continue after each.
Choose the Destination Folder
- In the Configure screen, under Destination Directory, select the folder where Nexla will write the files returned by
process().
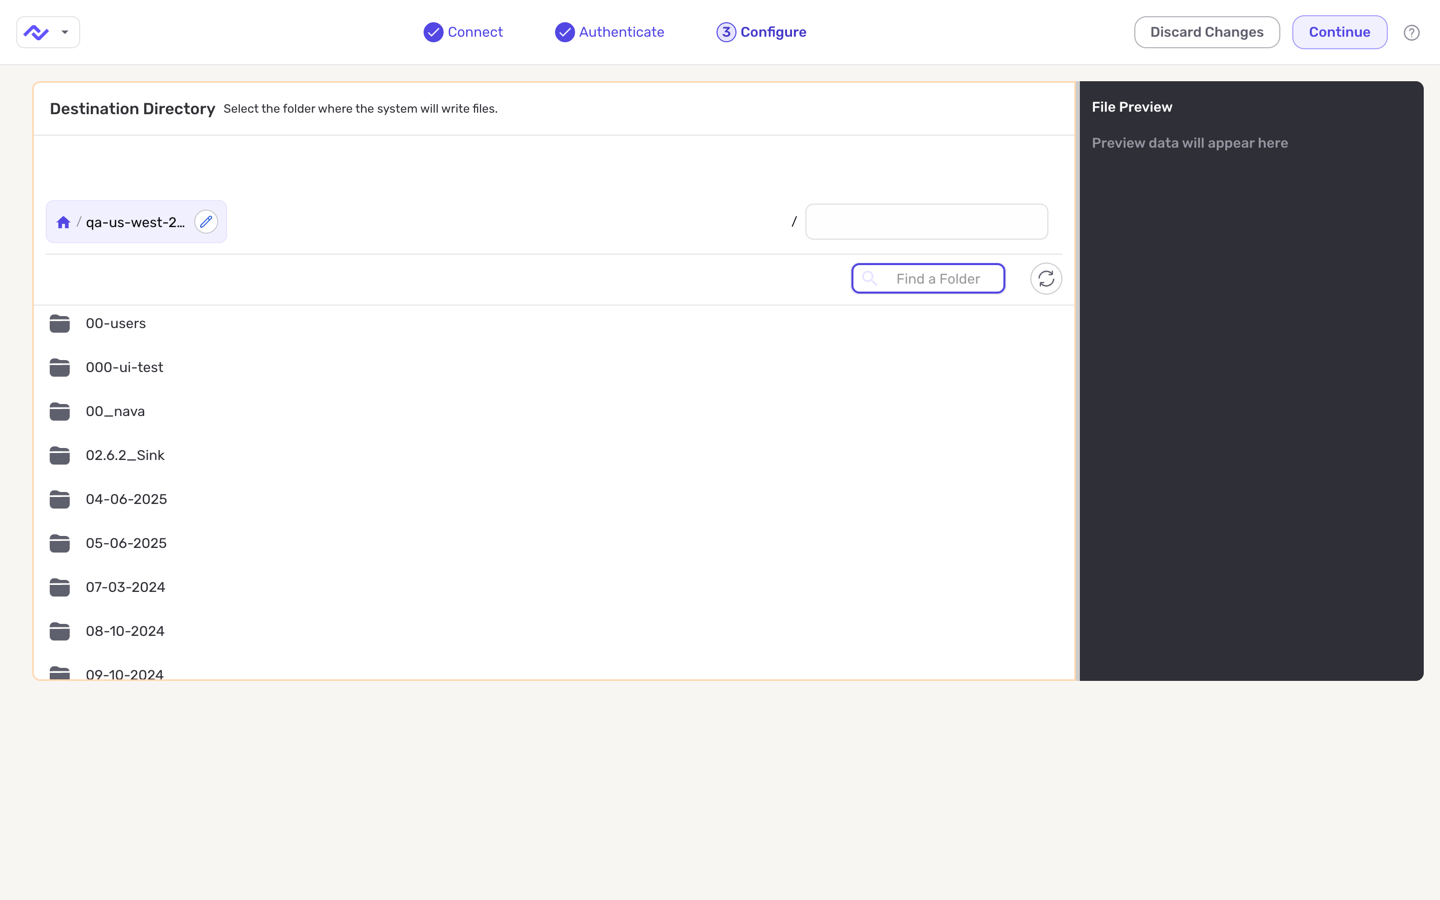
- Click Continue to create the destination. The flow is now complete and active, and it will run according to the schedule or trigger configured for the source.
3. Run & Manage a BYO Flow
- To process the files in the source folder immediately, click the Run Now node to the left of the source. The time of the most recent run is shown under it, and the next scheduled run is shown under the Cron Job node.
- To change the source folder, filters, or schedule, open the ⋯ menu on the Source node and select Edit.
- To change the code, packages, or variables, open the ⋯ menu on the Code node and select Edit code. View code opens the saved code in a read-only view.
- To change the destination folder, pause the destination from its ⋯ menu first, select Edit, and then activate it again after saving.
- To stop scheduled runs without deleting the flow, select Pause Flow from the ⋯ menu in the flow header; select Activate Flow to resume them.