Quick Start Guide
This article is a guide to help new users get started in Nexla.
The Quick Start Guide video in Section 1 is the easiest way to become familiar with Nexla. It introduces Nexla's interface and shows how to set up an example data flow. Additionally, Section 2 briefly describes each of Nexla's sections and the information and functions found there. Then, Section 3 provides step-by-step instructions for creating a simple example data flow.
1. Quick Start Guide Video
2. Nexla's Interface Sections
Nexla's intuitive user interface allows anyone to easily and efficiently complete any data workflow—from data discovery to data flow design and management, governance, collaboration, user administration, and more.
In Nexla, the toolbar on the left side of the screen is used to navigate between each of the sections introduced below.
The Integrate, Collaborate, Monitor, and Settings sections contain multiple screens, which are accessed using the section toolbar indicated in the following example:
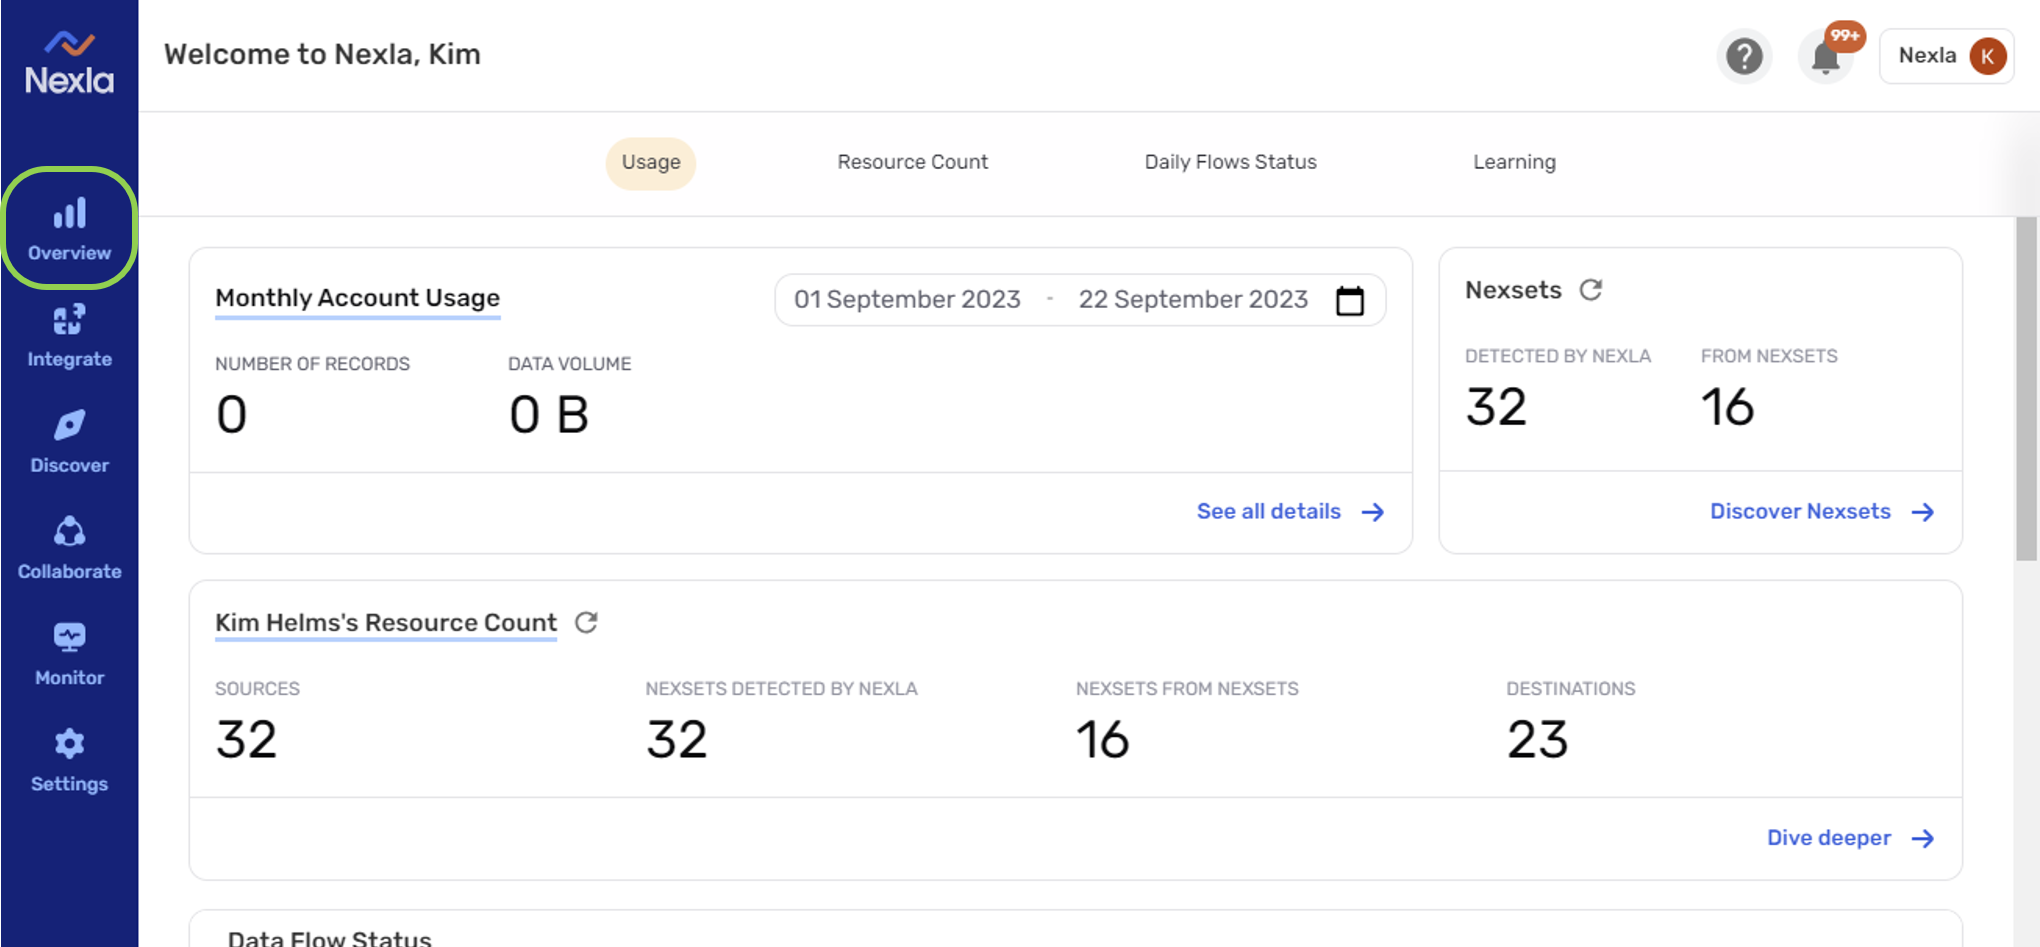
2.1 Overview
After logging into Nexla, users will first see the Overview section, which displays information about the user’s Nexla account, including usage, Nexset, and resource statistics as well as flow status summaries. Clickable links in each category provide additional details in Nexla’s other sections.
2.2 Integrate
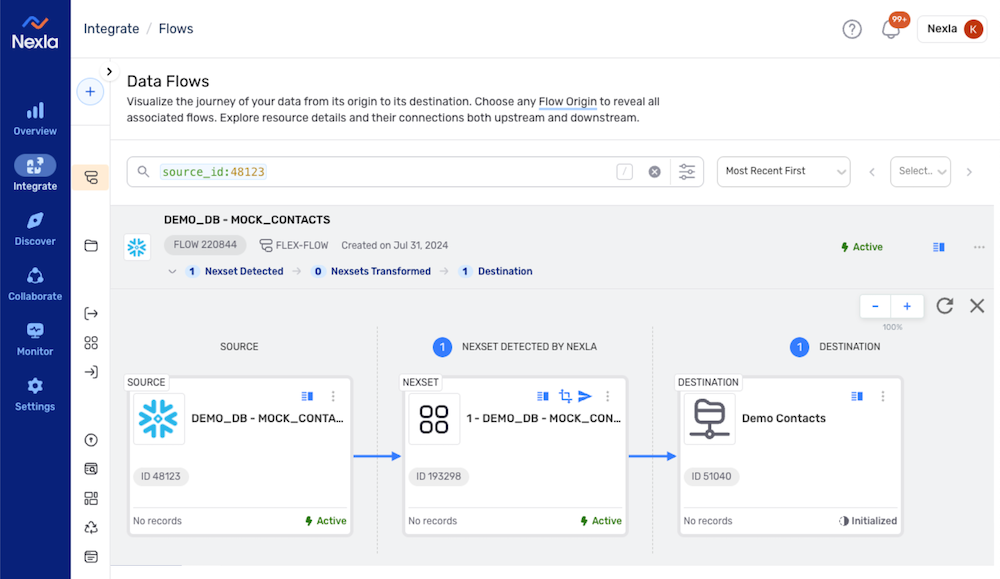
In the integrate section, users can find everything needed to create new data flows or modify existing flows. The screens in this section display accessible data flows and projects, data sources, Nexsets, data destinations, and other flow components, along with associated information and functions.
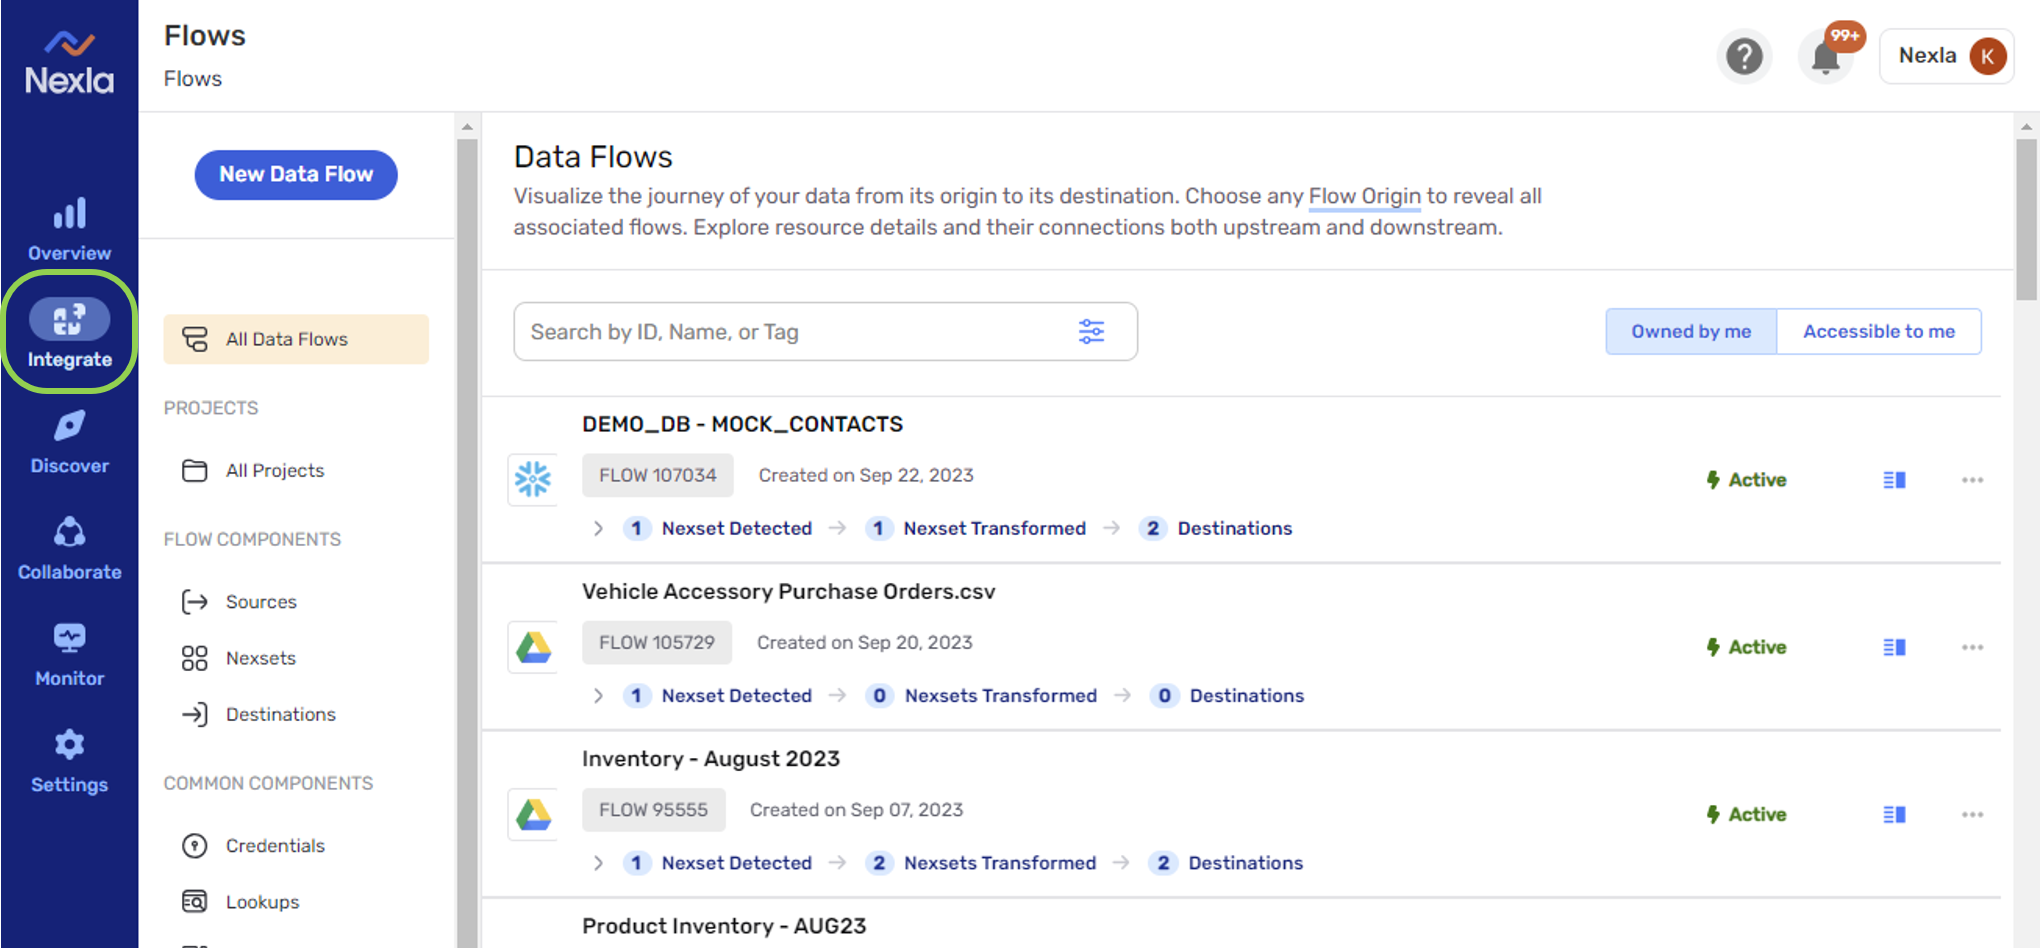
- See this video for more information about Nexla's Integrate section:
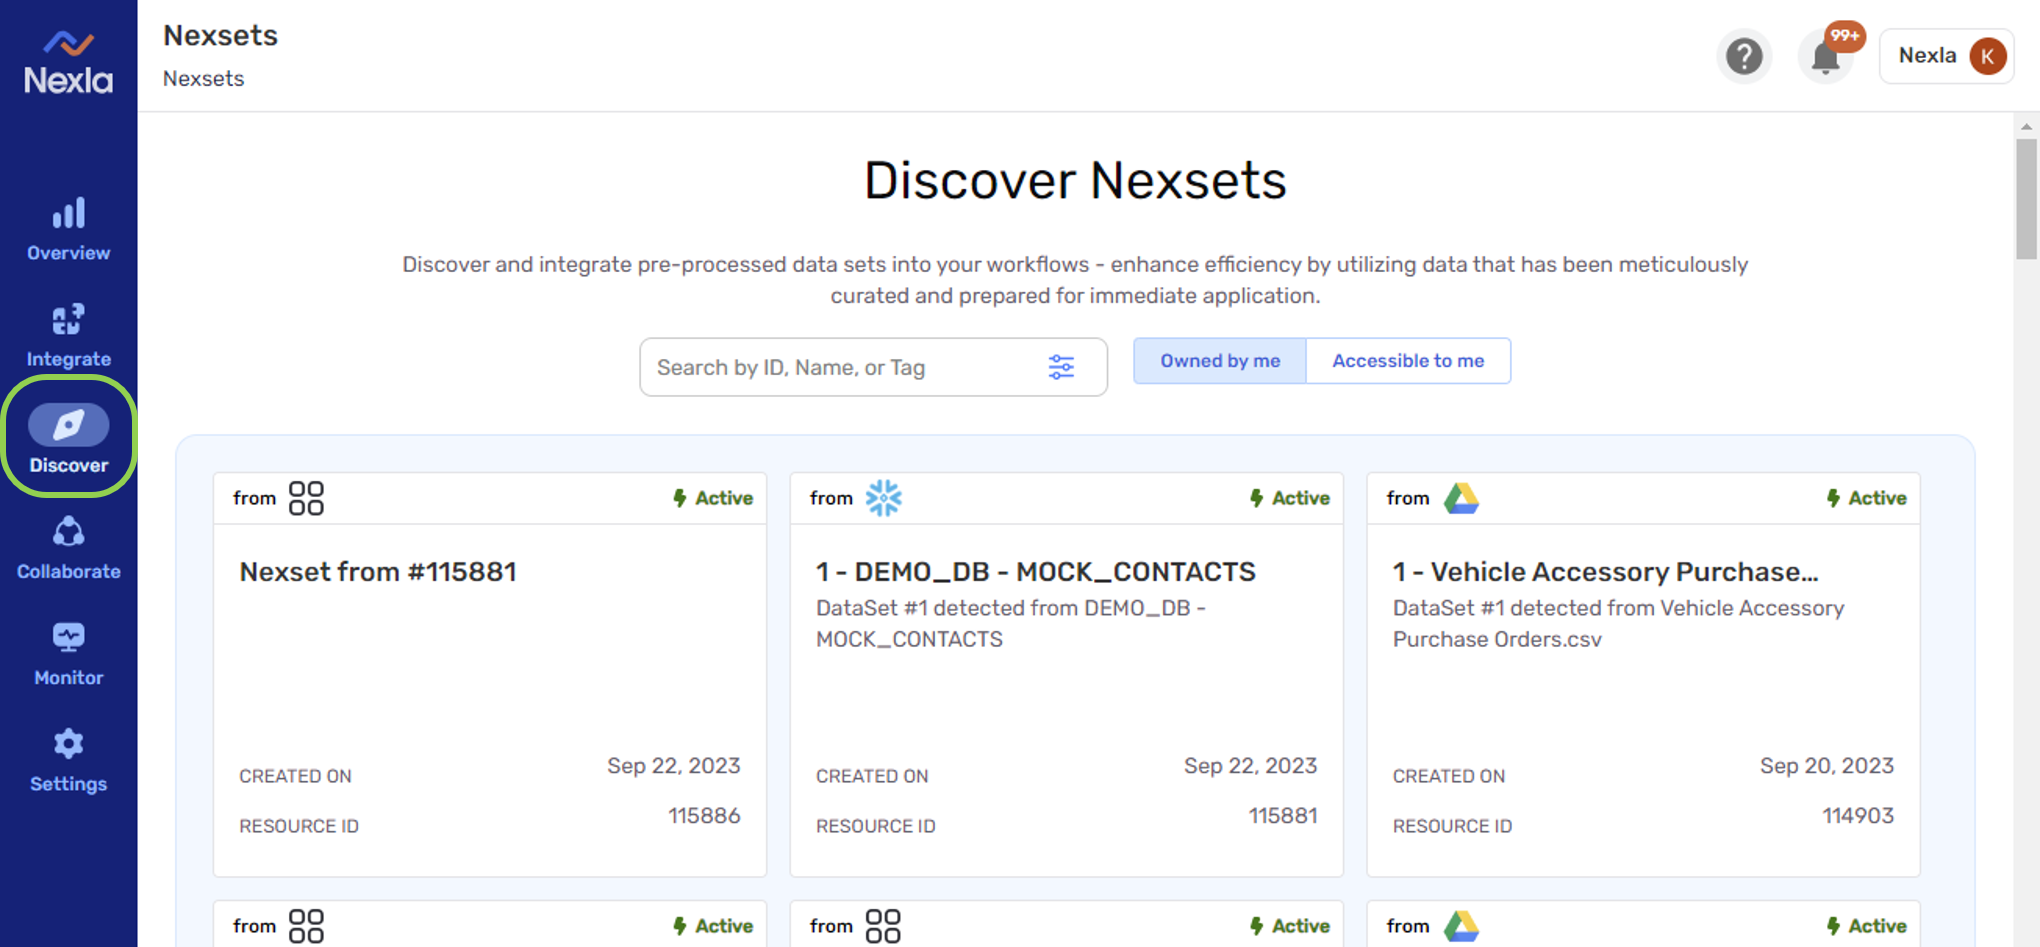
2.3 Discover
In the Discover section, users can find all Nexsets to which they have access. Nexsets can be searched by ID, name, or applied tags, and any listed Nexset can be immediately transformed or sent to a destination from this section.
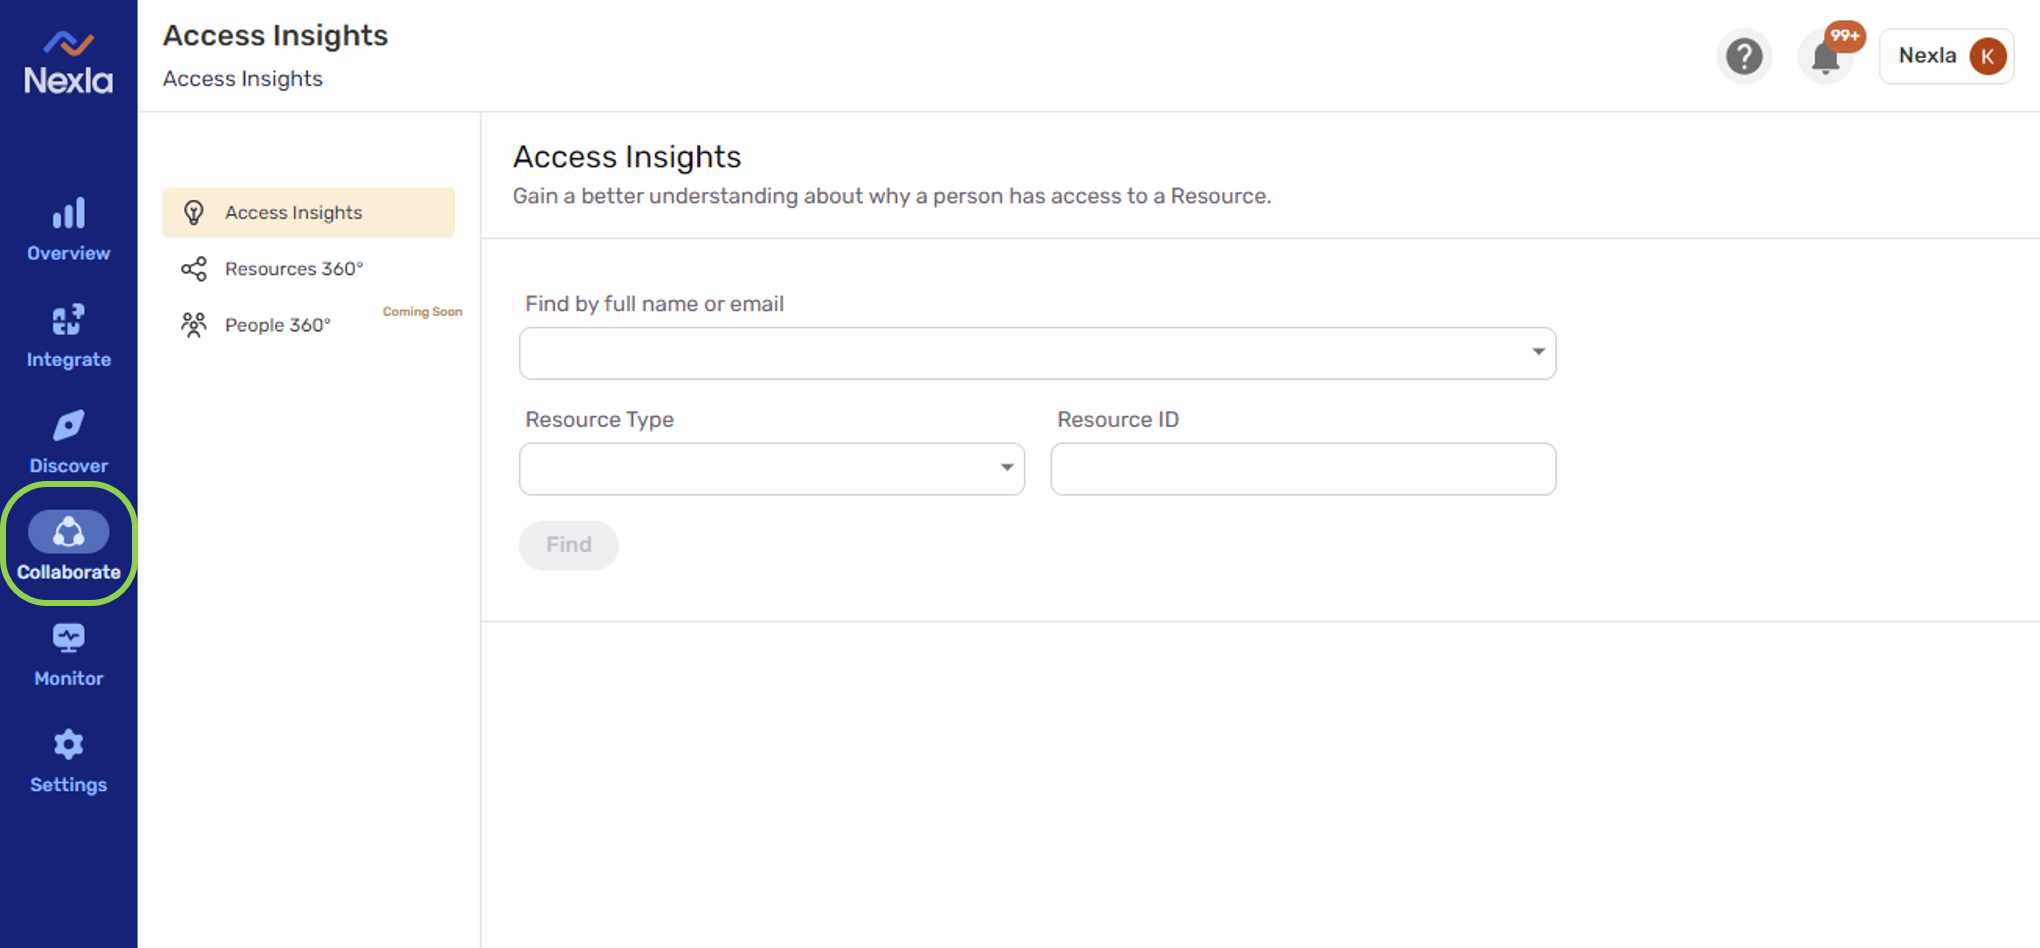
2.4 Collaborate
The Collaborate section allows users to easily understand and manage the resource-level access controls provided by Nexla, including viewing insights about user access by user or resource ID. This enables efficient collaboration among users, teams, or entire organizations.
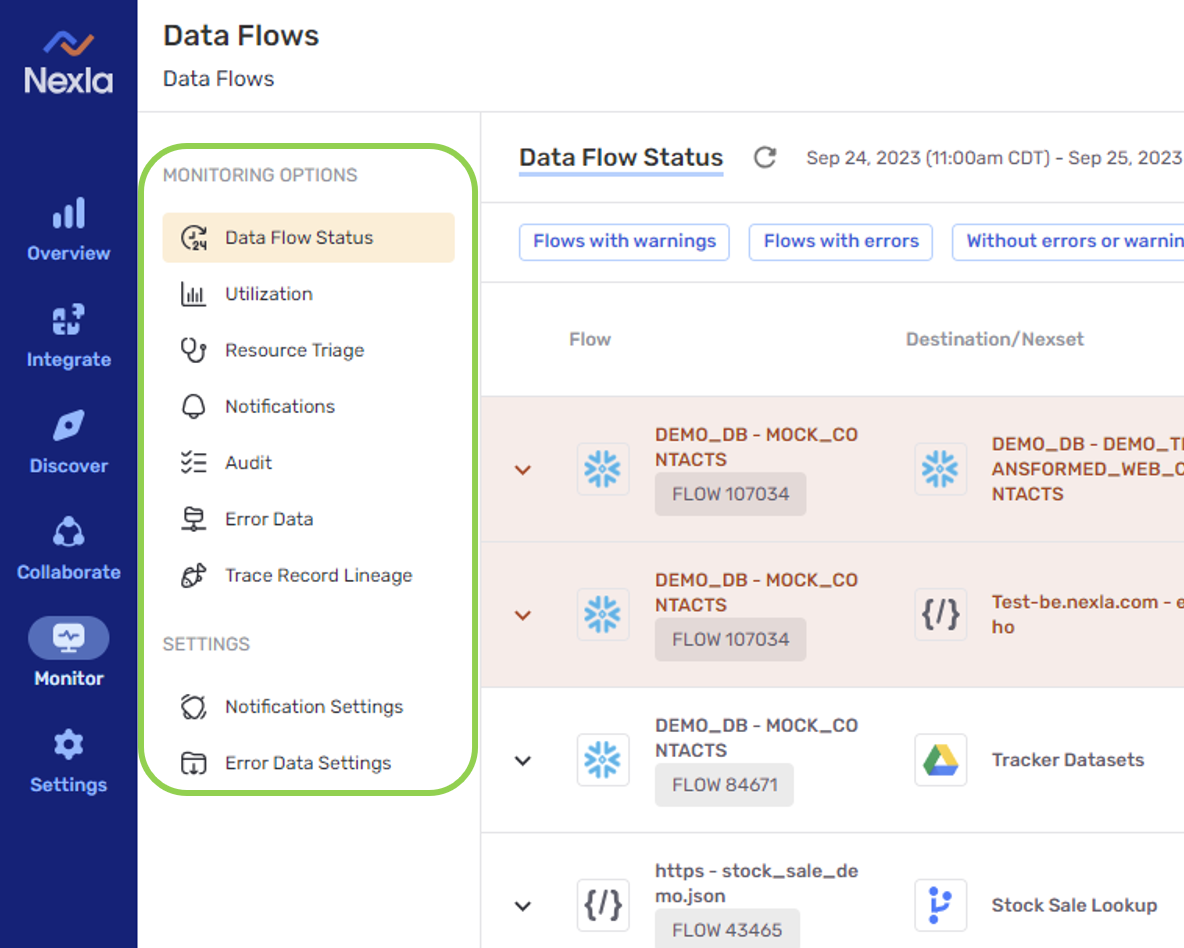
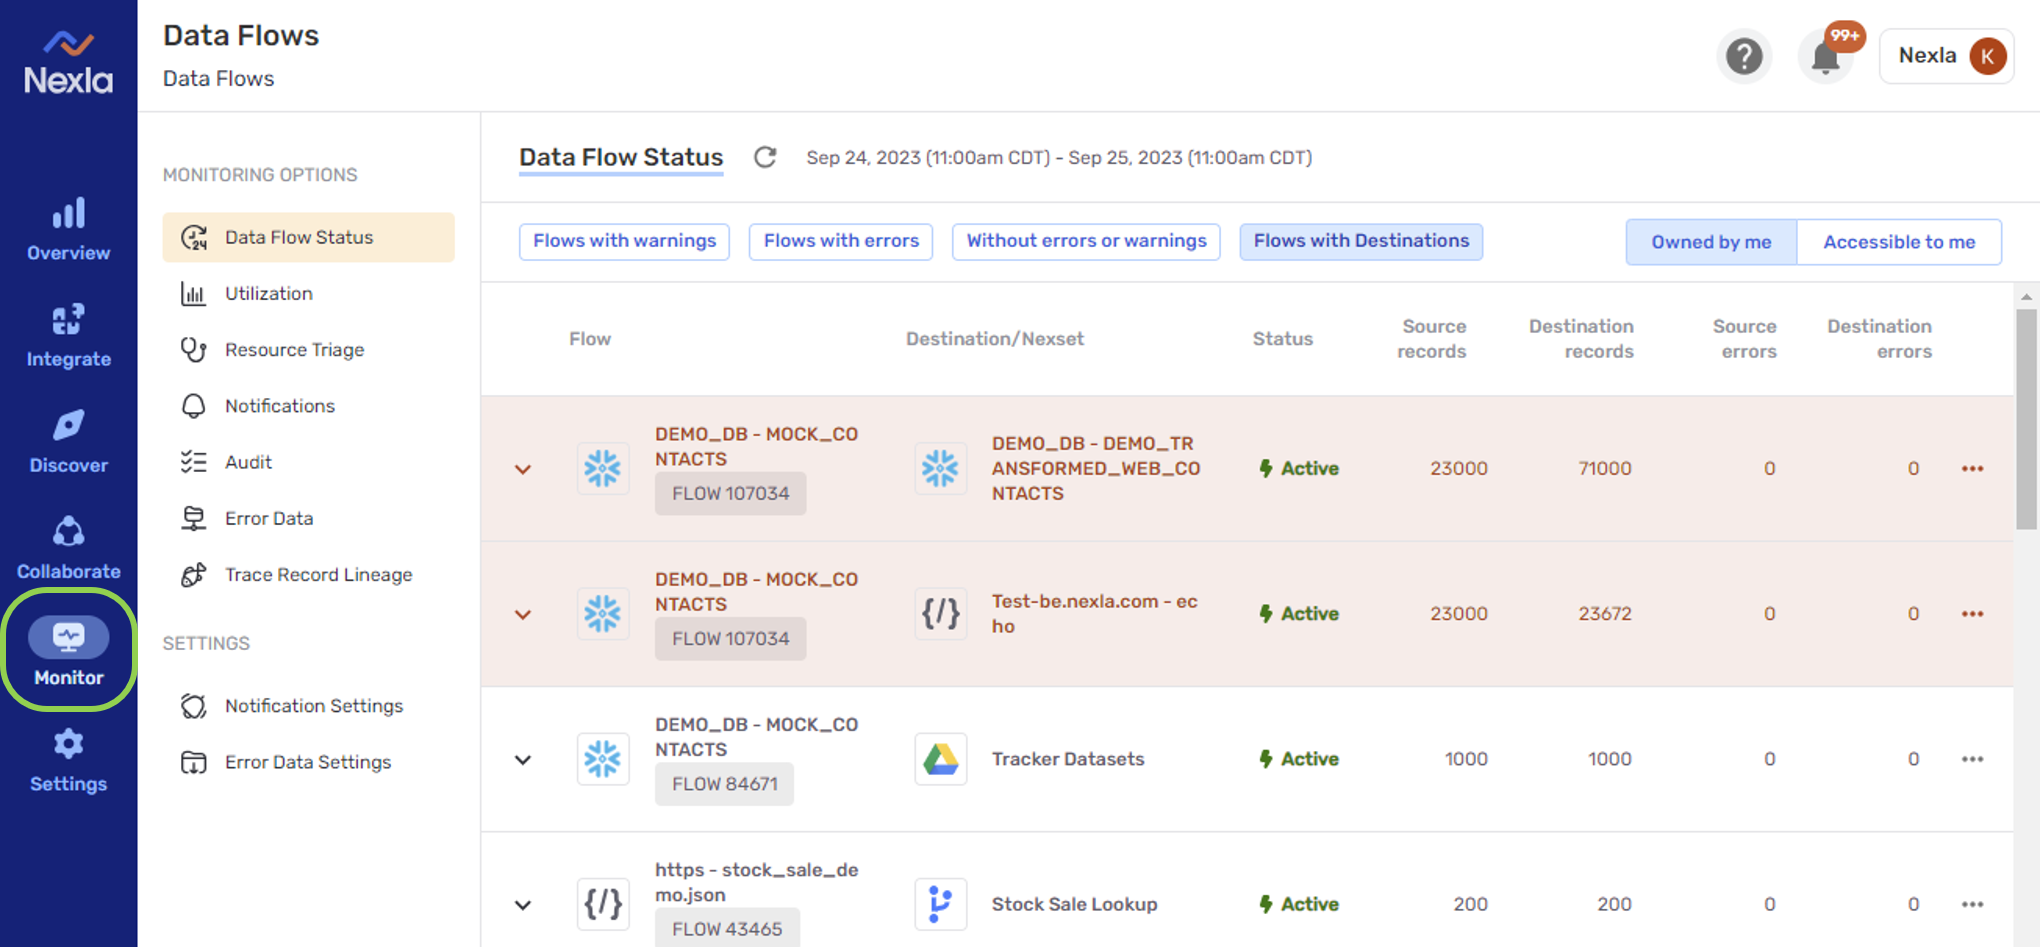
2.5 Monitor
The screens available in the Monitor section provide streamlined access to all of the monitoring information and settings provided by Nexla’s powerful platform. Users can conduct any governance or troubleshooting task, ranging from checking the status of data flows and examining flow resources to triage issues to monitoring notifications and errors, auditing resource events, tracing the lineage of records, and more, directly within this section.
- See this video for more information about Nexla's Monitor section:
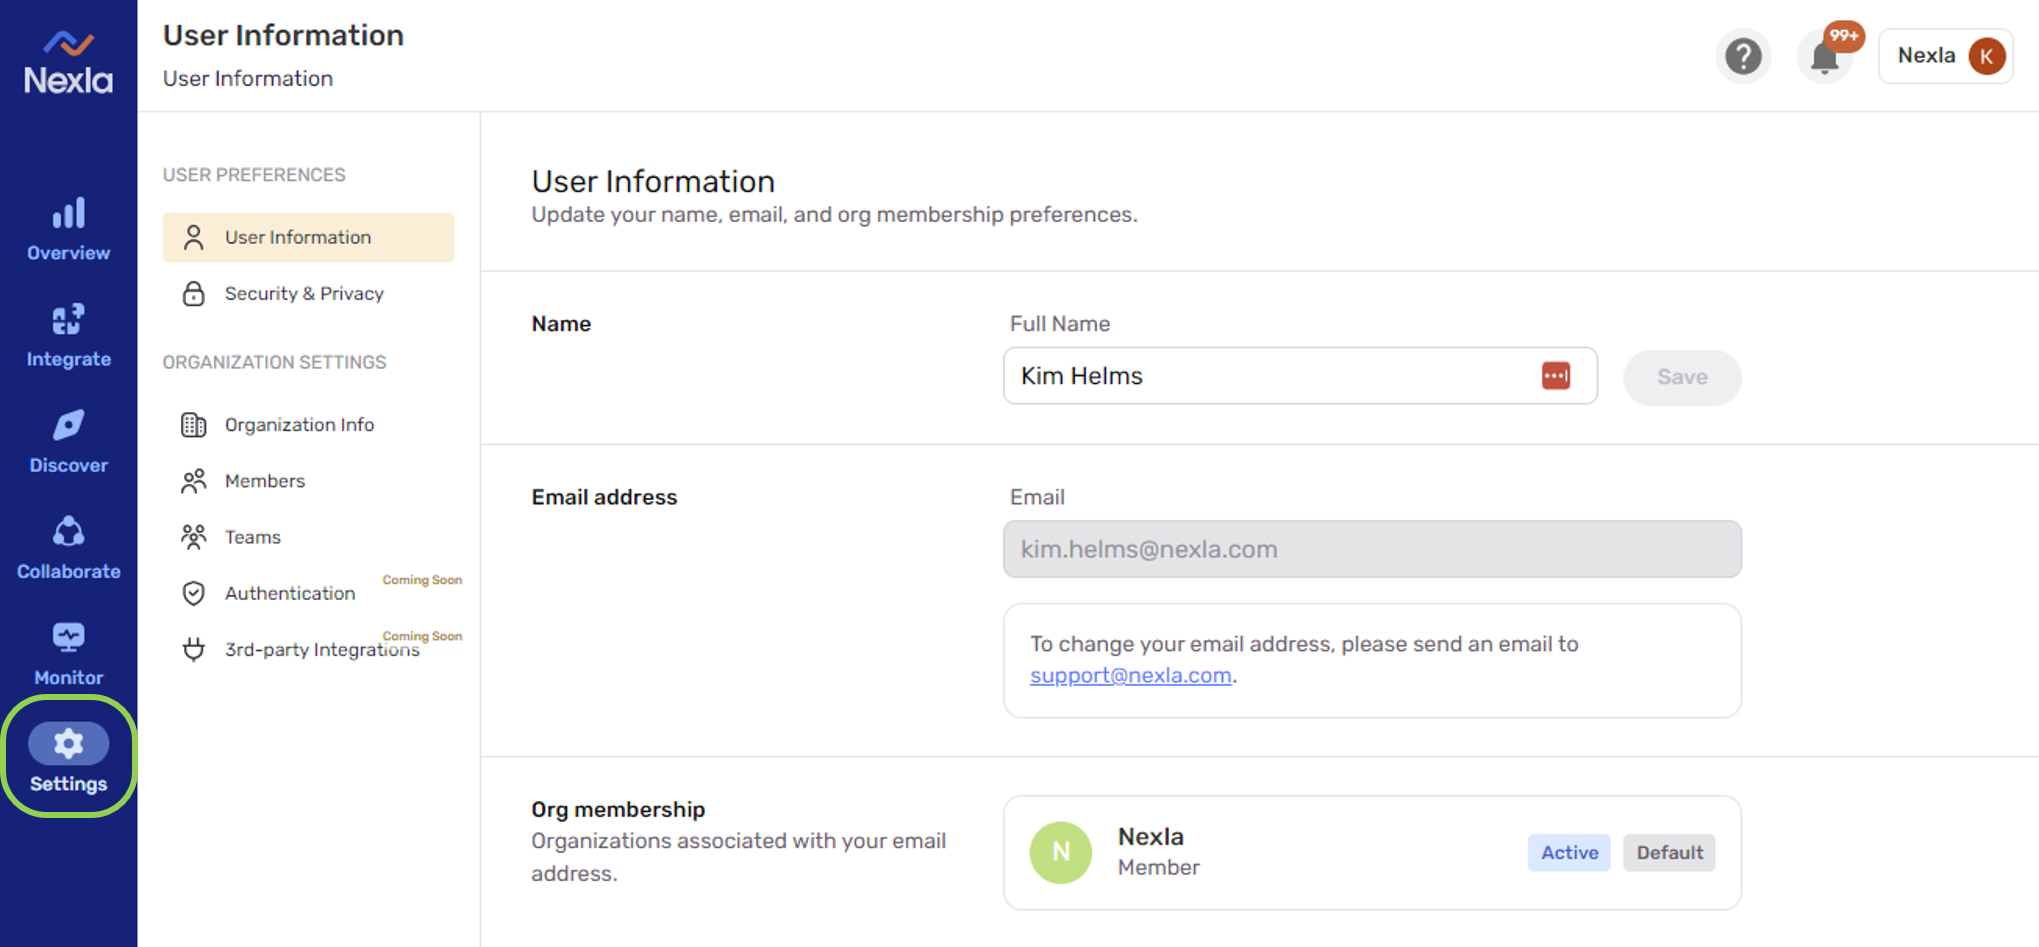
2.6 Settings
The Settings section provides account and organization management information and settings, including user account information and password management, as well as organization-level information and team creation and management settings available to Administrators.
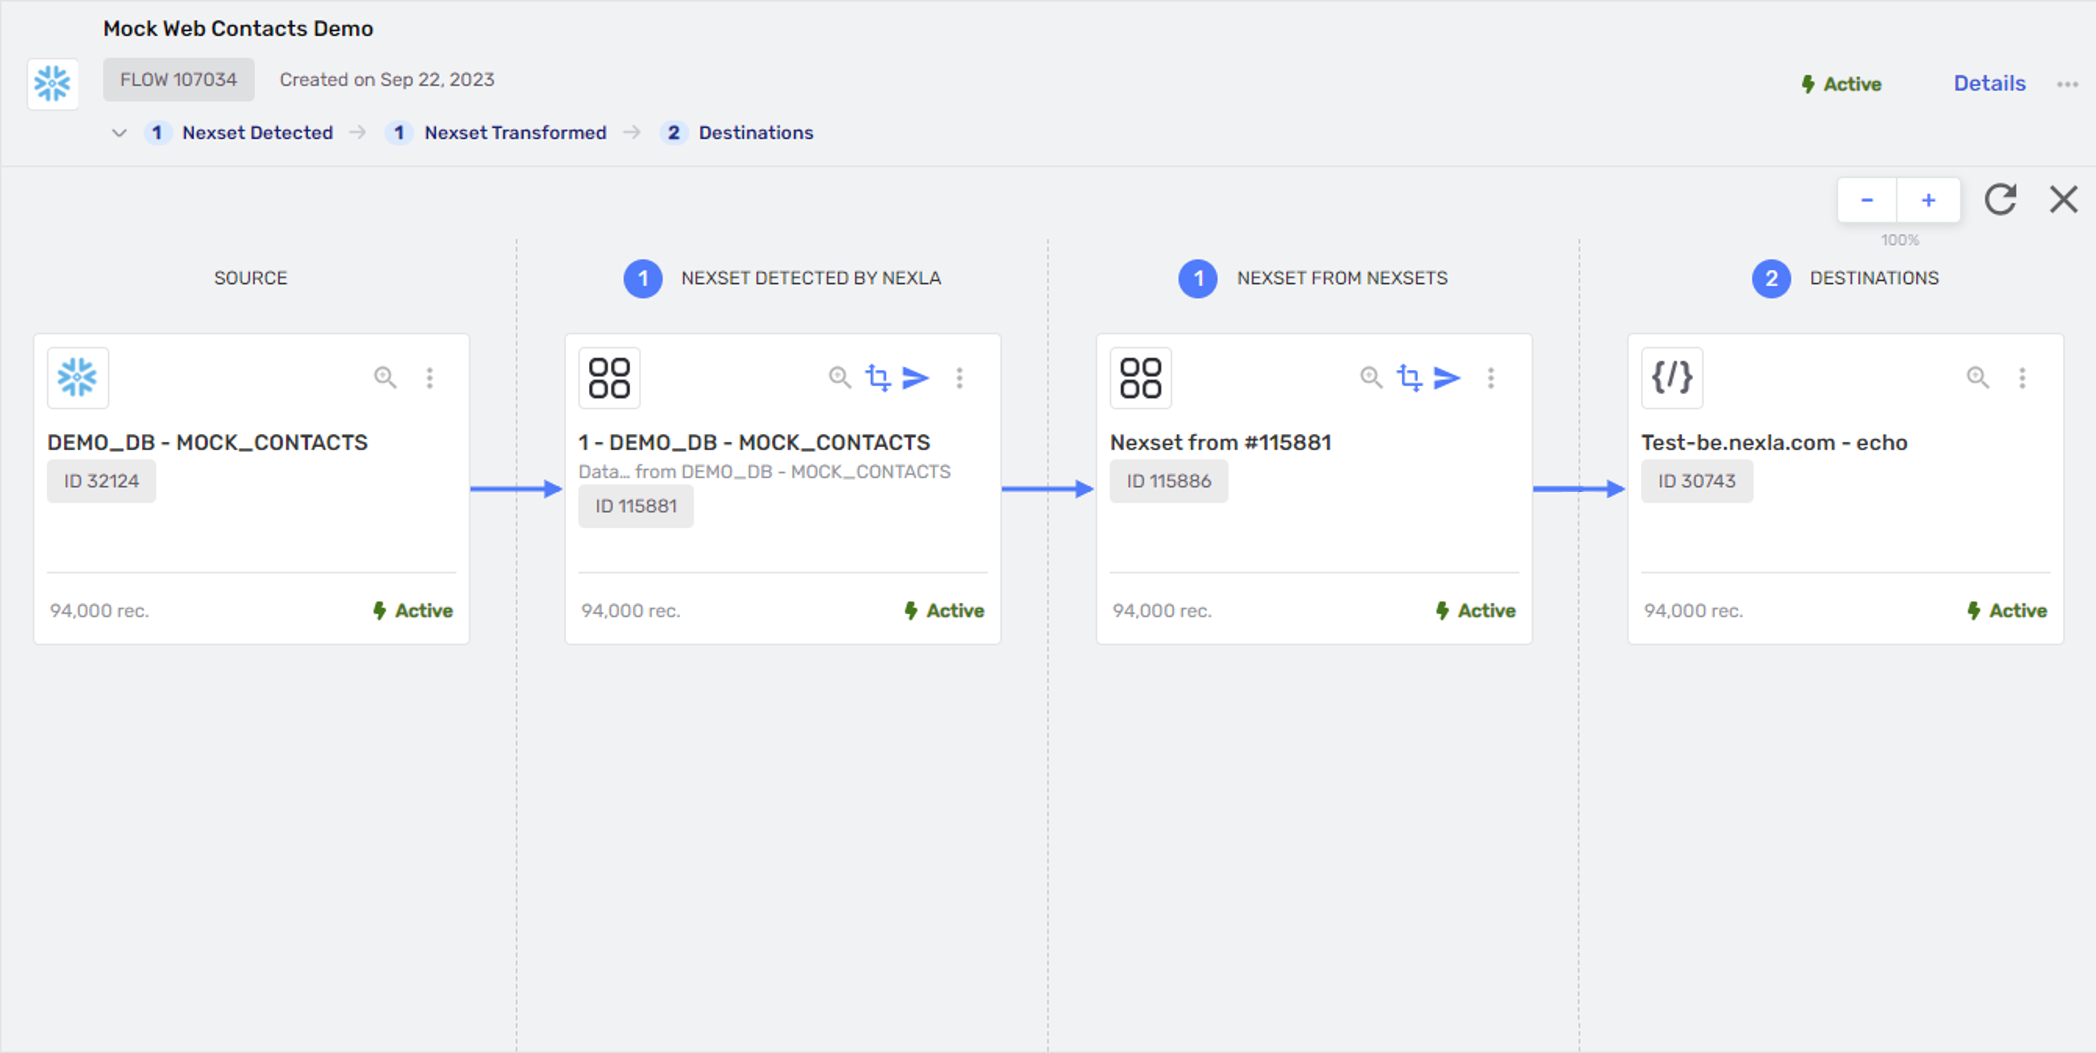
3. How to Create a Data Flow
Nexla users can easily and efficiently create data flows that ingest data from anywhere, make any needed transformations to the data, and send the data to any destination in only a few steps.
This section provides instructions for setting up a simple data flow in Nexla. The instructions can be applied to any data flow, but in the example flow created here, data is ingested from a Snowflake source, transformed, and sent to a Rest API destination.
3.1 Connect to a Data Source to Ingest Data
-
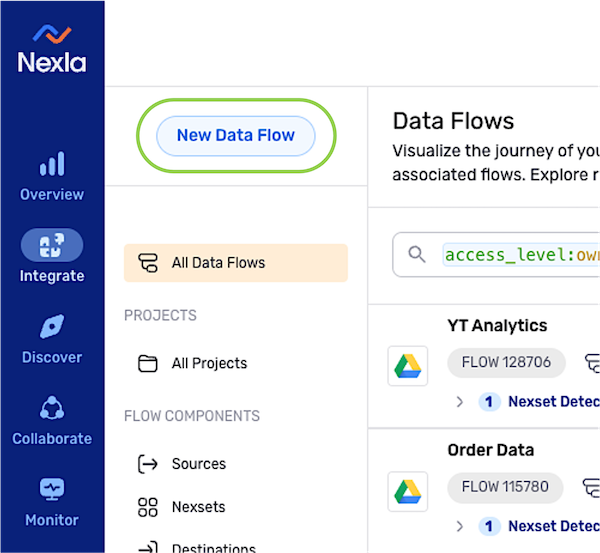
After logging into Nexla, navigate to the Integrate section by selecting
 from the platform menu on the left side of the screen.
 -
Click
 at the top of the Integrate toolbar on the left.
-
Select the type of data flow to be created from the menu on the left, and click
 .
.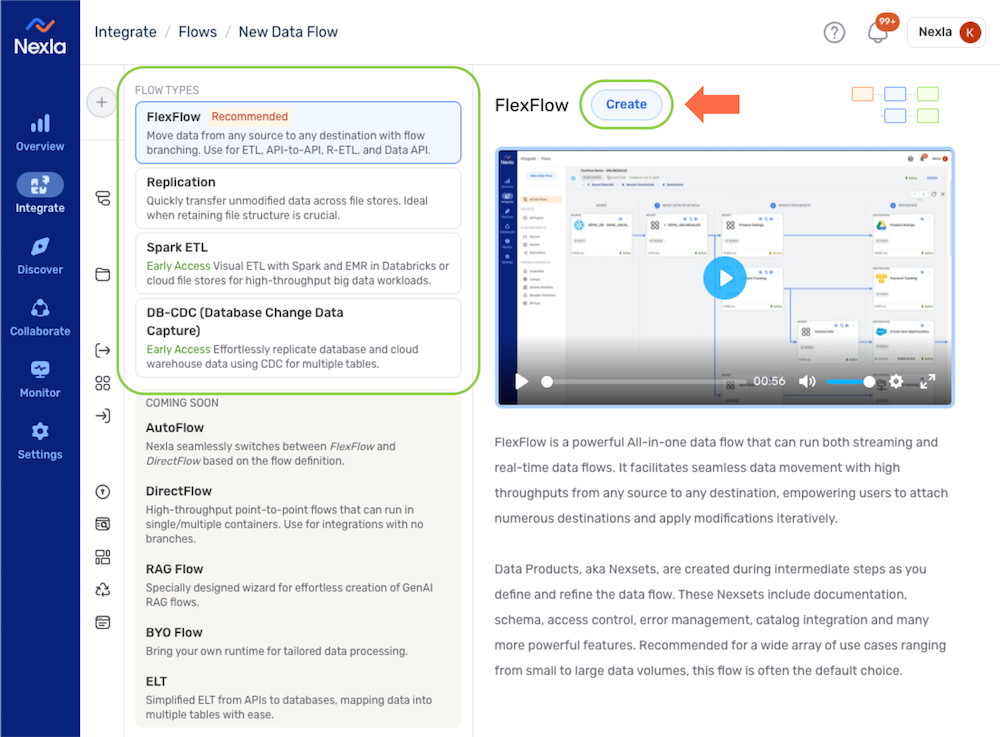 Data Flow Types in Nexla
FlexFlow:
FlexFlow is a flexible all-in-one data flow type that can be used to create both streaming and real-time data flows that can be used to transform data and/or move data from any source to any destination. This flow type uses the Kafka engine to facilitate seamless high-throughput movement of data from any source to any destination. FlexFlow is the recommended flow type for most workflows.DB-CDC:
DB-CDC data flows use change data capture to replicate tables across databases and/or cloud warehouses. This flow type is streamlined for use in data migration and maintenance workflows, allowing users to quickly create data flows that replicate data across storage locations.Spark ETL:
Spark ETL data flows are designed for rapidly modifying large volumes of data stored in cloud databases or Databricks and moving the transformed data into another cloud storage or Databricks location. This flow type uses the Apache Spark engine and is ideal for large-scale data processing wherein minimizing latency in data movement is a critical need.Replication:
Replication data flows are designed for use in workflows that require high-speed movement of unmodified files between storage systems. This flow type is ideal for use when both retaining file structure and transferring data as quickly as possible are critical.
-
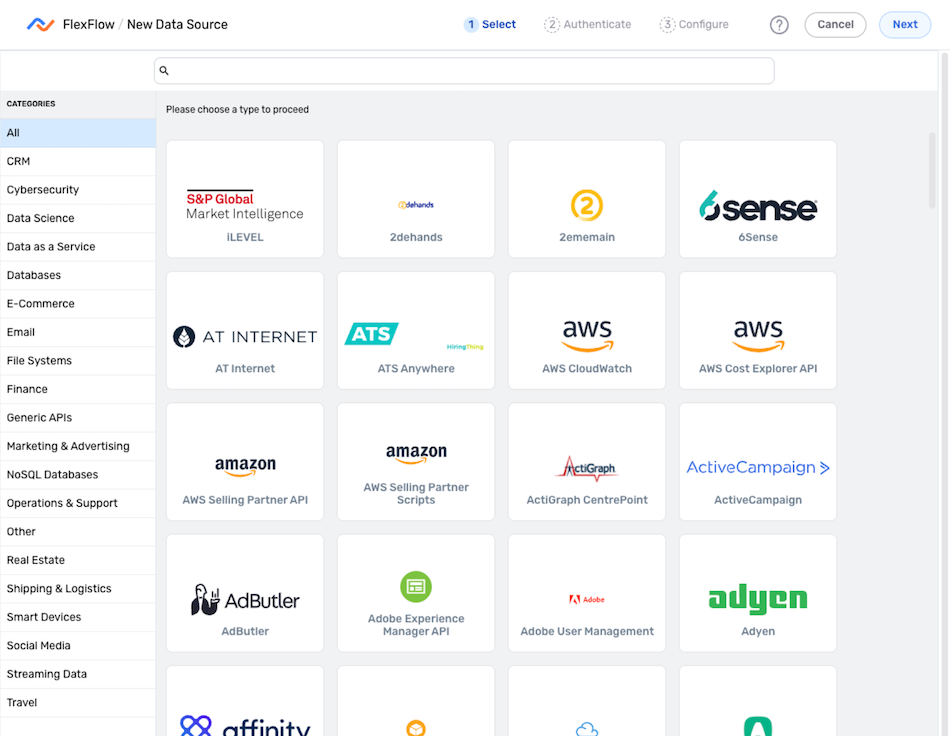
In the data source set-up screen, select a connector tile that matches the source type from which data will be ingested in this flow. Once a connector is selected, the platform will automatically advance to the next setup step.
Locating Connector TilesConnector tiles can be located by scrolling through the full list or by typing the connector name into the search bar at the top of the list.
▷ To view only connectors for data sources of a certain type, select a connector category from the menu on the left.
 Changing the Selected Source Type
To change the selected connector type after advancing to a later step in the flow setup process, use the menu at the top of the screen to navigate back to the Select step.
-
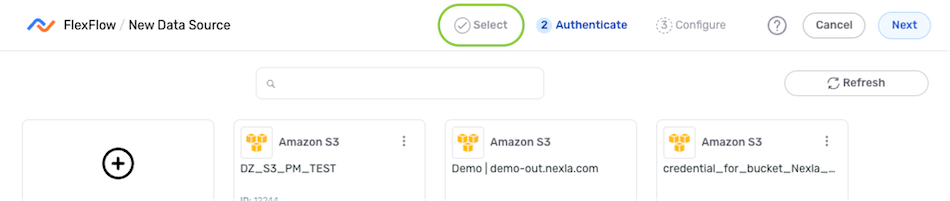
In the Authenticate screen, follow the instructions below to create or select the credential that will be used to connect to the data source.
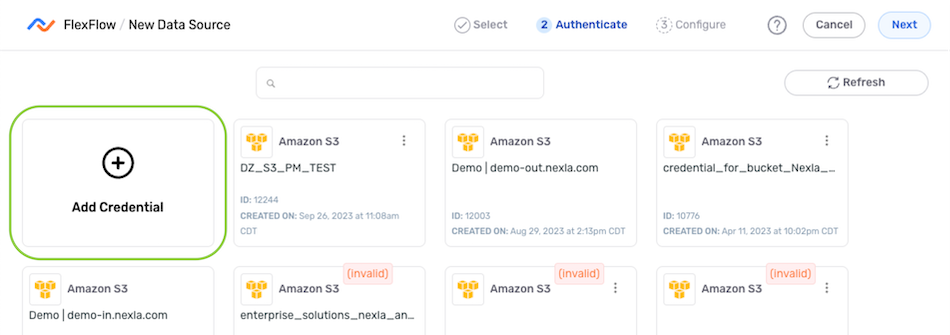
To create a new credential:
- Select the Add Credential tile.
- Enter and/or select the required information in the Add New Credential pop-up.
Adding New CredentialsCredential requirements vary depending on the data source type, with some sources requiring URLs, access keys, and other parameters that must be obtained from the source application/location in addition to account information.
Detailed information about credential creation for specific sources can be found on the Connectors page.
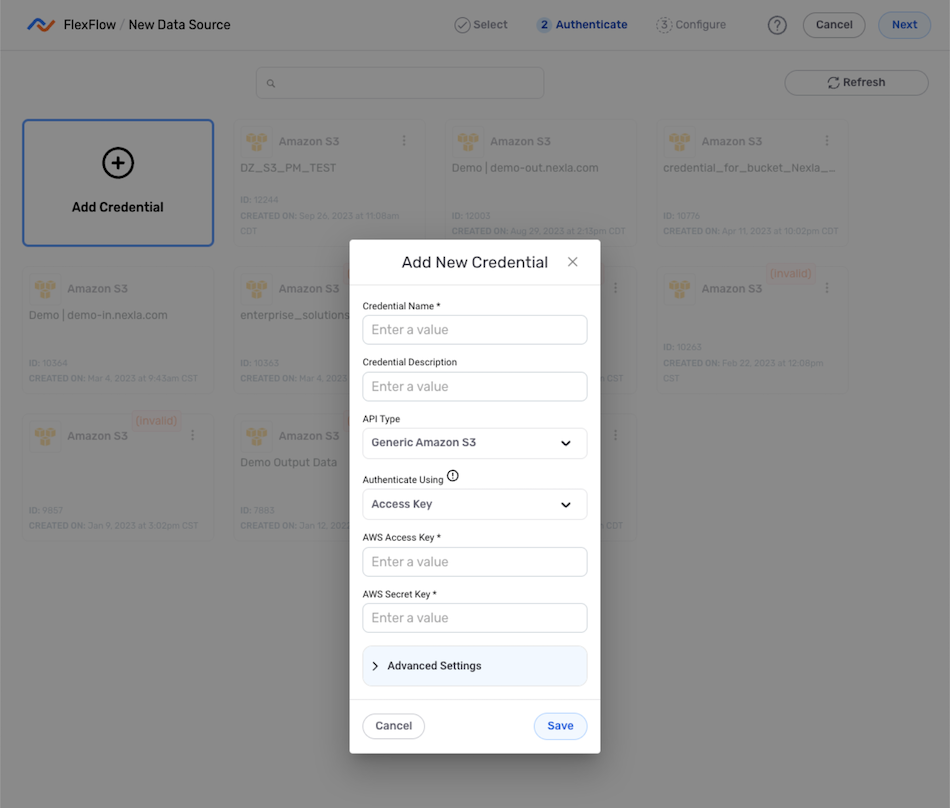
- Once all of the required information has been entered, click
 at the bottom of the pop-up to save the new credential, and proceed to step 6.
To use a previously added or shared credential:
- Select the credential from the list.

- Click
 in the upper right corner of the screen, and proceed to step 6.
-
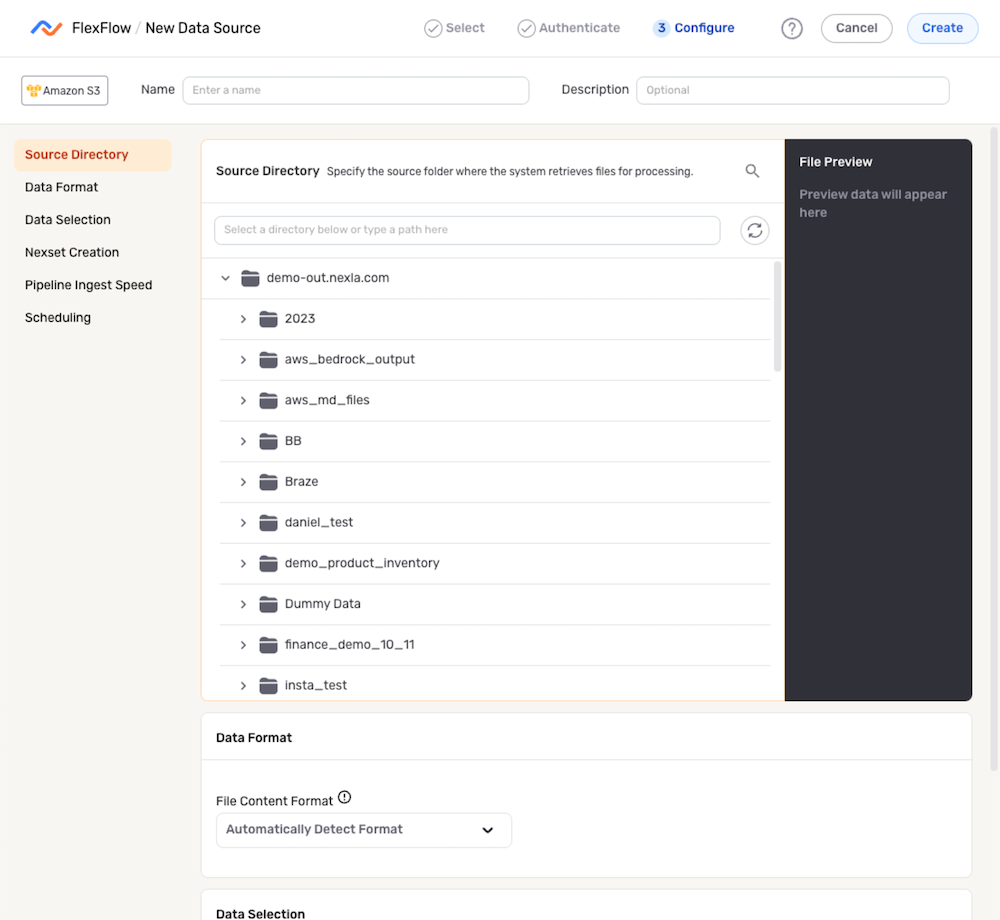
Select and configure the source location from which data should be read, including any desired advanced settings (i.e., the frequency at which data should be fetched, data selection settings, etc.).
Configuring Data SourcesThe data source selection and/or configuration procedure varies according to the source type. Detailed instructions for each data source type can be found on the Connectors page.
Example Data Source Configuration Screen (Amazon S3)
-
Click
 in the upper right corner of the screen to save and create the data source. Nexla will now automatically scan the source for data and organize that data into a Nexset, which is a logical data product that is immediately ready to be transformed or sent to any destination.

3.2 View and/or Transform a Nexset
View the data in the Nexset:
- Click the
 icon on a Nexset to open the Nexset Information screen.
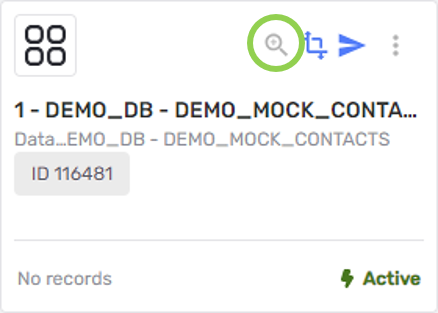
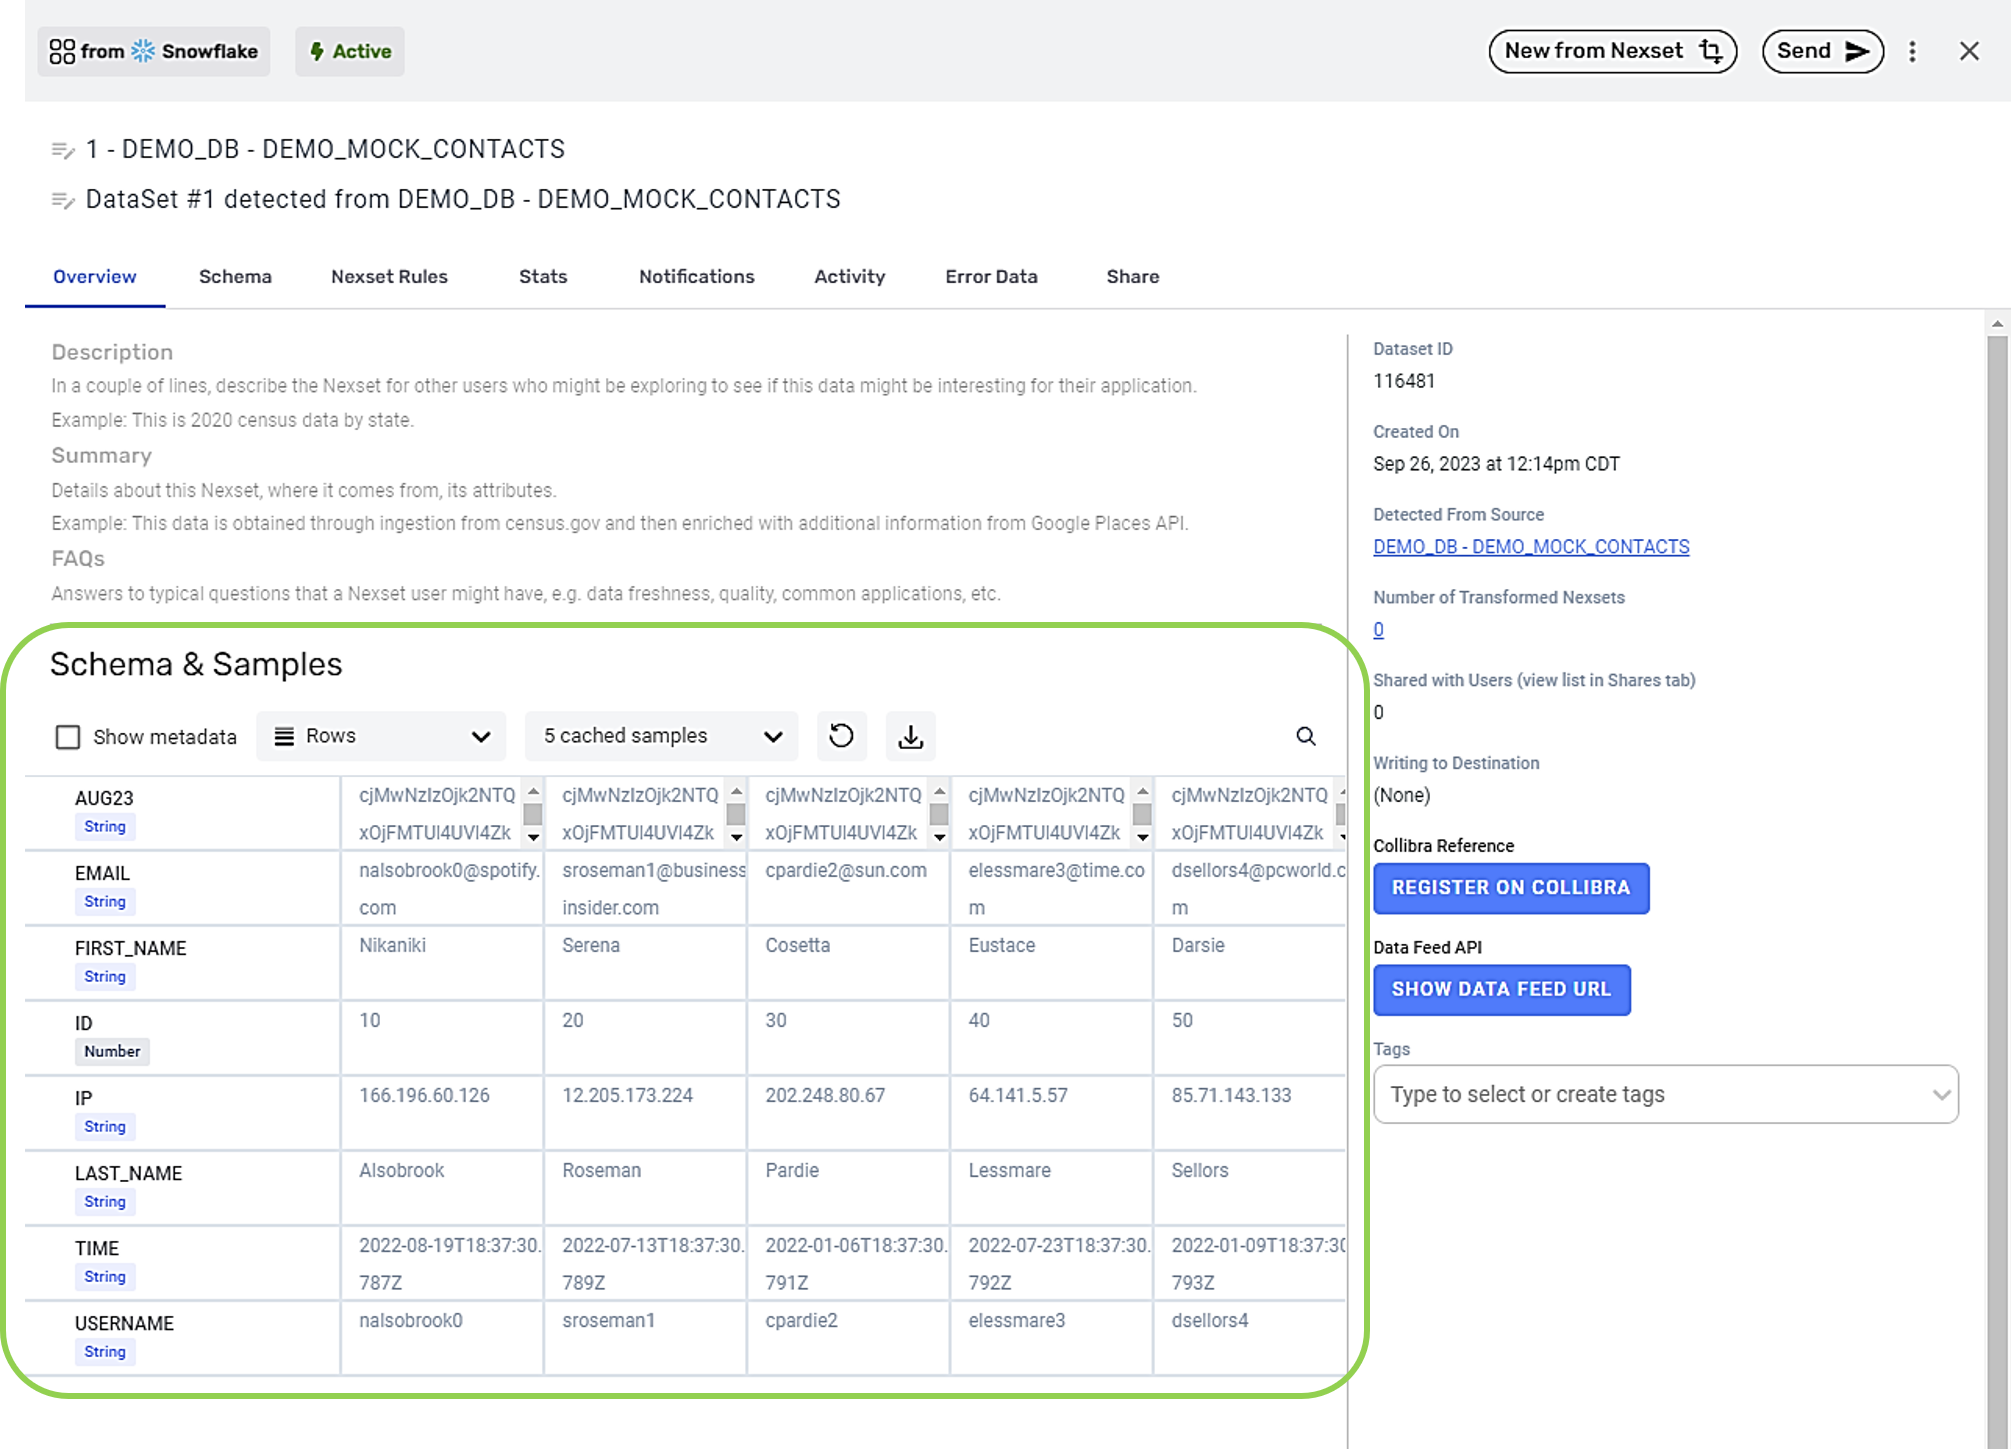
- Sample records from the Nexset are shown under the Schema & Samples heading at the bottom of the Nexset Information screen.
For a complete description of the functions and features available in the Nexset Information screen, see Nexset (Data Product) Information.
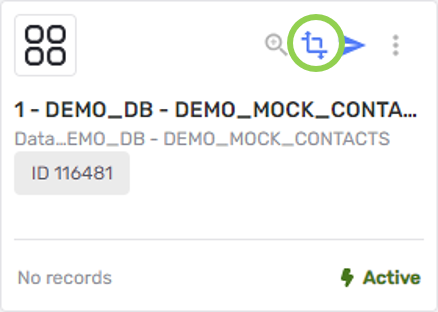
Transform the data in the Nexset:
- Click the
 icon on a Nexset to open it in the Nexset Designer.
- Create and apply Nexset Rules to make any necessary transformations to the data in the Nexset.
The Nexset Designer Overview article provides in-depth information about and instructions for transforming data in the Nexset Designer.
- Once the transformation is complete, click
 in the upper right corner of the screen to save the transformation and close the Nexset Designer.
3.3 Send a Nexset to a Destination
-
Click the
 icon on a Nexset to begin sending the data that it contains to a destination.
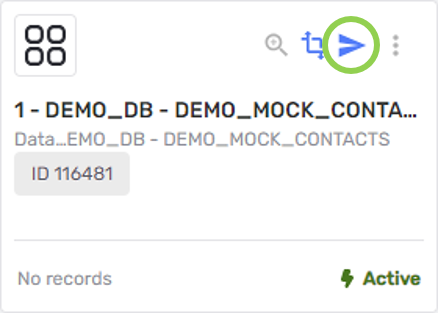
-
In the Send Nexset to Destination screen, select a connector tile that matches the destination type to which data will be sent in this flow. Once a connector is selected, the platform will automatically advance to the next setup step.
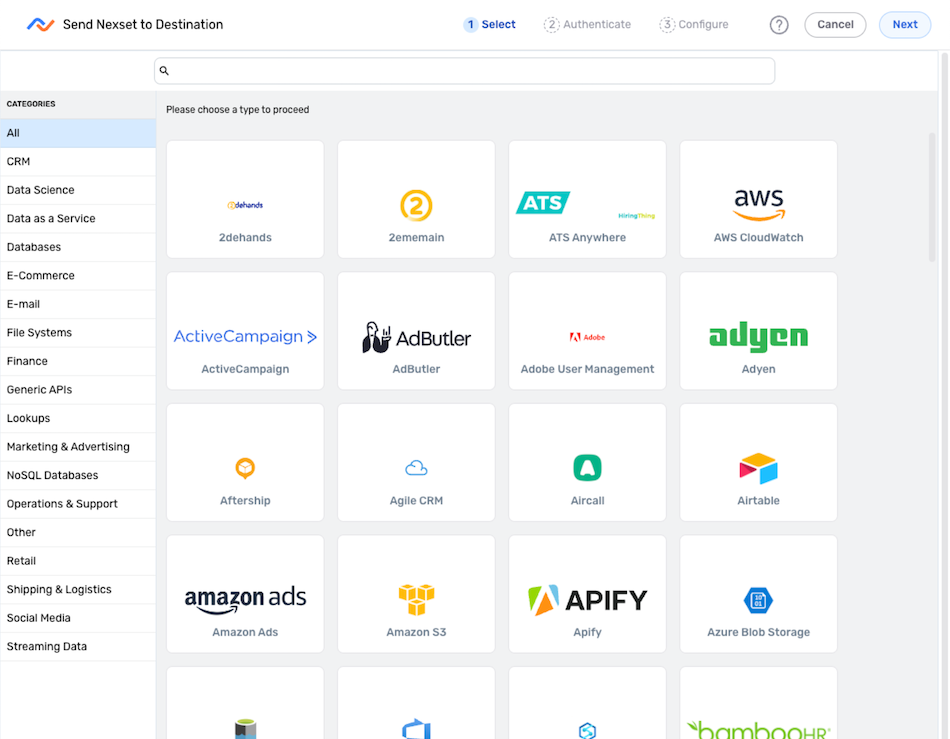 Changing the Selected Destination Type
To change the selected connector type after advancing to a later step in the flow setup process, use the menu at the top of the screen to navigate back to the Select step.
-
In the Authenticate screen, select or create the credential that will be used to connect to the destination, and click the Continue button. For detailed information about creating credentials for specific destinations, see the Connectors pages.
-
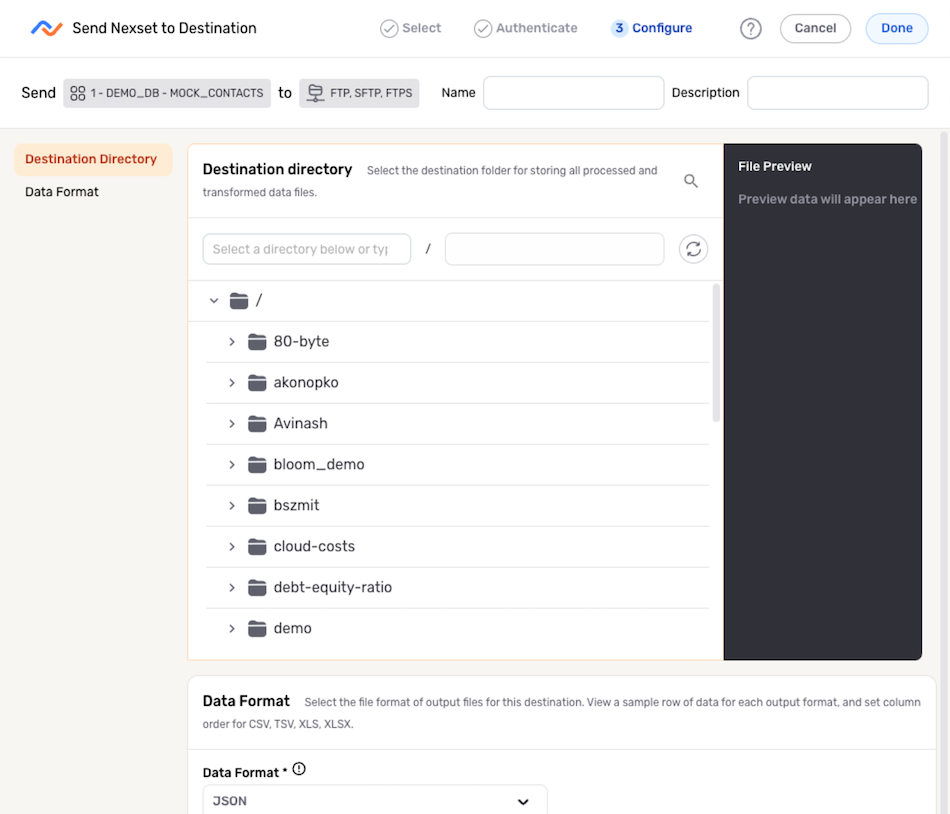
Select and configure the destination to which data will be written, including any desired advanced settings (for example, data formatting options).
Configuring Data DestinationsThe data destination selection and/or configuration procedure varies according to the destination type. Detailed instructions for each data destination type can be found on the Connectors page.
Example Data Destination Configuration Screen (FTP)
-
Click
 in the upper right corner of the screen to save and create the destination.Important: Data Movement
Data will not begin to flow into the destination until it is activated, as shown in the following step.
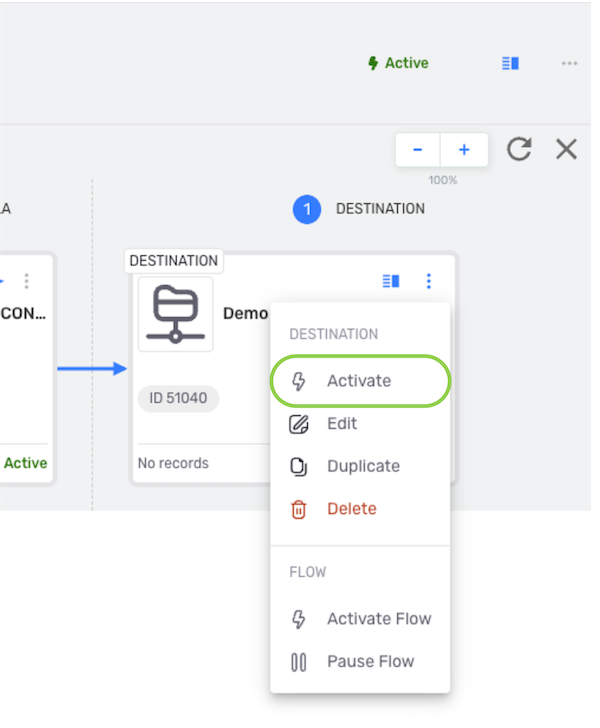
- Once created, the destination must be activated to begin the flow of data into the destination. To activate the destination, click the
 icon on the destination, and select
  from the dropdown menu.