Spark ETL Data Flows
Spark ETL data flows are designed for rapidly modifying large volumes of data stored in cloud databases or Databricks and moving the transformed data into another cloud storage or Databricks location. This flow type uses the Apache Spark engine and is ideal for large-scale data processing wherein minimizing latency in data movement is a critical need.
1. Spark ETL Flows
Spark ETL data flows typically only contain one type of data, such as logs from a single system, and have consistent data transformation requirements. In these flows, detected Nexsets can be transformed using Nexla's pre-built transforms (Nexset Rules) or Spark SQL queries, and detected or transformed Nexsets can be sent to a single destination.
While Spark ETL flows support data modification using Nexla transforms, this flow type only supports data movement to a single destination and is not designed for use with data lookups, data-feed transforms, or Flink SQL queries.
For workflows that require moving data to more than one location, varying transformations to create multiple Nexsets, and other Nexla features, the FlexFlow flow type is recommended.
Spark ETL Data Flow
Setting up a Spark ETL data flow in Nexla to handle big-data workloads is easy. The following sections provide step-by-step instructions for creating a new Spark ETL, along with information about optional features and settings available for this flow type.
Spark ETL Flows: Quick Start Guide Video
2. Create a New Spark ETL Flow & Data Source
-
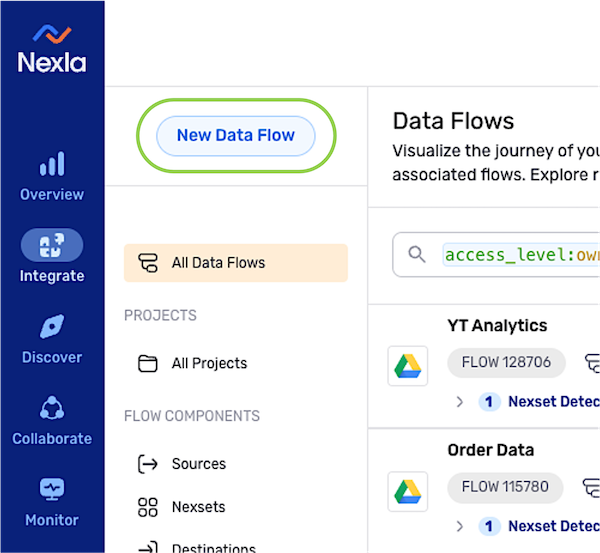
After logging into Nexla, navigate to the Integrate section by selecting
 from the platform menu on the left side of the screen.
 -
Click
 at the top of the Integrate toolbar on the left.
-
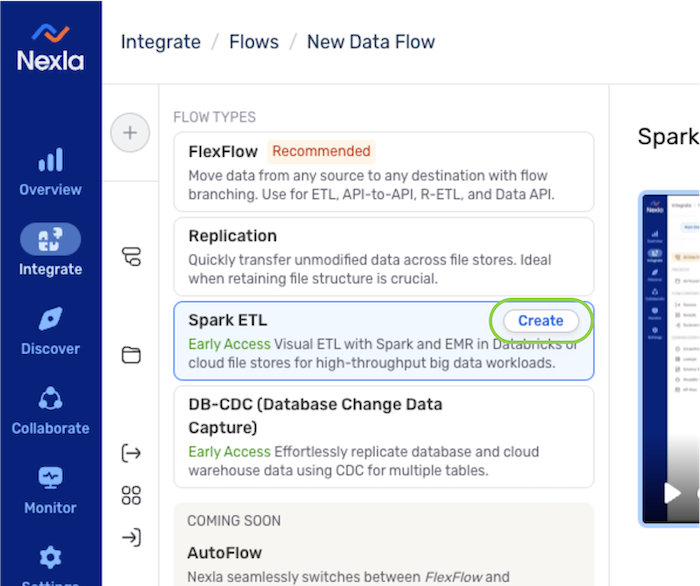
Select Spark ETL from the list of flow types, and click
 to proceed to data source creation.Learning About Flow Types
In the Select Flow Type screen, click on a data flow type to view more information about it in the panel on the right, including a brief introductory video.
Data flows of each type can also be created by clicking the button at the top of this panel.
2.1 Configure the Data Source
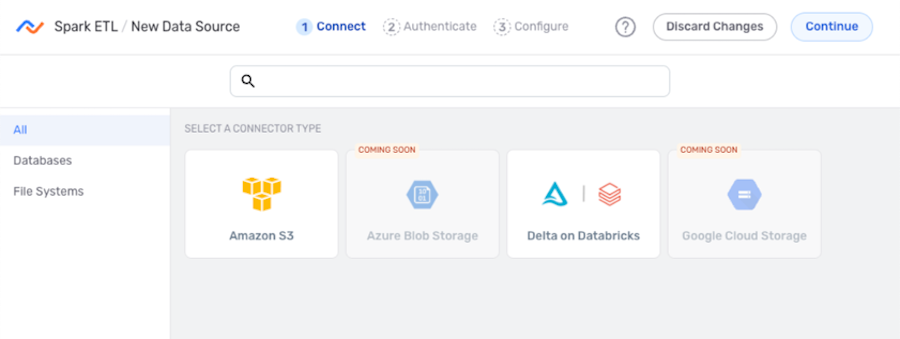
- In the Connect screen, select the connector tile matching the data source type from the list.
-
Spark ETL data flows are only supported for some of the connectors available in Nexla, and only supported connectors are shown on this screen.
-
To create a data flow with a data source type not available in this screen, use the FlexFlow flow type or one of the other flow types listed on the Nexla Data Flow Types page.
-
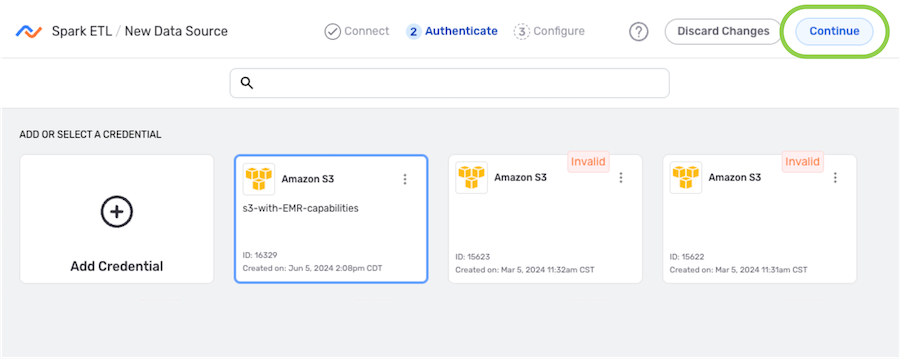
- In the Authenticate screen, select or create the credential that will be used to connect to the data source, and click
 . Detailed information about credential creation for specific sources can be found on the Connectors page.
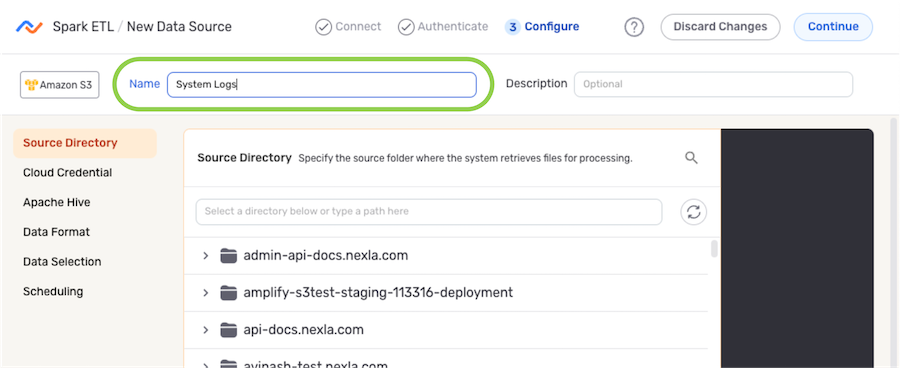
- Enter a name for the data source in the Name field.
-
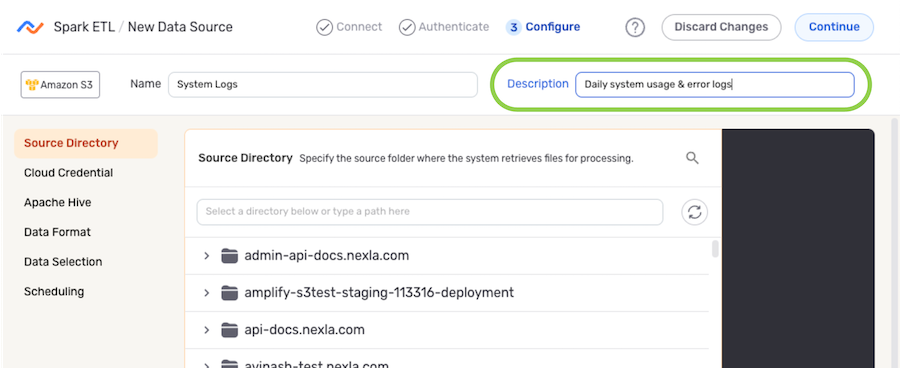
Optional: Enter a brief description of the data source in the Description field.
Resource DescriptionsResource descriptions should provide information about the resource purpose, data freshness, etc. that can help the owner and other users efficiently understand and utilize the resource.
- The subsections below provide information about additional settings available for data sources in Spark ETL flows. Follow the listed instructions to configure each setting for this data source, and then proceed to Section 2.2.
Source Table/Source Folder
In Spark ETL flows, data sources can be configured to ingest all data in the overall location accessible with the selected credential or only data in subfolders/tables within a specific location.
-
Under the Source Table or Source Folder section, navigate to the directory location from which Nexla will read files from this source; then, hover over the listing, and click the
 icon to select this location.
- To view/select a nested location, click the
 icon next to a listed folder to expand it.
- To view/select a nested location, click the
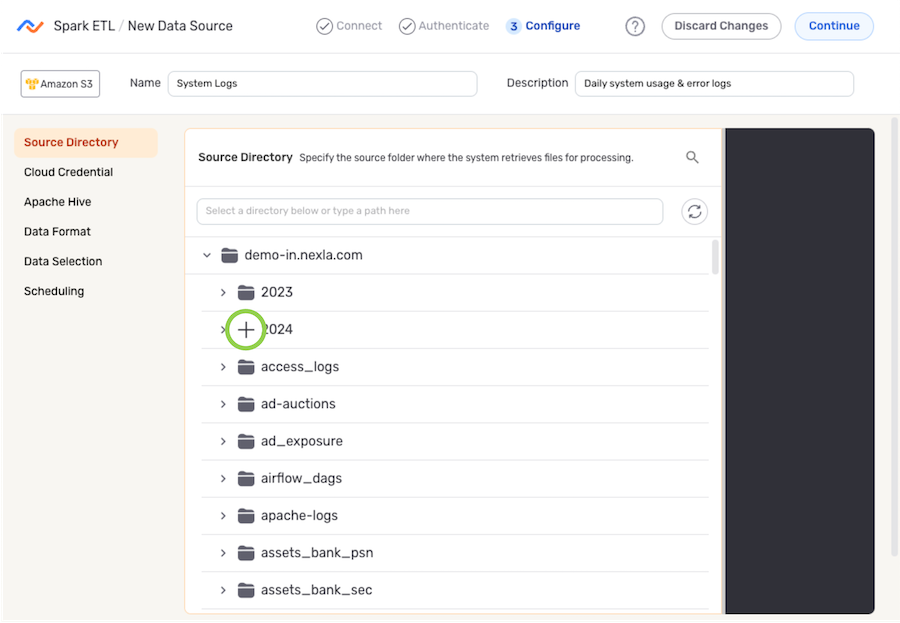
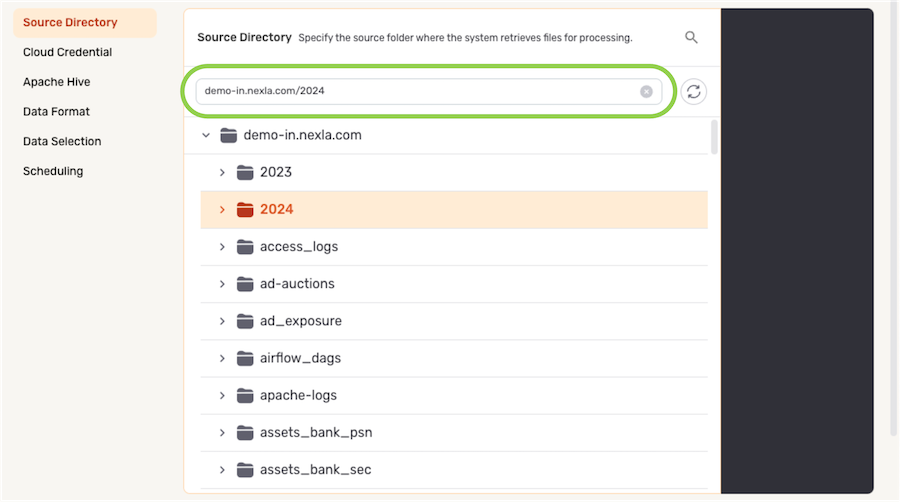
- The selected directory location is displayed at the top of the Source Table or Source Folder section.
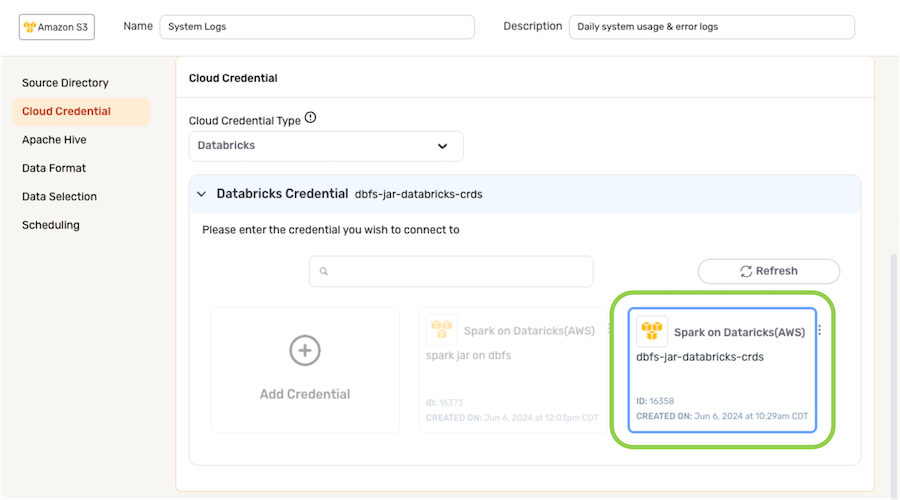
Cloud Credential
Spark ETL data flows require a cloud credential in addition to the data credential selected in the Authenticate step above.
Cloud credentials are used to access the cloud storage provider and allow Nexla to spawn and stop virtual machines, data warehouses, and other similar entities required for Spark ETL flow execution.
- Select the type of cloud credential that will be used to connect to the selected data source location from the Cloud Credential Type pulldown menu.
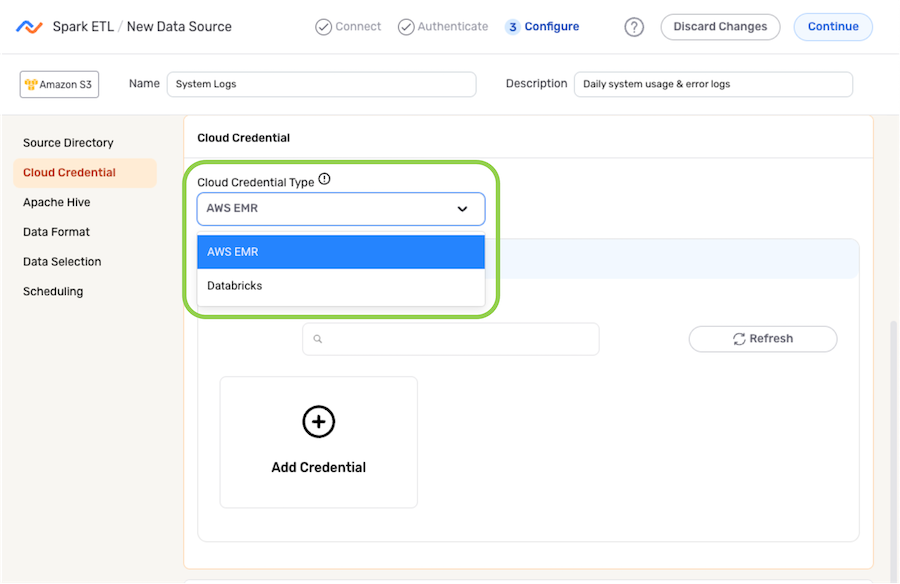
-
Add or select the cloud credential that will be used.
-
To add a new cloud credential:
-
Select the Add Credential icon.
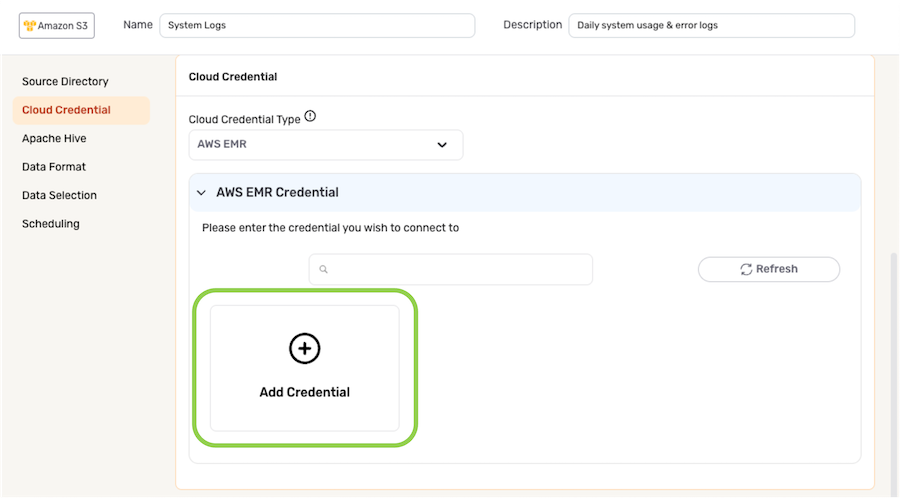
-
In the Add New Credential window, enter the required information, and click
 .
.
-
-
To use an existing cloud credential, select the credential from the list.
-
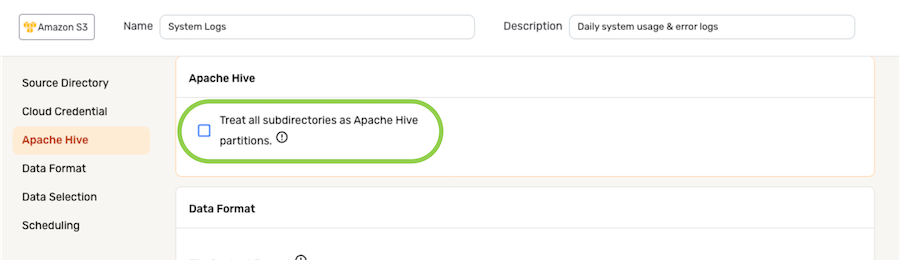
Apache Hive
-
To treat all subdirectories detected within the chosen data source location as Apache Hive partitions, check the box next to Treat all subdirectories as Apache Hive partitions.
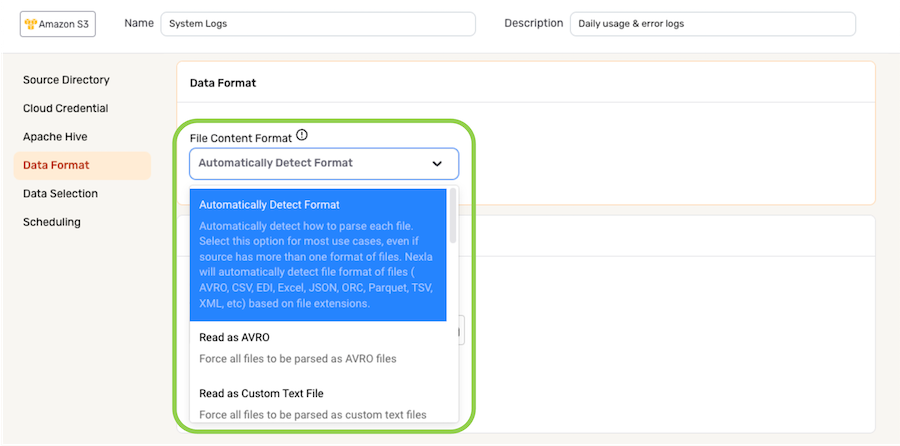
Data Format
By default, Nexla automatically detects the format of files ingested from data sources and parses the data contained in the files accordingly. Automatic file format detection is recommended for most workflows, including when the source contains files in more than one format.
For more information about Nexla's automatic file format detection, see the Automatic File Format Detection section in Supported File Formats.
For specialized use cases, users can designate a specific incoming file format for a data source in a Spark ETL flow, forcing Nexla to parse all files ingested from the source according to the designated file format.
-
To specify the format that will be used to parse files from this source, select the appropriate format from the File Content Format pulldown menu under the Data Format section.
-
Some file formats require additional information, such as delimiter, schema, metadata, and relevant data settings. For instructions on completing these settings, follow the corresponding link below:
Custom Text Files
Compressed ZIP and/or TAR Files
EDI Files
Excel Files
Fixed-Width Files
JSON Files
Log Files
PDF Files
XML Files
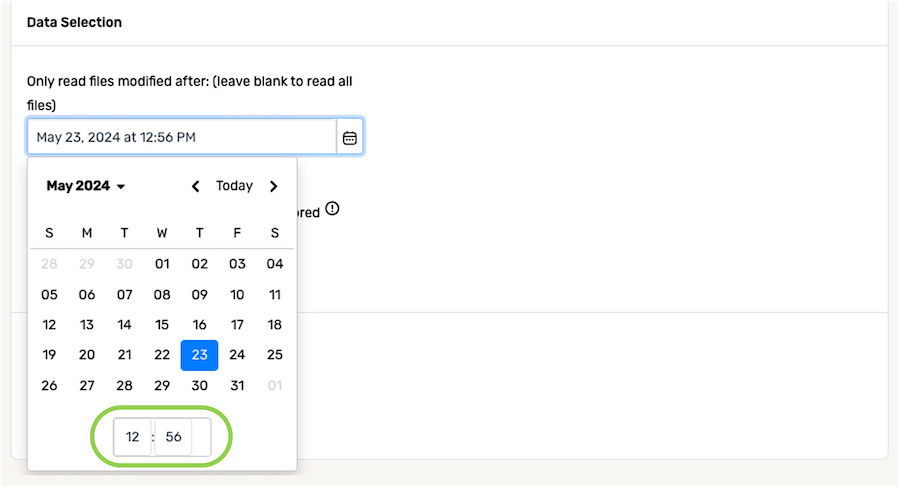
Data Selection
When setting up the data source in a Spark ETL flow, Nexla provides configuration options for specifying which data should be ingested from the source, allowing users to customize data ingestion to suit various use cases. Data can be selected for ingestion from file-based storage systems according to file modification dates, naming patterns, and/or subfolder paths.
The settings discussed in this section are located under the Data Selection category.
▷ To ingest all files in the selected location:
-
To configure Nexla to ingest all files from the data source, regardless of when the files were added or modified, delete the pre-populated date and time from the Only read files modified after: field, and leave this field blank.

▷ To ingest files according to the most recent modification date:
- When Nexla should only ingest newer or recently modified files from the data source, the platform can be configured to selectively ingest files modified after a specified date and time. To specify the file modification date and time that will be used to select which files should be read from this source, click the
 icon in the Only read files modified after: field under, and select the date from the dropdown calendar.
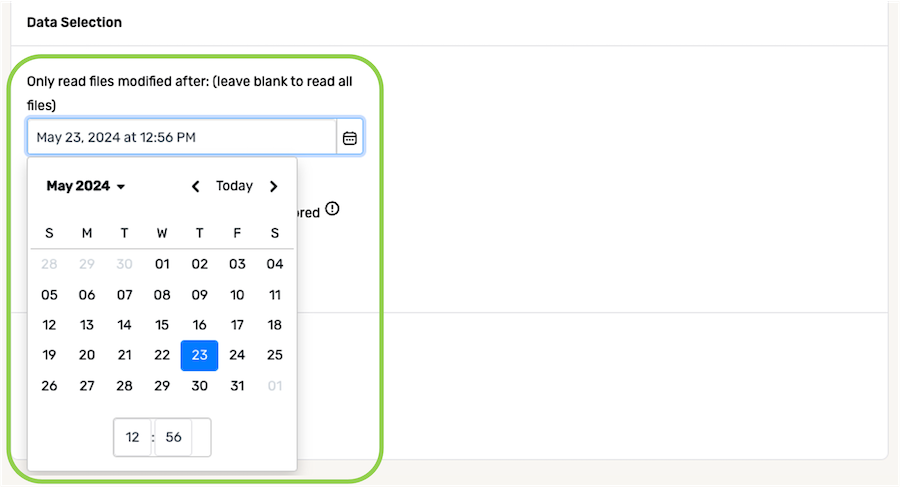
- In the field at the bottom of the calendar, enter the time (in 24-h format) on the selected date that should be referenced when identifying new and/or modified files from the source.
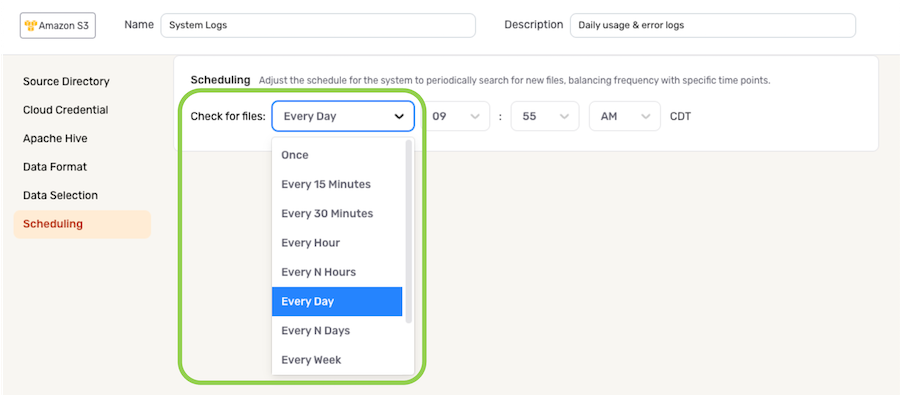
Scheduling
Scan scheduling options can be used to define the frequency at which the data source will be scanned for data changes in a Spark ETL flow. Any data changes identified during a scan will then be replicated into the configured destination.
-
By default, when a new Spark ETL data flow is created, Nexla is configured to scan the source for data changes once every day. To continue with this setting, no further selections are required. Proceed to Section 2.2.
-
To define how often Nexla should scan the data source for new data changes, select an option from the Check for Files pulldown menu under the Scheduling section.
- When options such as Every N Days or Every N Hours, a secondary pulldown menu will be populated. Select the appropriate value of N from this menu.
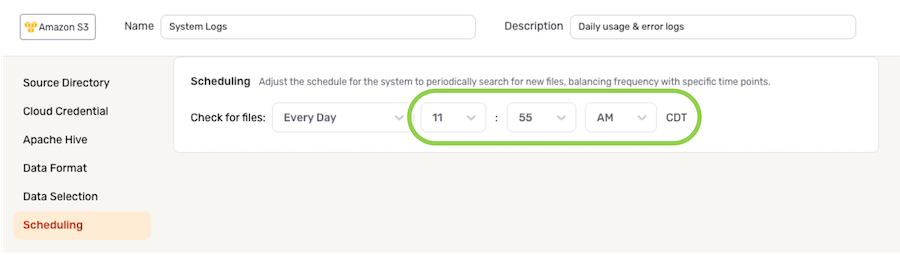
- To specify the time at which Nexla should scan the source for new data changes, use the pulldown menu(s) to the right of the Check For Files menu. These time menus vary according to the selected scan frequency.
2.2 Save & Activate the Data Source
After all required settings and any desired additional options are configured, click ![]() in the top right corner of the screen to save & activate the data source.
in the top right corner of the screen to save & activate the data source.
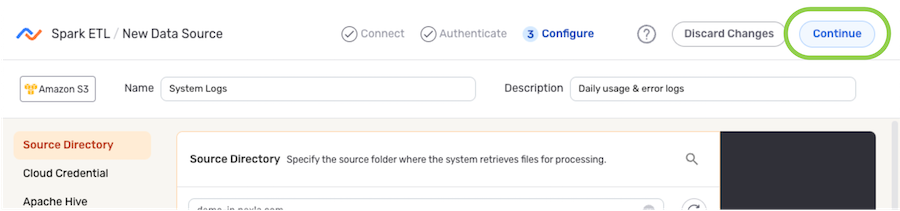
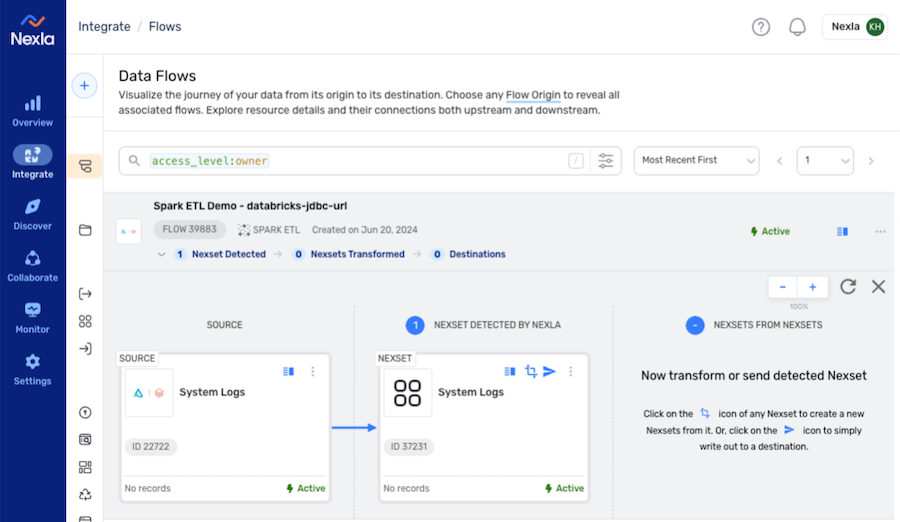
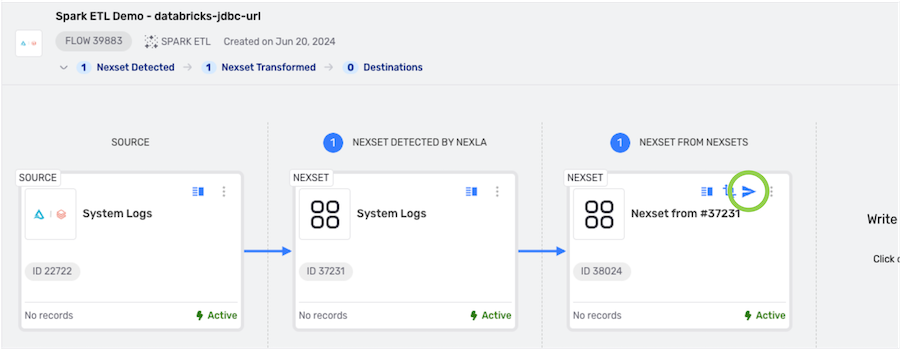
Once the data source is created, Nexla will automatically scan it for data according to the configured settings. Identified data will be organized into a Nexset, which is a logical data product that is immediately ready to be sent to a destination.
New Spark ETL Data Flow with Data Source & Detected Nexset
3. Transform the Detected Nexset
In Spark ETL data flows, detected Nexsets can be transformed in the Nexset Designer using Nexla's pre-built transforms and/or Spark SQL queries.
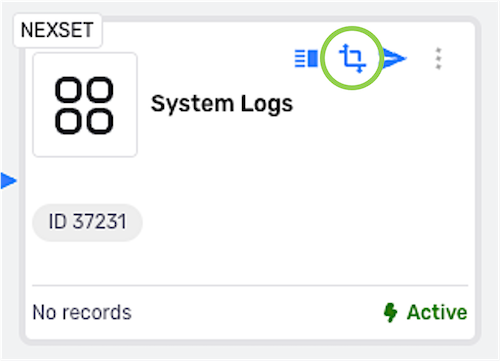
- To begin constructing a transform, click the
 icon on the Nexset to open it in the Nexset Designer.
- Follow the instructions in Section 3.1 to transform the Nexset using Nexla's pre-built transforms, or see the instructions in Section 3.2 to transform the Nexset using a Spark SQL query.
3.1 Pre-Built Transforms
-
In the Nexset Rules pane, click the
 button, and select Transform from the menu to create a new Transform rule group.
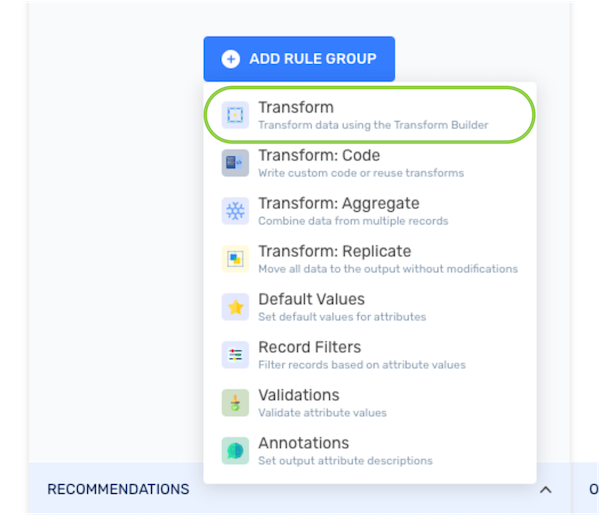
-
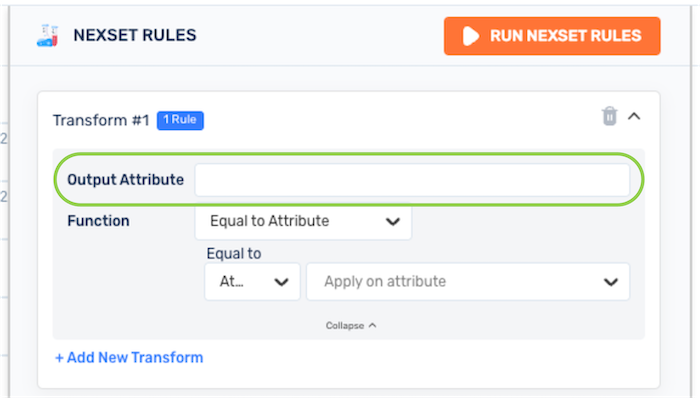
Enter a name for the attribute that will contain the transformed data created with this rule in the Output Attribute field.
-
Use the Function pulldown menu to select a transform function that will be applied with this rule; then, select and/or enter the additional required input parameters.
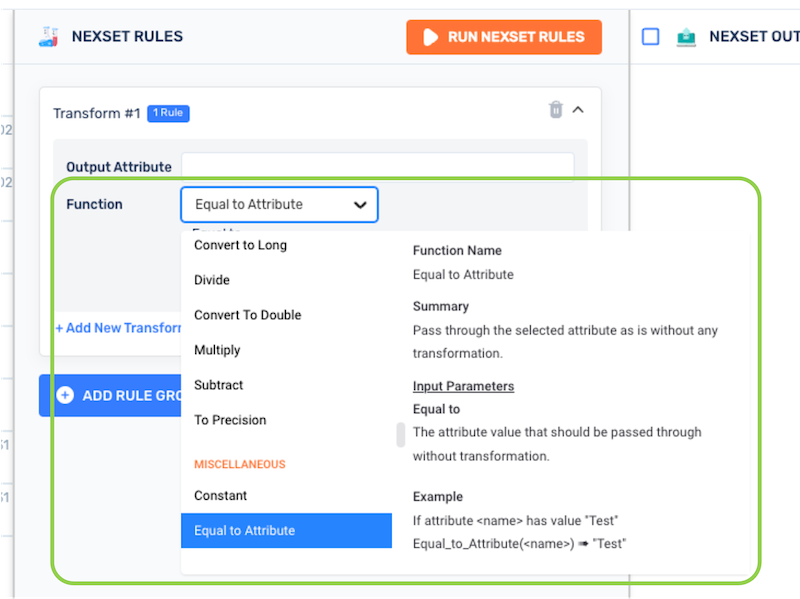 Using Pre-Built Transforms
The parameters required to create a transform rule varies according to the selected transform function. In right-hand panel of the Function pulldown menu, an explanation of each parameter—including its data type and function in the transform—can be found under the Input Parameters heading when hovering over a transform function.

For in-depth information about Nexla's pre-built transform rules and how to use them in the Nexset Designer, see Nexla's Pre-Built Transforms and Nexset Designer Overview.
-
Once all necessary transform rules have been added, proceed to Section 3.3 to save the transform and create the transformed Nexset.
3.2 Spark SQL Query
-
In the Nexset Rules pane, click the
button, and select Transform: Aggregate from the menu to create a new rule group for the Spark SQL query.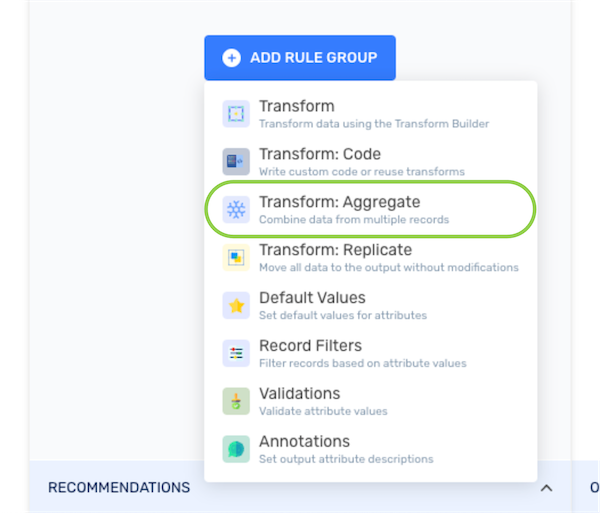
-
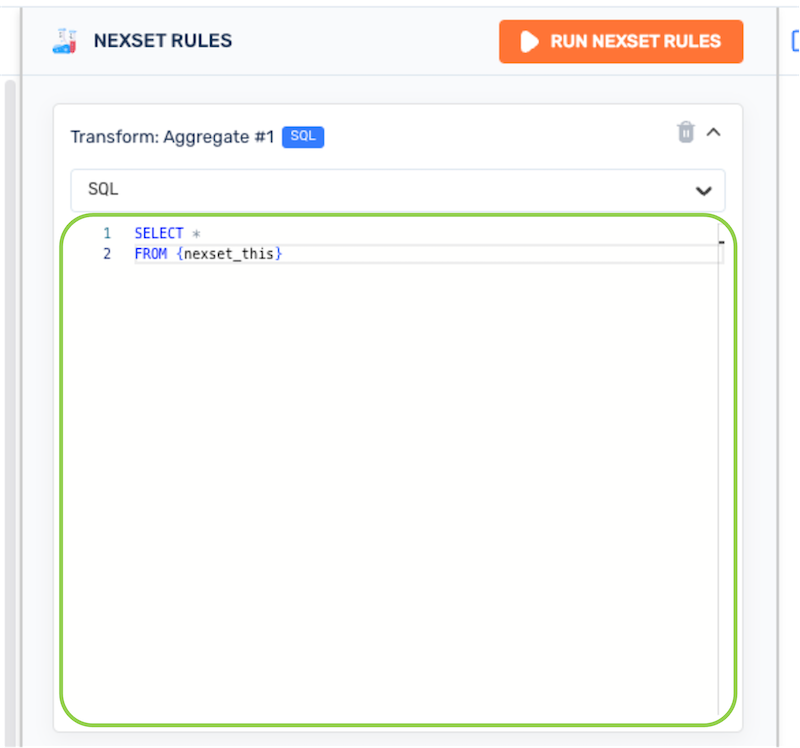
Ensure that SQL is selected from the pulldown menu at the top of the new rule group, and enter the query in the text field, adhering to Spark SQL syntax.
-
Click the
 button at the top of the Nexset Rules pane to generate a preview of the output data in the Nexset Output pane on the right. The output preview can be used to ensure that the SQL query generates the desired output in the transformed Nexset.
 -
Once the Spark SQL query is complete and generates the desired output, proceed to Section 3.3 to save the transform and create the transformed Nexset.
3.3 Save & Activate the Transformed Nexset
- After constructing the transform, click the
 button in the top right corner of the screen to save the transform and close the Nexset Designer.

-
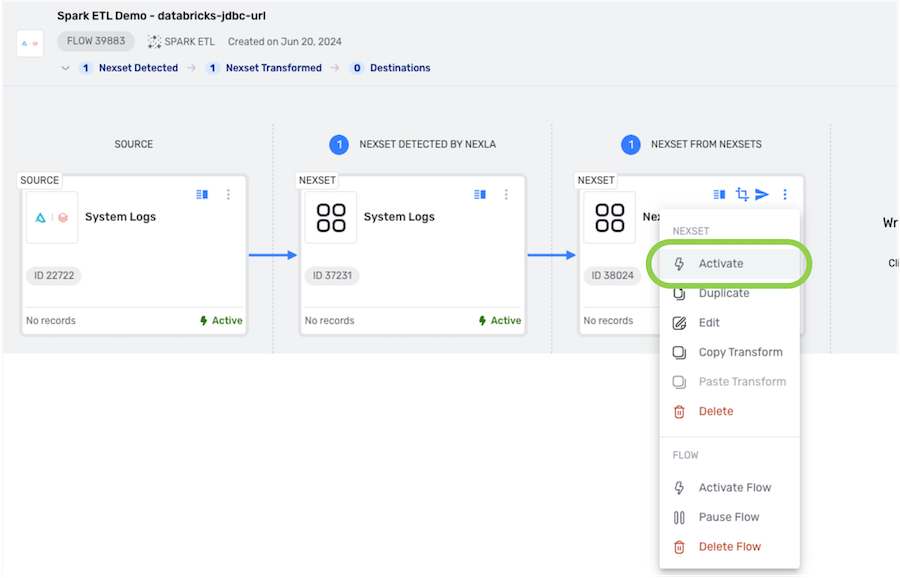
The newly created transformed Nexset must first be activated before data will begin to flow into it. To activate the transformed Nexset, click the
 icon on the Nexset, and select
  from the menu.
- The activated Nexset is now ready to be sent to a destination.
4. Send the Nexset to a Destination
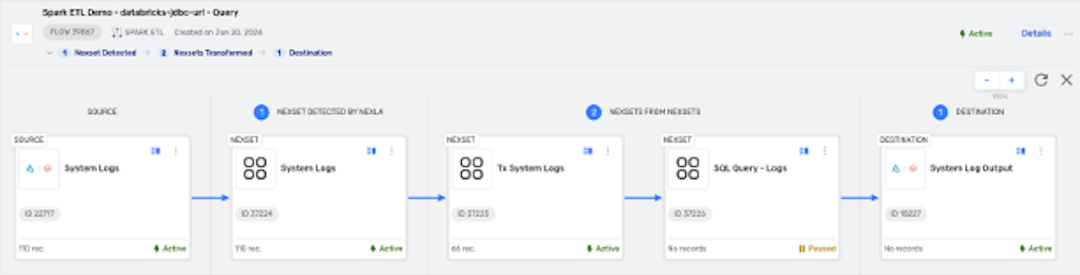
Spark ETL data flows are designed to send data to a single destination. In these flows, users can send either detected Nexsets or transformed Nexsets (created by modifying the data in the detected Nexset) to a cloud storage or Databricks location by following the steps in this section.
- Click the
 icon on the Nexset to begin creating a destination in the data flow.
4.1 Configure the Destination
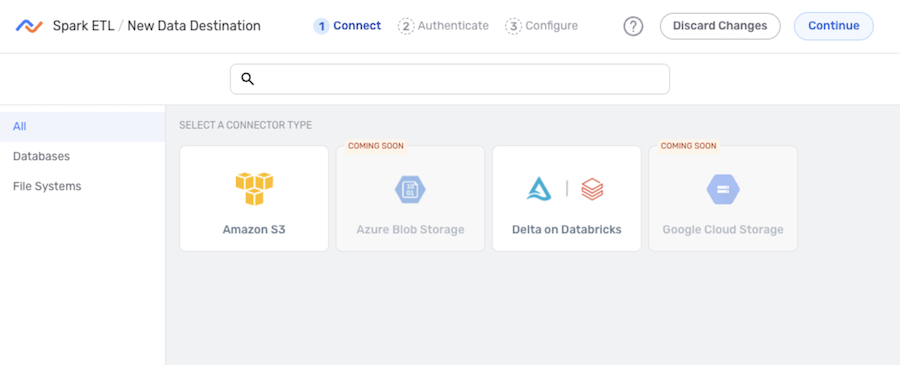
- In the Connect screen, select the connector tile matching the data destination type from the list.
-
Destinations in Spark ETL data flows are only supported for some of the connectors available in Nexla, and only supported connectors are shown on this screen.
-
To create a data flow with a data destination type not available in this screen, use the FlexFlow flow type or one of the other flow types listed on the Nexla Data Flow Types page.
-
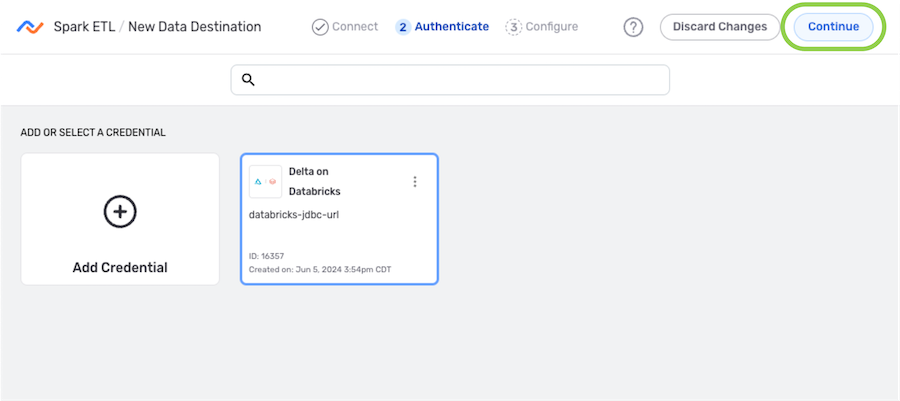
- In the Authenticate screen, select or create the credential that will be used to connect to the destination, and click . Detailed information about credential creation for specific destinations can be found on the Connectors page.
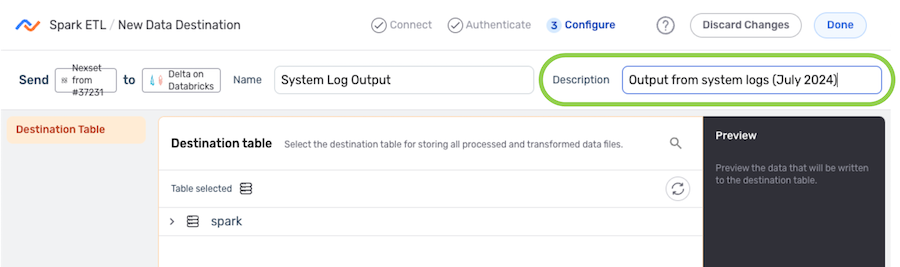
- Enter a name for the destination in the Name field.
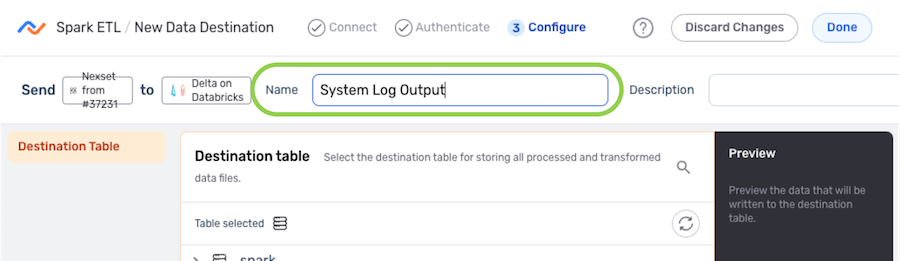
-
Optional: Enter a brief description of the destination in the Description field.
Resource DescriptionsResource descriptions should provide information about the resource purpose, data freshness, etc. that can help the owner and other users efficiently understand and utilize the resource.
- The subsections below provide information about additional settings available for data destinations in Spark ETL flows. Follow the listed instructions to configure each setting for this destination, and then proceed to Section 4.2.
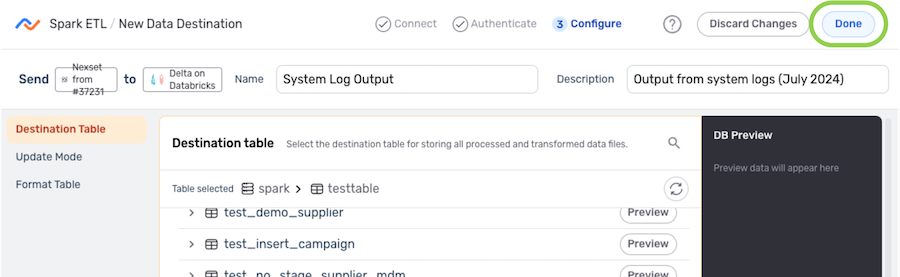
Destination Table
-
Under the Destination Table section, navigate to the table to which Nexla will write the Nexset data; then, hover over the listing, and click the
icon to select this location.- To view/select a nested location, click the icon next to a listed folder to expand it.
- To view/select a nested location, click the
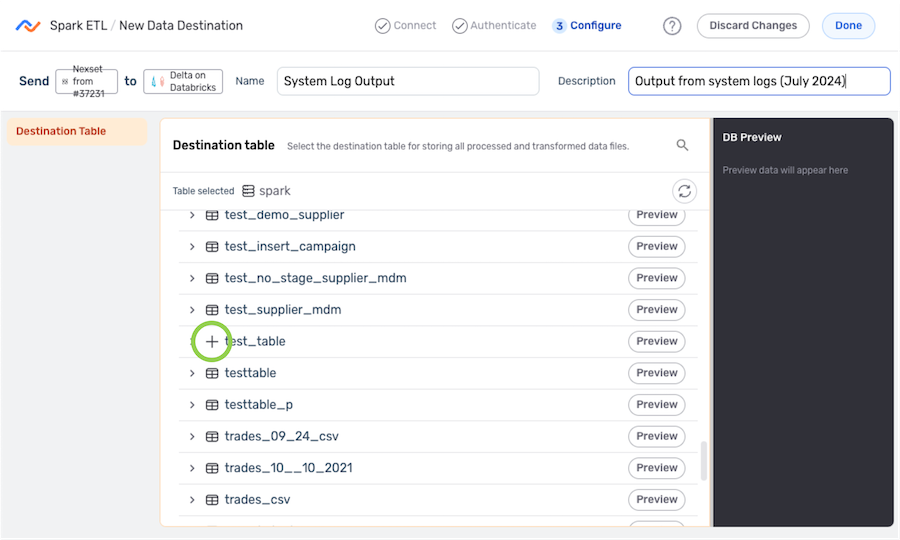
- The selected directory location is displayed at the top of the Destination Table section.

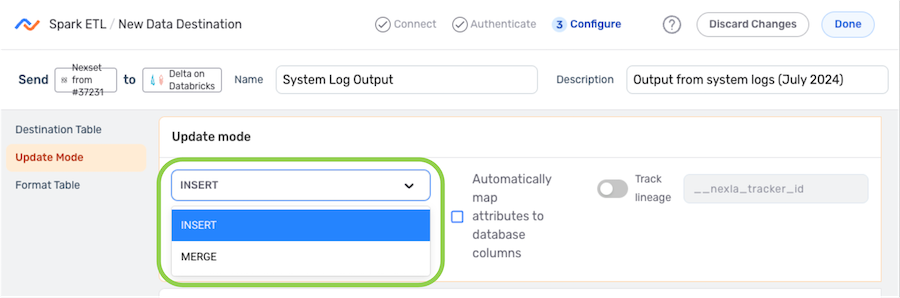
Update Mode
- Under Update Mode, select whether the records contained in the Nexset should be inserted or upserted into the table using the Update Mode pulldown menu.
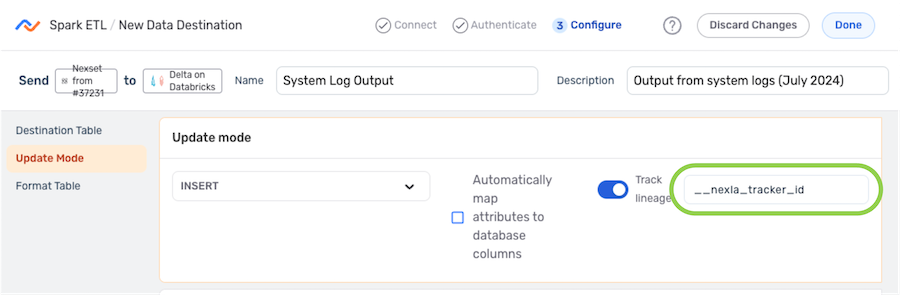
Record Lineage Tracking
Nexla provides the option to trace the lineage of records sent to the destination in Spark ETL data flows. This lineage includes the origin of the record data, all applied transformations or changes, and all destinations to which the record data has been sent over time.
-
To enable record lineage tracking, click on the Track Lineage slide switch under Update Mode. Once activated, the switch will turn blue.
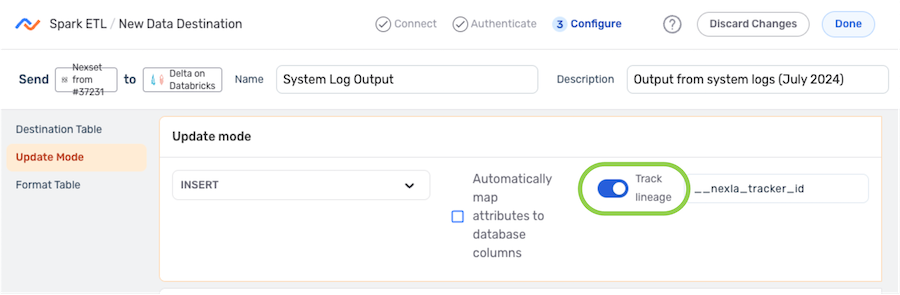
-
Enter the tracker name in the Track Lineage text field. Nexla will include an attribute with the name entered in this field. This attribute will be assigned a unique value for each record written to the destination.
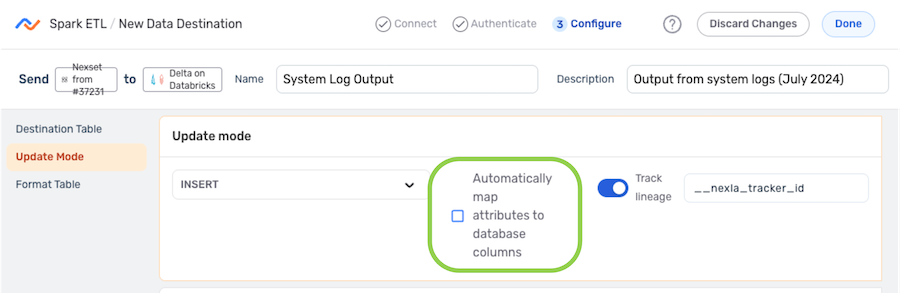
Automatic Mapping
- To configure Nexla to automatically map the Nexset record attributes to columns in the database, check the box next to Automatically map attributes to database columns.
4.2 Save & Activate the Destination
-
Once all required settings and any desired additional options are configured, click
 in the top right corner of the screen to save the data destination.Important: Data Movement
Data will not begin to flow into the destination until it is activated by following the instructions below.
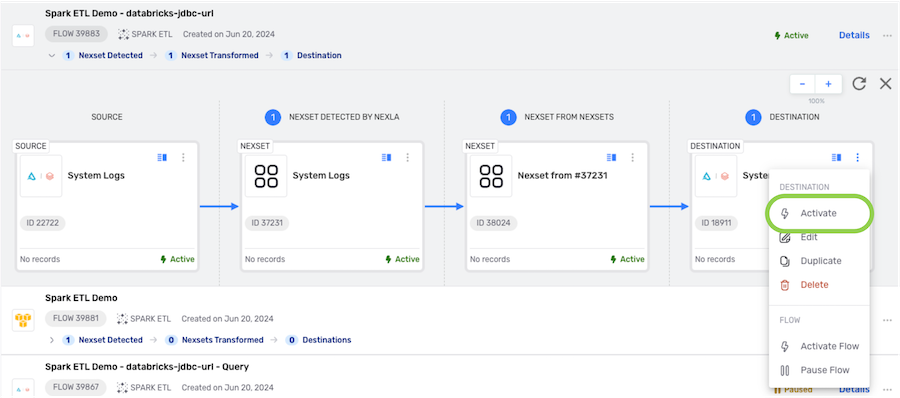
- To activate the destination, click the
 icon on the destination, and select
  from the dropdown menu.