Writing Data to an API Destination
In Nexla, users can easily create data flows that send data in detected or transformed Nexsets to any API-based destination. These destinations can be created using Nexla's pre-configured connectors designed to interface with many popular systems, or users can configure almost any REST API destination using the fully customizable universal REST API connector.
In this article, learn how to send data to an API-based destination, including creating & configuring the destination, testing to ensure that the data will be successfully received by the API, and applying any needed changes to the Nexset schema.
1. Select the Connector Type & Credential
More detailed instructions for the initial steps of destination creation can be found in the articles on the Connectors and Common Setup for REST API-Based Systems pages.
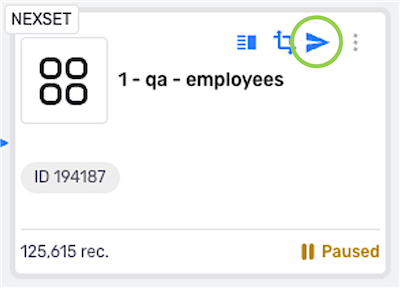
- To begin sending a Nexset to an API-based destination, click the
 icon on the Nexset to begin configuring a new destination.
-
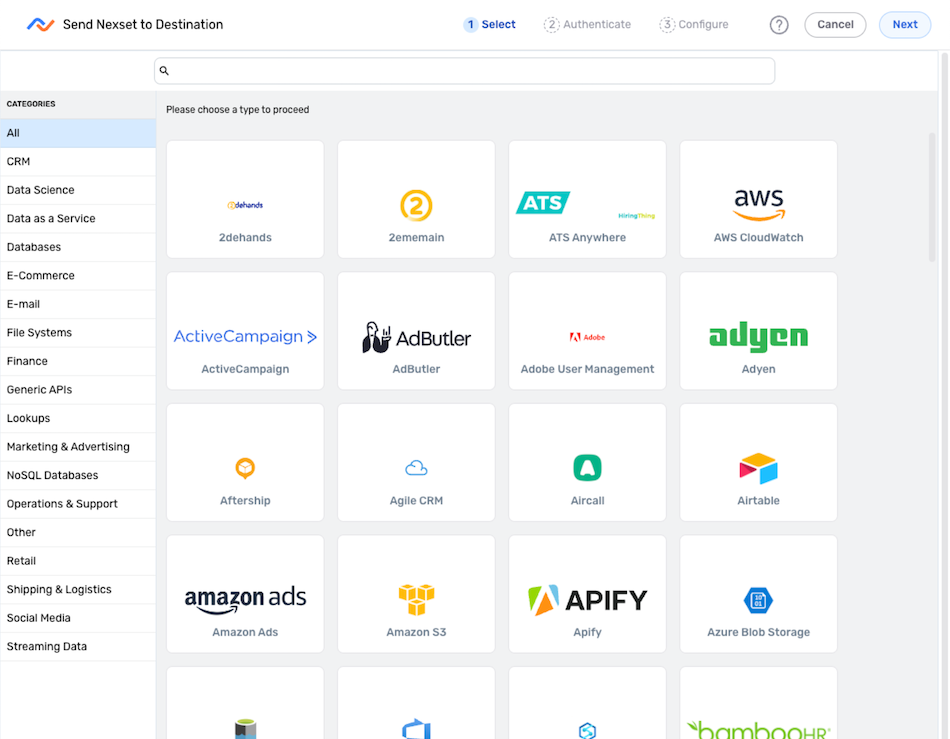
In the Send Nexset to Destination screen, select the connector tile matching the API-based data system to which the Nexset data will be sent. Once a connector is selected, the platform will automatically advance to the next setup step.
- To create the destination using the fully customizable universal REST API connector, select the REST API connector tile.
-
Create or select the credential that Nexla will use to connect to the API-based destination; then, click
 .Creating New Credentials
The information required to create a new credential varies for each API-based data system. More detailed instructions are provided for each connector, including pre-configured and universal REST API connectors, in the articles on the Connectors and Rest API (Universal) pages.
2. Configure the Destination
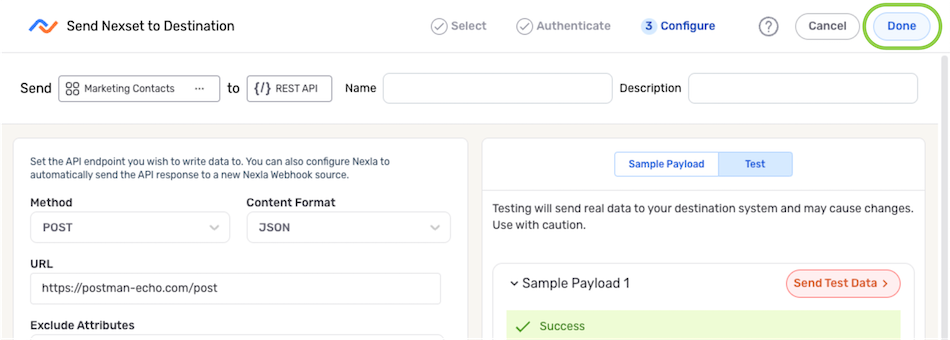
For any API-based destination, settings such as the endpoint URL, payload content format, record batching, and more can be configured manually in the Configure screen during destination setup. The available settings vary according to the selected connector, since Nexla's pre-configured connectors are customized to work with the corresponding data system.
Many API connectors also include pre-built templates that can be used to easily configure the API destination for common use cases. These connectors can be configured using one of the available templates by selecting the Template tab in the Configure screen; or, to configure these destinations manually, select the Advanced tab.
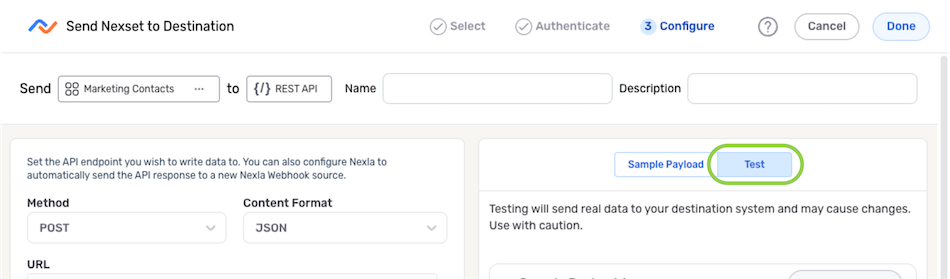
3. Test the Configuration
Sending Nexset data to an API destination requires that settings such as the endpoint URL and request method are correctly configured. Additionally, many APIs have strict data formatting requirements. When setting up an API destination, Nexla users can send a test request to the API before saving the destination to ensure that the Nexset data will be successfully received.
Currently, testing is only available when configuring the API destination manually using the Advanced tab.
When an API destination is tested, real data is sent to the API. This may cause changes to existing data or duplication of Nexset data within the receiving system. To avoid data changes or to facilitate easily fixing any duplications or other issues, an ID can be assigned to the test payload before sending the test request, as described below.
Testing an API destination before saving is optional and is not required.
To access API destination testing, select the Test tab at the top of the right-hand panel.
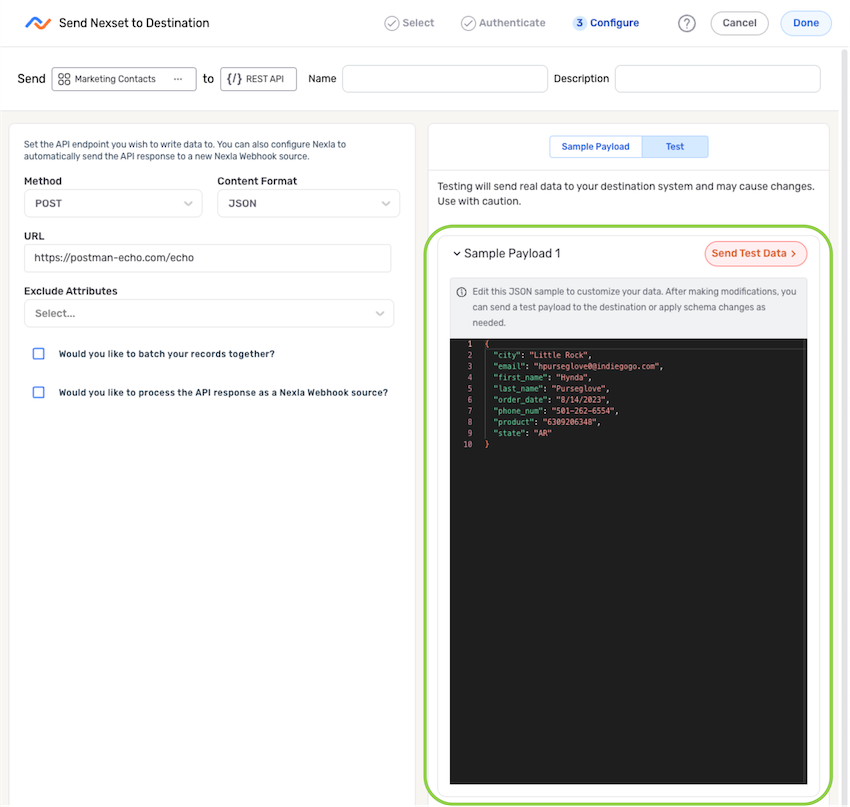
Viewing and Editing Payloads
- Click on a sample payload to expand it.
-
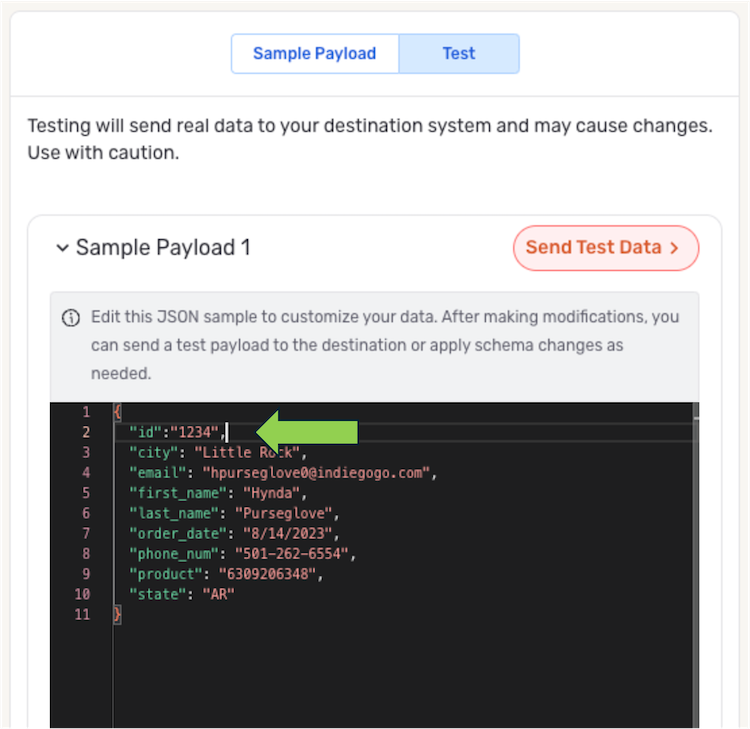
Sample payloads are shown in a fully editable text field that allows the displayed properties & values to be modified or removed. Within this field, any needed schema changes can be made, including adding new properties—such as an ID or marker to facilitate easy removal of duplicates in the destination system.
Example: Adding an ID Property to the Payload
Sending a Test Request
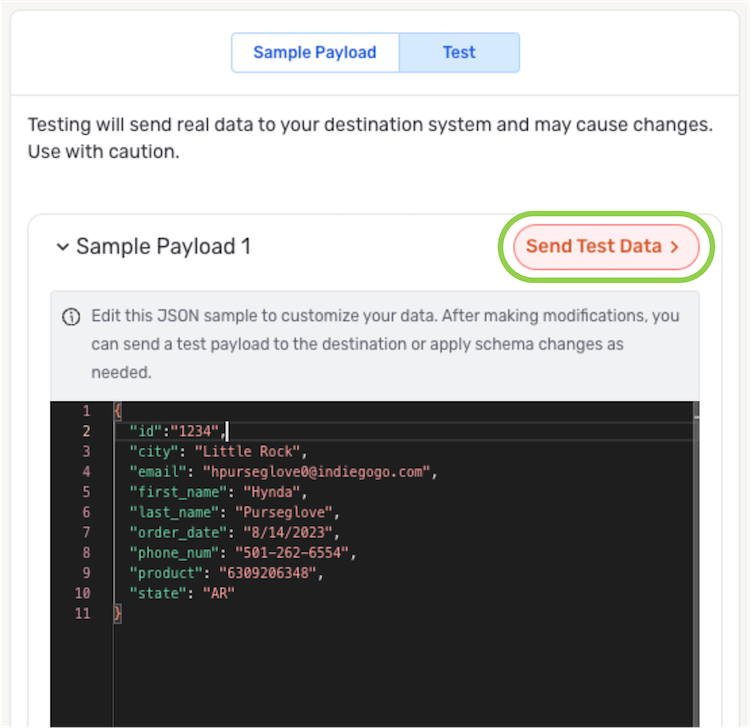
To send a test request to the API, click the ![]() button on the payload. The test request will be sent using the currently configured destination settings and will contain the payload exactly as shown in the expanded Sample Payload field (including any modifications).
button on the payload. The test request will be sent using the currently configured destination settings and will contain the payload exactly as shown in the expanded Sample Payload field (including any modifications).
After sending a test payload to the API destination, a result indicating whether the API successfully received & processed the request will be displayed, along with the server response.
-
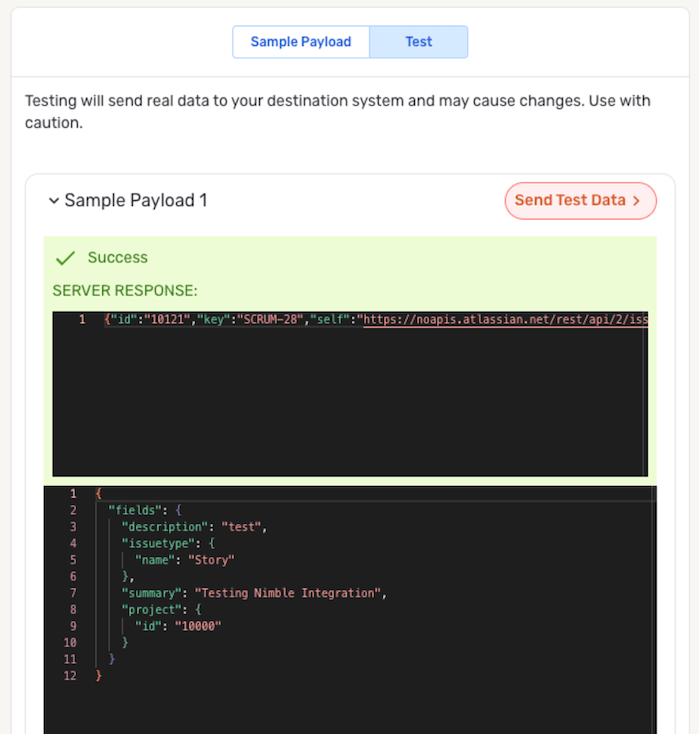
Success indicates that the API endpoint successfully received & processed the request.
Example: Successful API Test
-
An error message is displayed when the API endpoint fails to receive and/or process the request. The error status code is displayed, along with the server response.
When an API destination test fails, the server response will often provide information about the cause of the error, such as by identifying missing parameters. Changes can then be made to the destination settings and/or the sample payload, and the API test can be repeated as many times as needed.
Example: Failed API Test
The server response indicates that the error was due to the
absence of a valid project ID or key in the payload.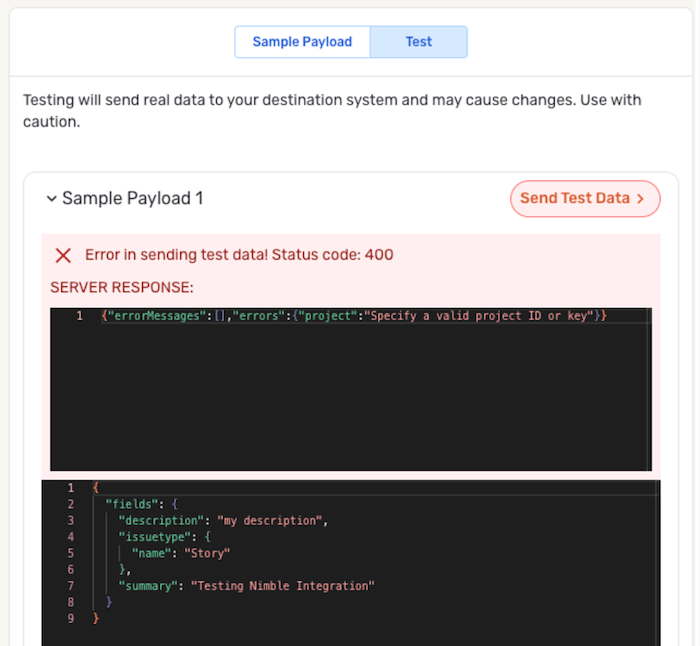
Interactive Tutorial
For a hands-on demonstration of API destination testing within the Nexla UI, follow the interactive tutorial below.
4. Save the API Destination
Once the API destination is configured, click ![]() in the top right corner of the screen to save & create the new destination in the data flow.
in the top right corner of the screen to save & create the new destination in the data flow.
Data will not begin to flow into the destination until it is activated.
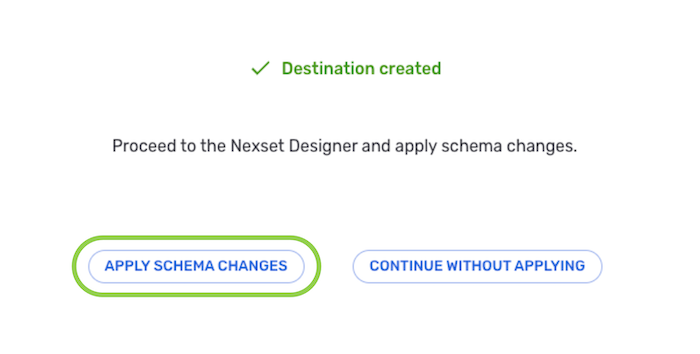
Applying Schema Changes
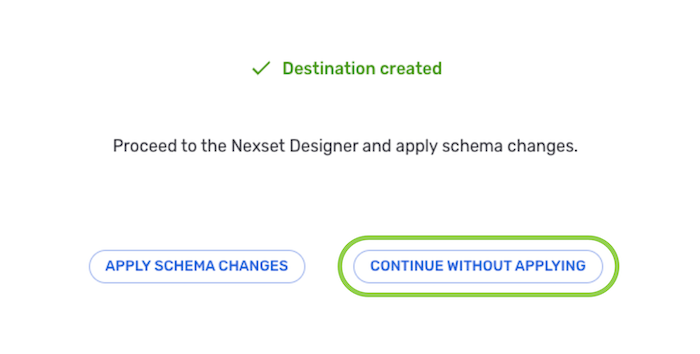
If changes to the sample schema of a transformed Nexset were made in the Sample Payload field during API destination setup, the next screen provides the option to apply these schema changes to the Nexset or discard the changes.
To apply the schema changes to a transformed Nexset:
-
Click the Apply Schema Changes button to open the Nexset in the Nexset Designer.
-
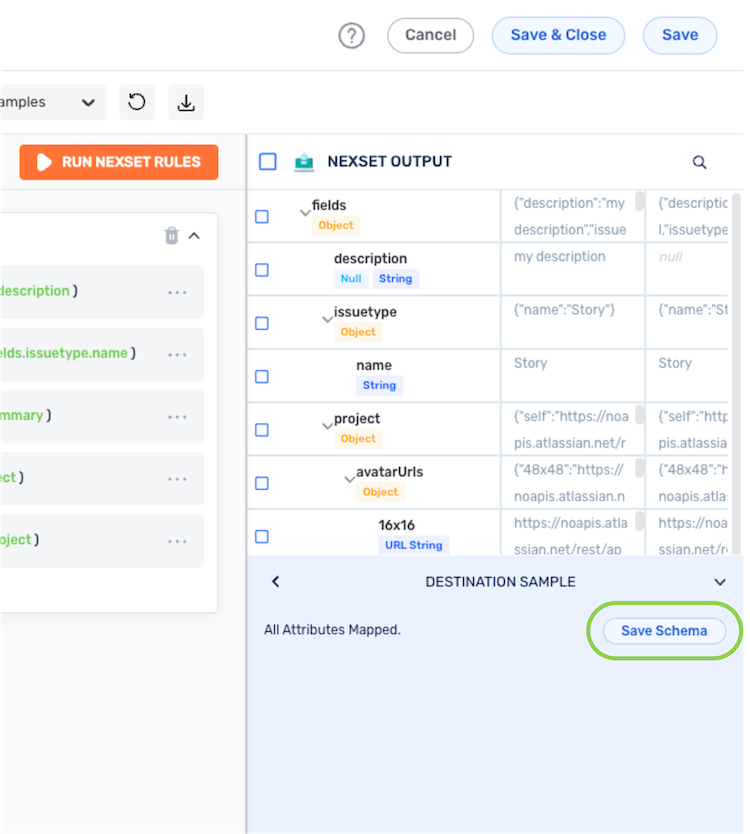
The schema used in the Sample Payload field during API destination creation will be loaded as a schema template in the Schema Template panel on the lower right side of the Nexset Designer screen. Only schema attributes that are currently unmapped to the output Nexset will be shown in the list.
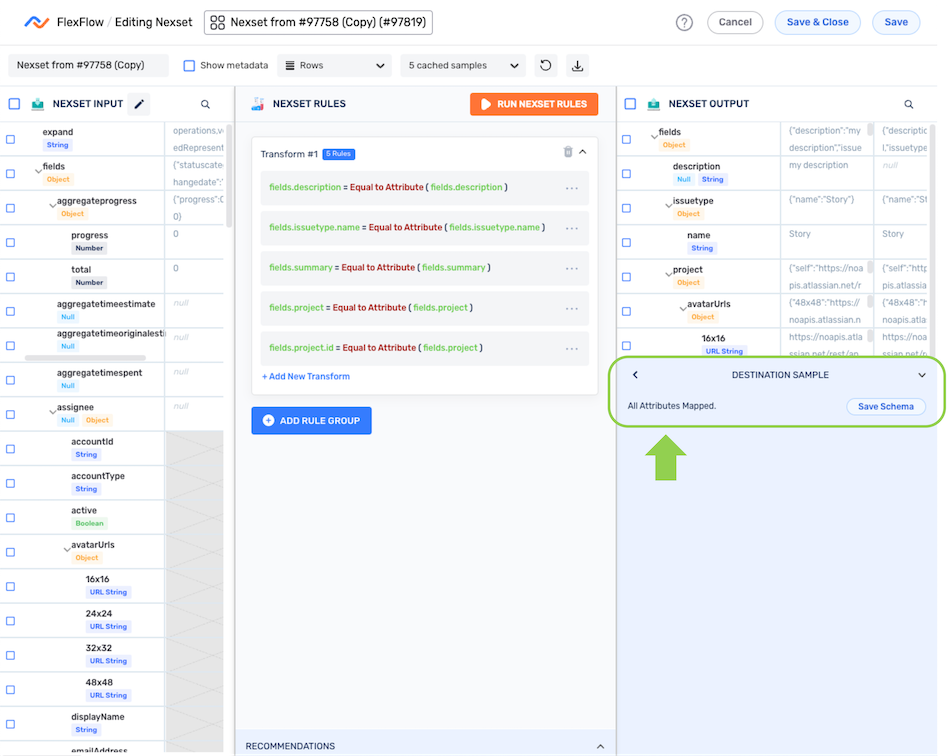
Use the schema template as a reference to add the unmapped attributes to the output Nexset by creating the corresponding transform rules in the Nexset Rules panel. Once all parameters included in the template are mapped to the output Nexset, the message "All Attributes Mapped" will be displayed.
Schema TemplatesFor more information about using schema templates to create Nexsets in the Nexset Designer, see Using Schema Templates.
Schema Template
This schema template is generated based on parameters included in
the sample payload during API destination testing.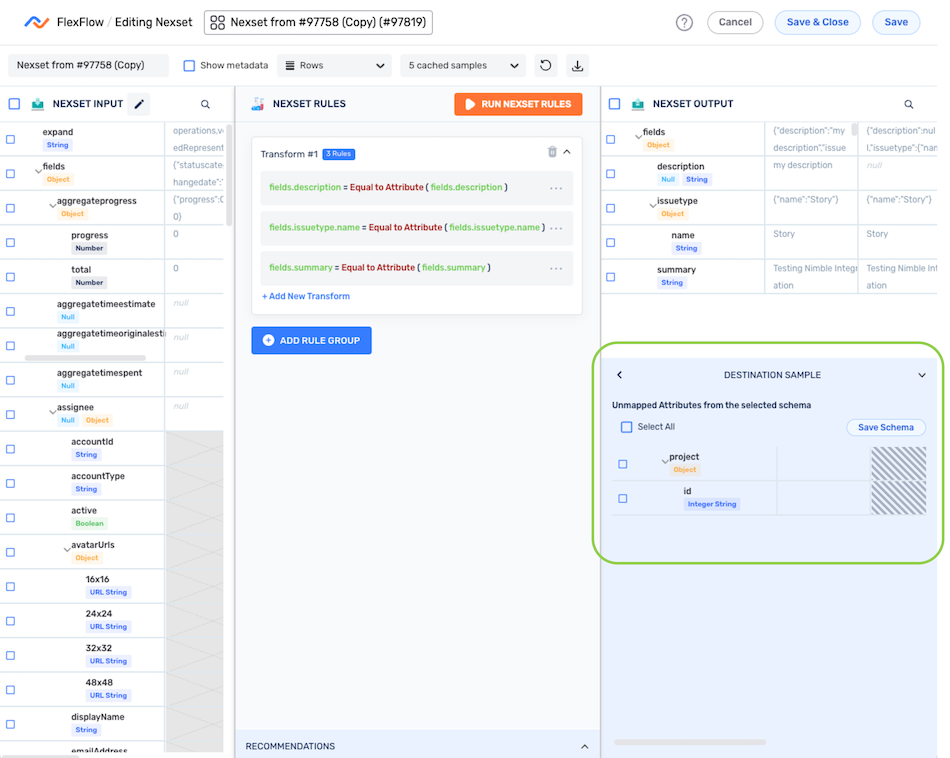
Completed Schema Template
Once all parameters included in the template are mapped to the output Nexset, the message "All Attributes Mapped" is displayed.
-
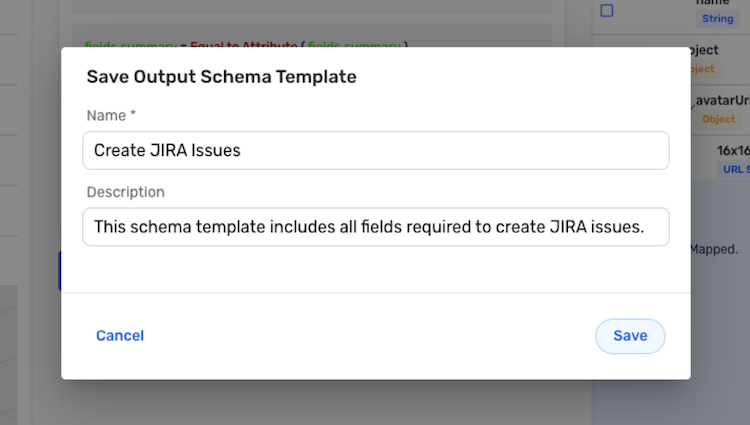
The schema template created from the edited sample payload can also be saved for future reference. To save the schema template, click the
 button at the top of the Schema Template panel; then, enter a schema template name & description in the pop-up window, and click
  .Saved Schema Templates
Saved schema templates can be used when transforming any Nexset in the Nexset Designer. To view all accessible schema templates, navigate to the Schema Templates screen in the Integrate section.
Save the Schema Template
Schema Template Name & Description
-
Once all necessary changes have been made to the Nexset, click the
 button in the top right corner of the screen to save & apply the transform and close the Nexset Designer.
To discard the schema changes:
- Click the Continue without Applying button to discard any changes made to the schema without applying them to the Nexset. For example, this option can be used when an ID was added to the test payload but should not be applied to the records in the Nexset.
5. Activate the Destination
The newly created API destination must be activated before the Nexset data will begin to flow into the destination. This providing Nexla users with full control over when the data should be transferred, as well as the opportunity to perform any needed checks and/or modifications to the destination before activation.
- To activate the API destination, click the
 icon on the destination, and select
  from the resource menu.
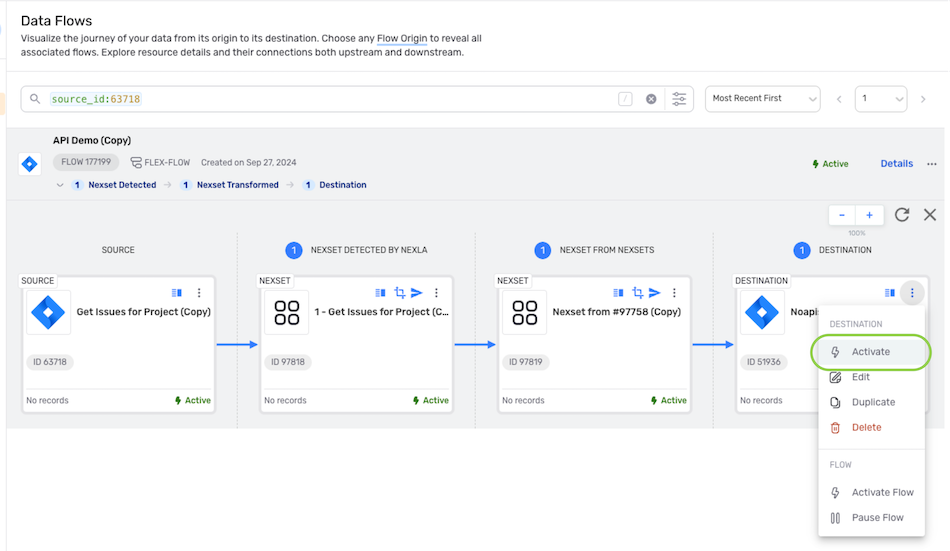
- Once the destination is activated, the Nexset data will begin to flow into the destination according to the configured settings.