Replication Data Flows
Replication data flows are designed for use in workflows that require high-speed movement of unmodified files between storage systems. They can also be used to conduct high-speed cloning of individual tables between cloud data warehouses. This flow type is best suited for use when both retaining file structure and transferring data as quickly as possible are critical.
1. Replication Flows
In Replication flows, latency is minimized by executing all nodes of the data flow in memory and transferring new data to the destination as soon as it becomes available. These flows are used to quickly replicate structured or unstructured files across multiple data stores and can include multiple destinations.
Replication data flows can be used to replicate data into one or multiple locations; however, this flow type does not support the use of data transformations to create transformed Nexsets.
For workflows that require data modification via transformations and/or other Nexla features, the FlexFlow flow type is recommended.
Replication Data Flow
Setting up a Replication data flow in Nexla to quickly replicate data between storage systems or databases is easy. The following sections provide step-by-step instructions for creating a new Replication flow, along with information about optional features and settings available for this flow type.
Replication Flows: Quick Start Guide Video
2. Create a New Replication Flow & Data Source
-
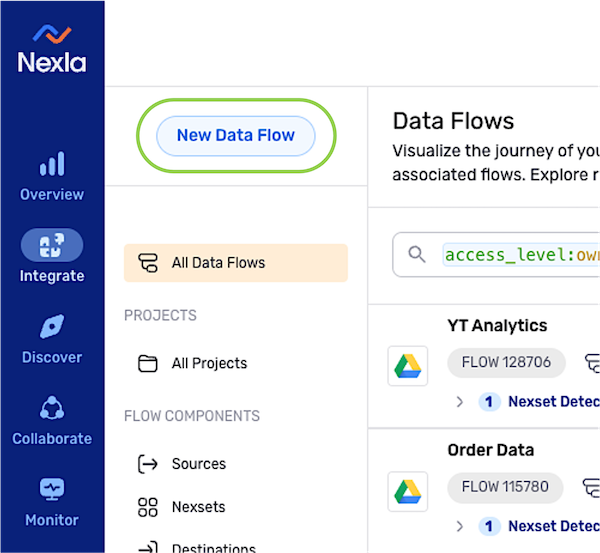
After logging into Nexla, navigate to the Integrate section by selecting
 from the platform menu on the left side of the screen.
 -
Click
 at the top of the Integrate toolbar on the left.
-
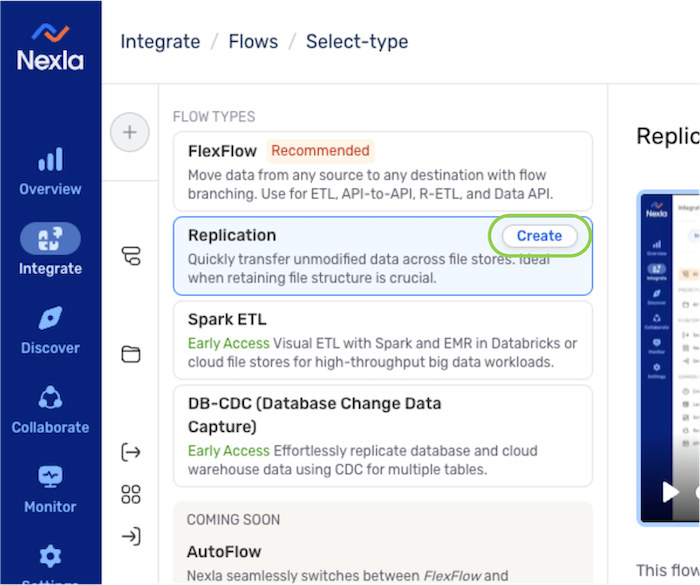
Select Replication from the list of flow types, and click
 to proceed to data source creation.Learning About Flow Types
In the Select Flow Type screen, click on a data flow type to view more information about it in the panel on the right, including a brief introductory video.
Data flows of each type can also be created by clicking the
 button at the top of this panel.
2.1 Configure the Data Source
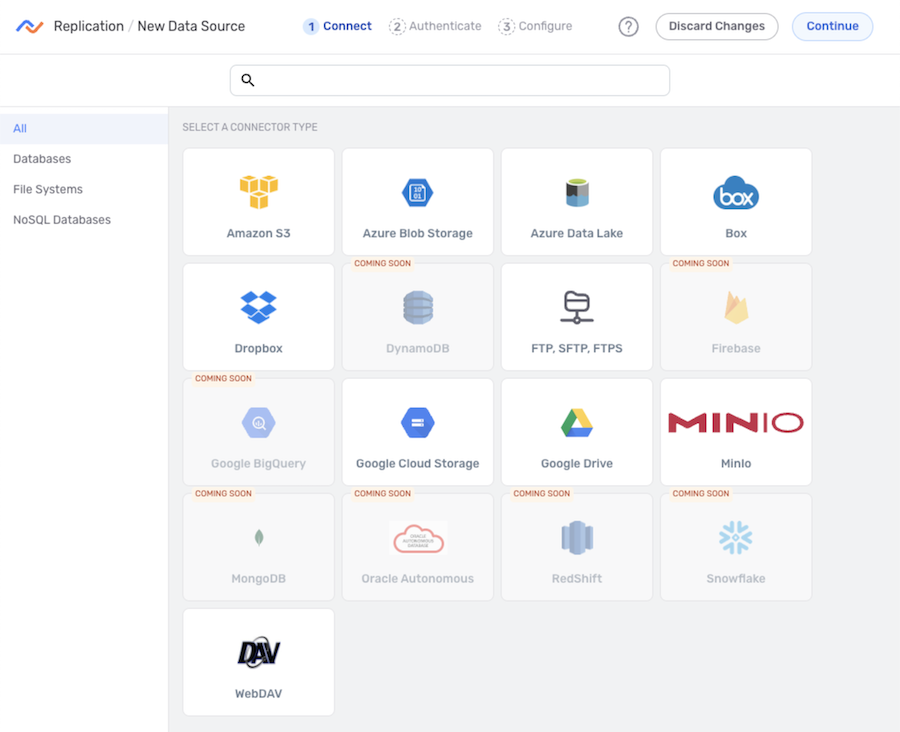
- In the Connect screen, select the connector tile matching the data source type from the list.
-
Replication data flows are only supported for some of the connectors available in Nexla, and only supported connectors are shown on this screen.
-
To create a data flow with a data source type not available in this screen, use the FlexFlow flow type or one of the other flow types listed on the Nexla Data Flow Types page.
-
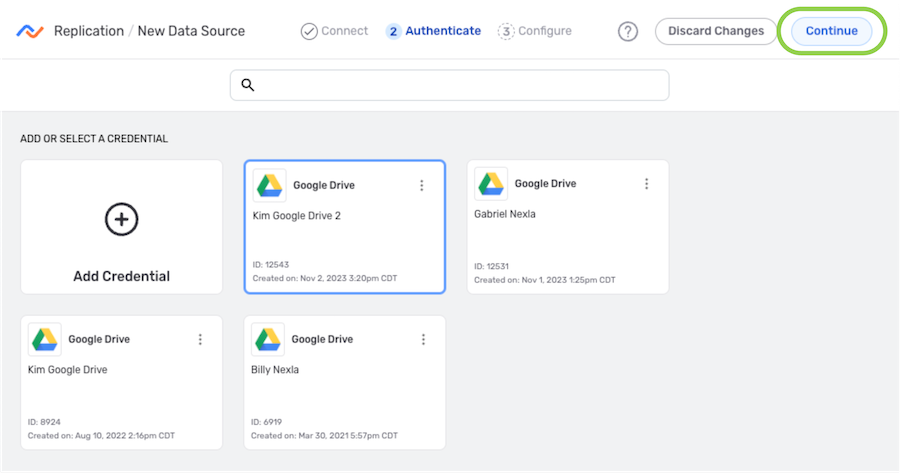
- In the Authenticate screen, select or create the credential that will be used to connect to the data source, and click
 . Detailed information about credential creation for specific sources can be found on the Connectors page.
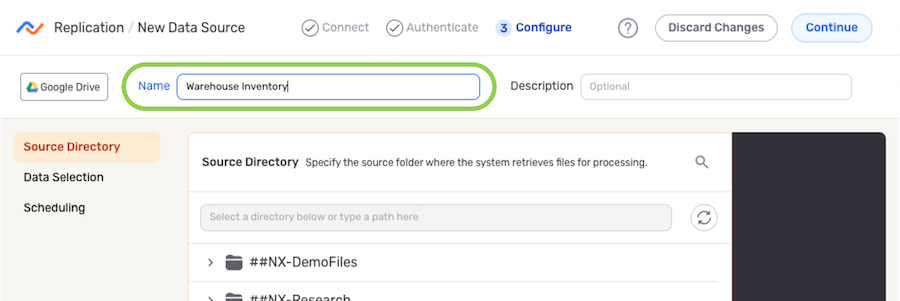
- Enter a name for the data source in the Name field.
- The subsections below provide information about additional settings available for data sources in Replication flows. Follow the listed instructions to configure each setting for this data source, and then proceed to Save & Activate the Data Source.
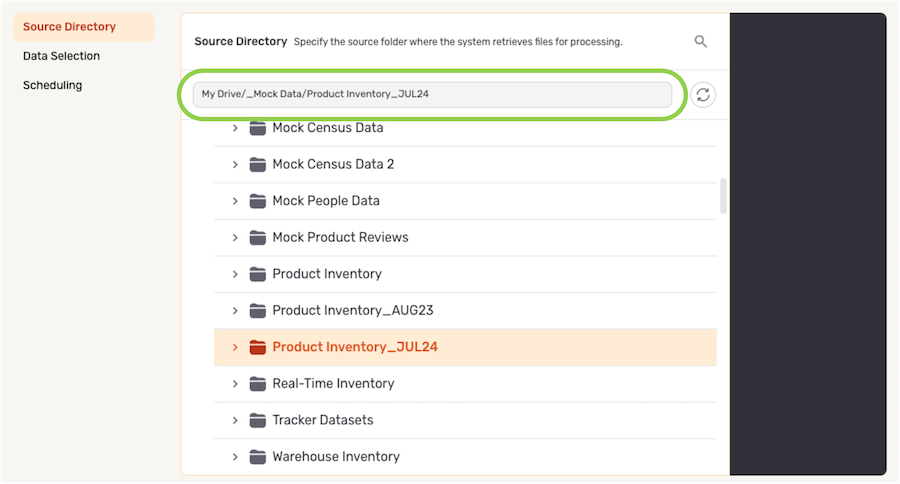
Source Directory
Replication flows can be used to clone an entire directory that is accessible with the selected credential or individual tables within the directory into the destination location.
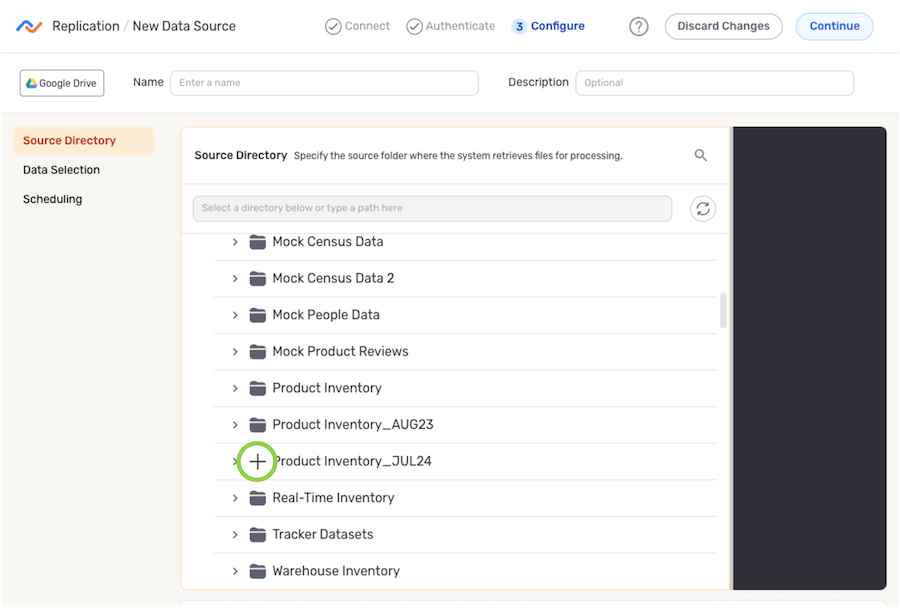
-
Under the Source Directory section, navigate to the directory location from which Nexla will read files from this source; then, hover over the listing, and click the
 icon to select this location.
- To view/select a nested location, click the
 icon next to a listed folder to expand it.
- To view/select a nested location, click the
- The selected directory location is displayed at the top of the Source Directory section.
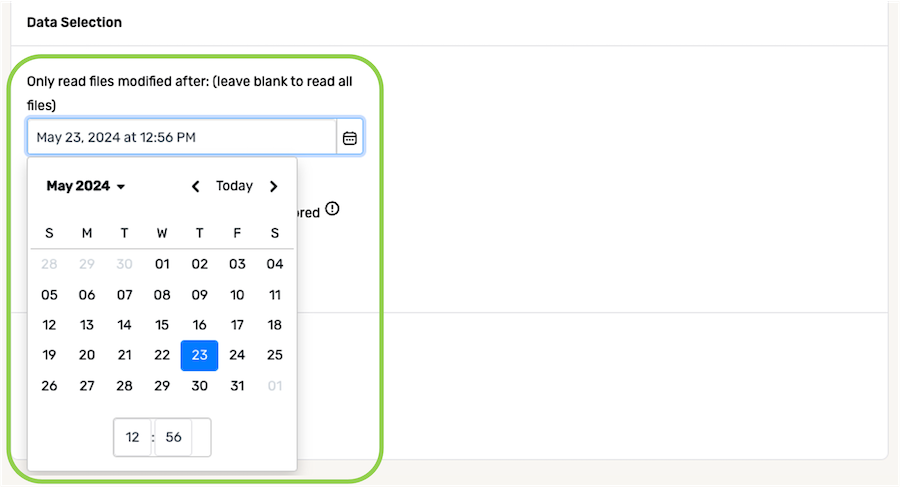
Data Selection
In Replication flows, users can optionally configure Nexla to read & replicate only some files within the selected location according to the most recent file modification date.
▷ Include all files in the source location (Default):
- By default, Nexla will read & replicate all files within the selected location. To continue with this configuration, no action is needed.
▷ Include only files modified after a specified date:
- When Nexla should only ingest newer or recently modified files from the data source, the platform can be configured to selectively ingest files modified after a specified date and time. To specify the file modification date and time that will be used to select which files should be read from this source, click the
 icon in the Only read files modified after: field under, and select the date from the dropdown calendar.
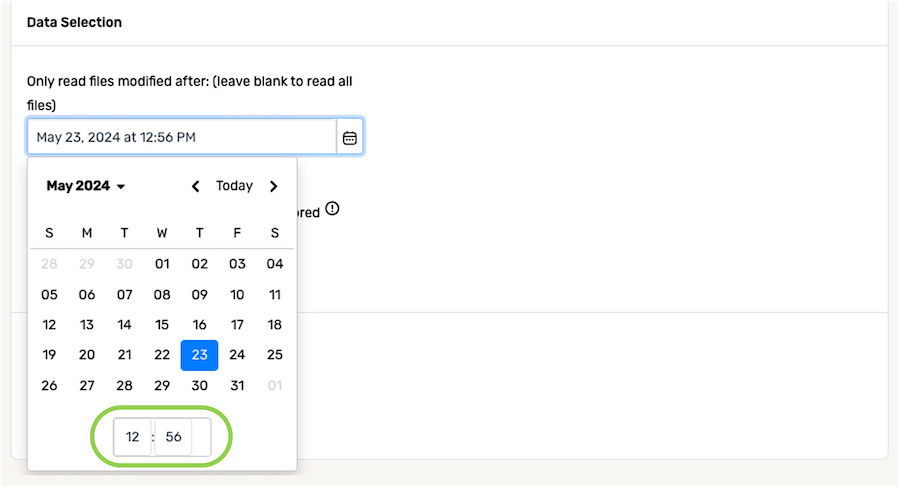
- In the field at the bottom of the calendar, enter the time (in 24-h format) on the selected date that should be referenced when identifying new and/or modified files from the source.
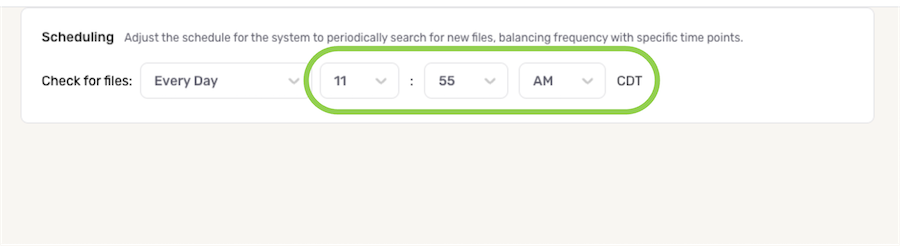
Scheduling
Scan scheduling options can be used to define the frequency at which the source location will be scanned for new or modified data in a Replication flow. Any new or modified data identified during a scan will then be replicated into the configured destination.
-
By default, when a new Replication data flow is created, Nexla is configured to scan the source for data changes once every day. To continue with this setting, no further selections are required. Proceed to Section 2.2.
-
To define how often Nexla should scan the data source for new data changes, select an option from the Check for Files pulldown menu under the Scheduling section.
- When options such as Every N Days or Every N Hours, a secondary pulldown menu will be populated. Select the appropriate value of N from this menu.
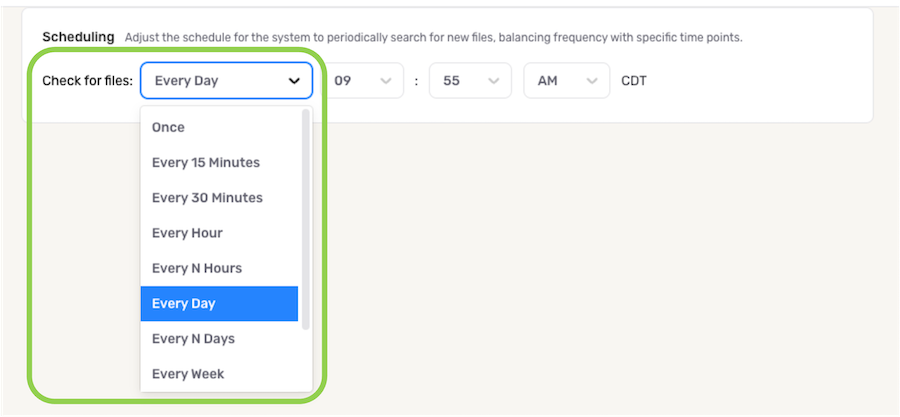
- To specify the time at which Nexla should scan the source for new data changes, use the pulldown menu(s) to the right of the Check For Files menu. These time menus vary according to the selected scan frequency.
2.2 Save & Activate the Data Source
After all required settings and any desired additional options are configured, click ![]() in the top right corner of the screen to save & activate the data source.
in the top right corner of the screen to save & activate the data source.

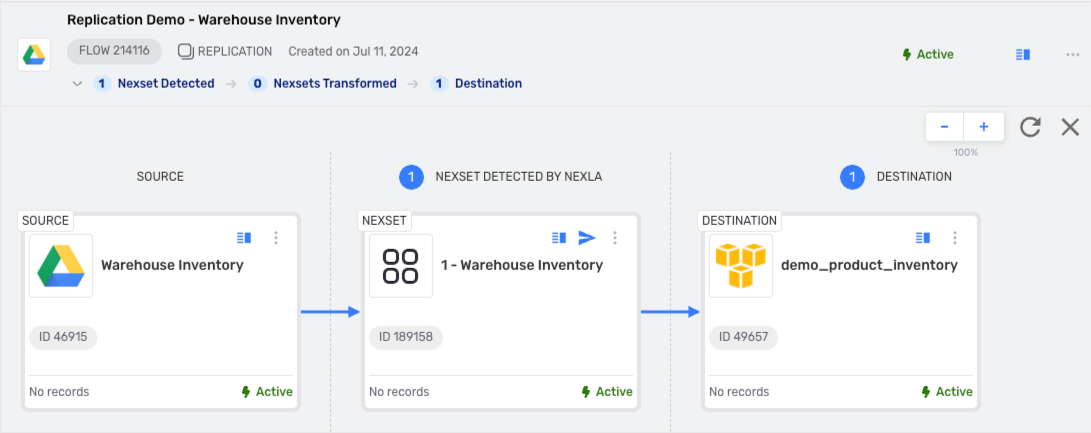
Once the data source is created, Nexla will automatically scan it for data according to the configured settings. Identified data will be organized into a Nexset, which is a logical data product that is immediately ready to be sent to a destination.
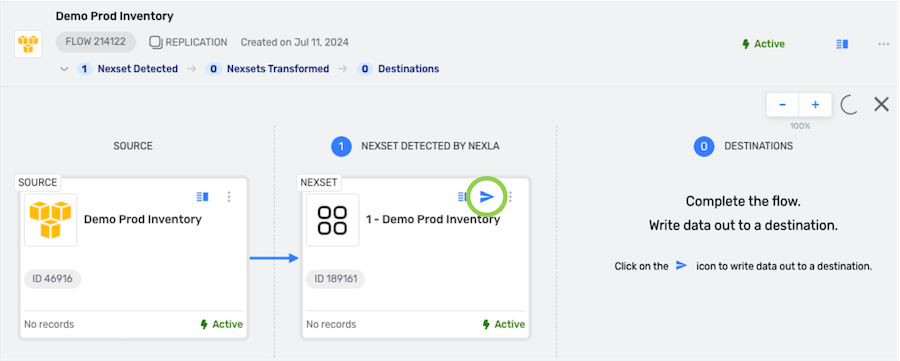
New Replication Data Flow with Data Source & Detected Nexset

3. Create the Data Destination
Replication flows are designed to rapidly move unmodified data from a single data source to one or more destinations and do not allow Nexset transformations. For workflows that require transformations and/or other Nexla features, the FlexFlow flow type is recommended.
- Click the
 icon on the detected Nexset in the Replication data flow to begin setting up the destination to which the data will be sent.
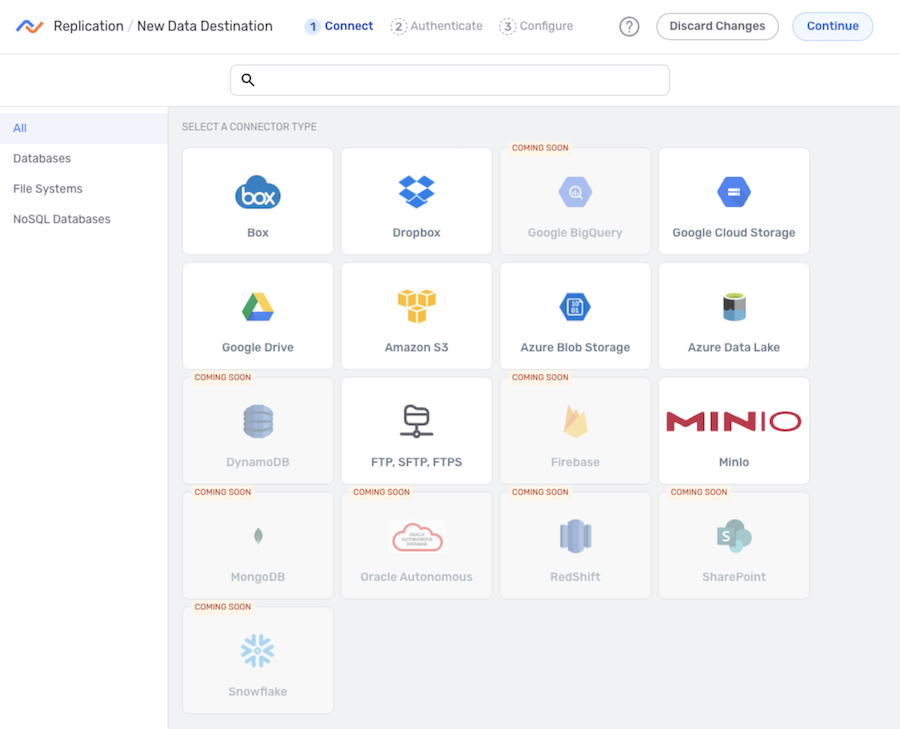
3.1 Configure the Destination
-
In the Connect screen, select the connector tile matching the data destination type from the list.
-
Replication data flows are only supported for some of the connectors available in Nexla, and only supported connectors are shown on this screen.
-
To create a data flow that sends data to a destination type not available in this screen, use the FlexFlow flow type or one of the other flow types listed on the Nexla Data Flow Types page.
-
- In the Authenticate screen, select or create the credential that will be used to connect to the data destination, and click . Detailed information about credential creation for specific destinations can be found on the Connectors page.
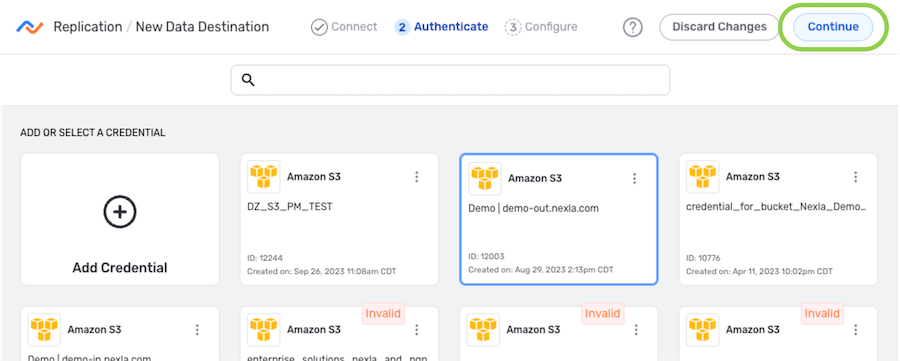
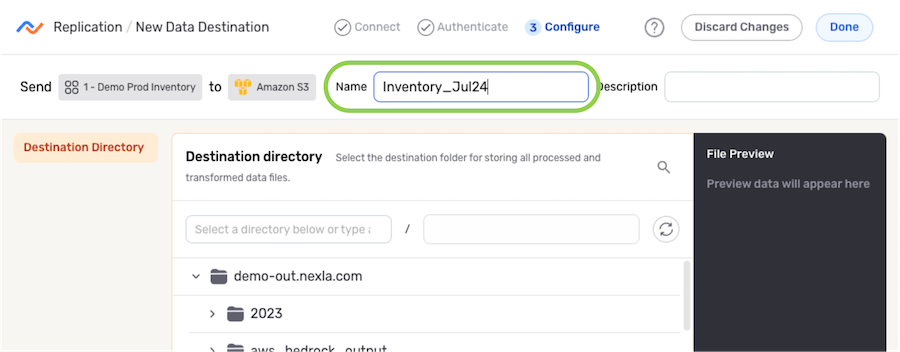
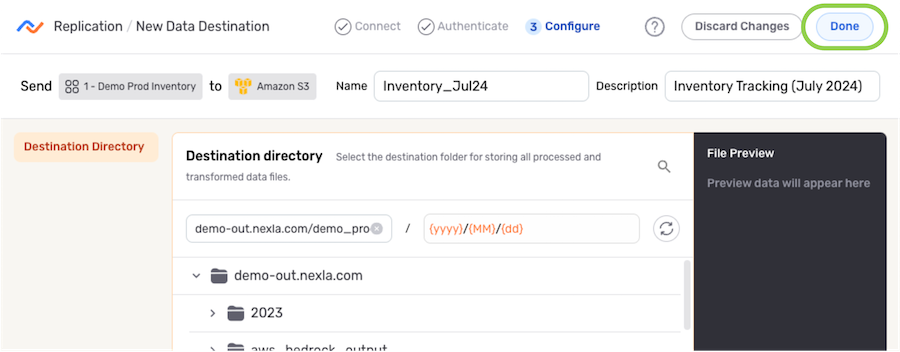
- Enter a name for the destination in the Name field.
-
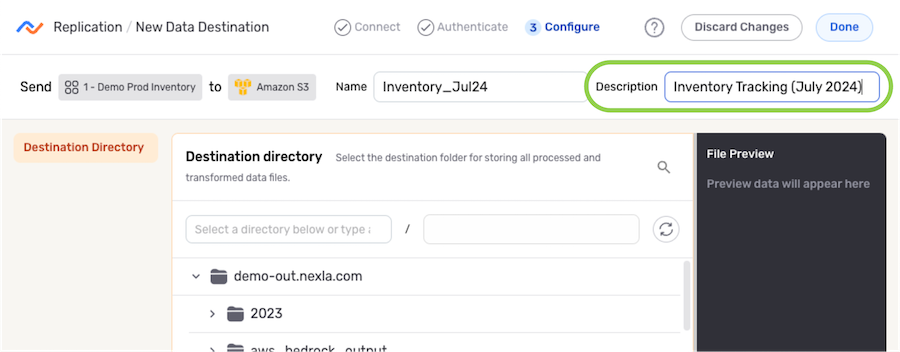
Optional: Enter a brief description of the destination in the Description field.
Resource DescriptionsResource descriptions should provide information about the resource purpose, data freshness, etc. that can help the owner and other users efficiently understand and utilize the resource.
- The subsections below provide information about additional settings available for data destinations in Replication flows. Follow the listed instructions to configure each setting for this destination, and then proceed to Section 3.2.
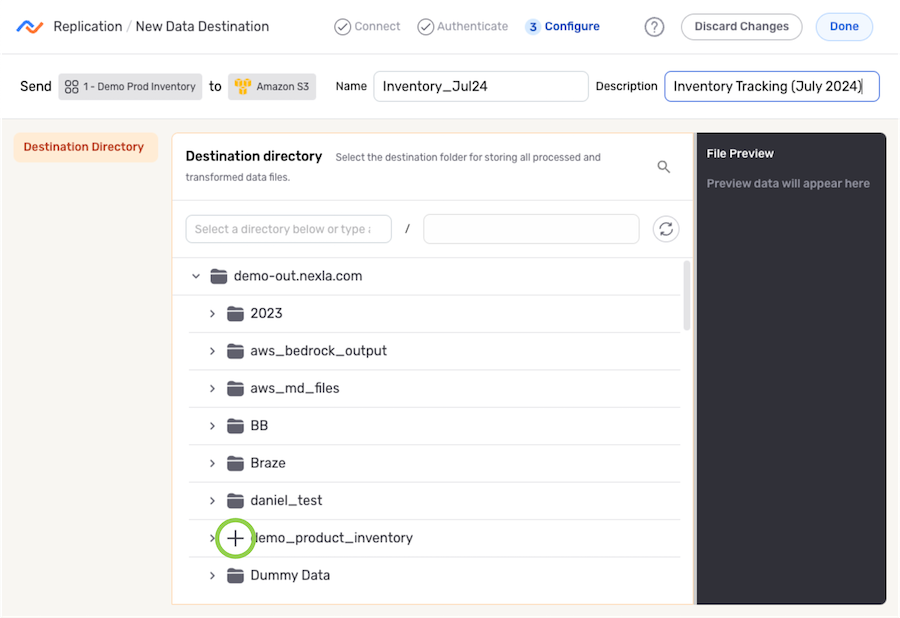
Destination Directory
-
Under the Destination Directory section, navigate to the directory location into which Nexla will replicate the Nexset data; then, hover over the listing, and click the
icon to select this location.- To view/select a nested location, click the icon next to a listed folder to expand it.
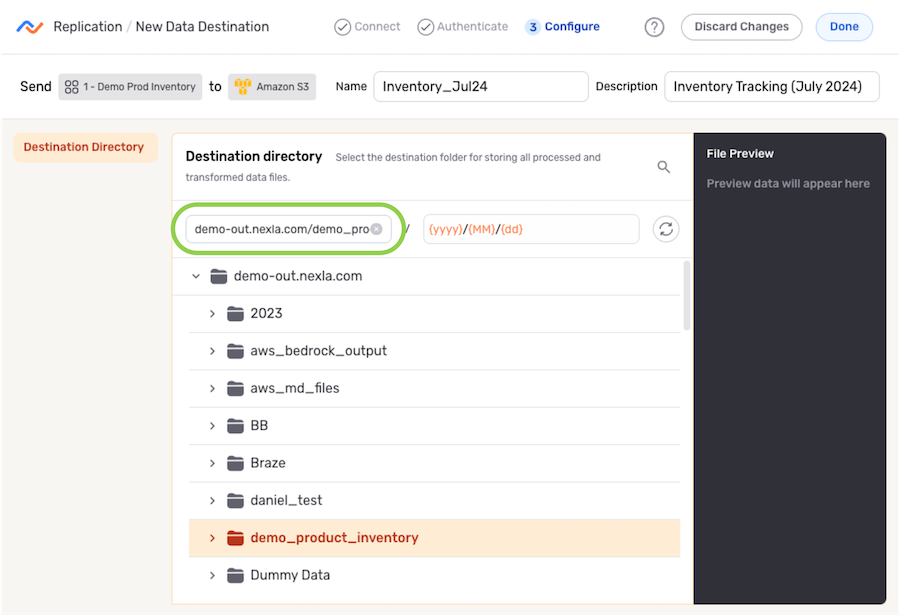
- To view/select a nested location, click the
- The selected directory location is displayed at the top of the Destination Directory section.
3.2 Save & Activate the Destination
-
Once all required settings and any desired additional options are configured, click
 in the top right corner of the screen to save the data destination.Important: Data Movement
Data will not begin to flow into the destination until it is activated by following the instructions below.
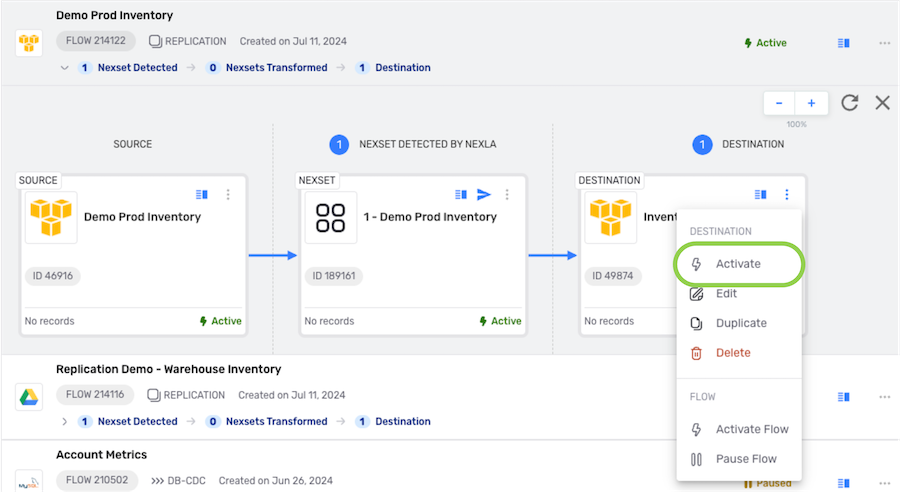
- To activate the destination, click the
 icon on the destination, and select
  from the dropdown menu.