Connect email systems to your data ecosystem with Nexla's intelligent email connector. Automatically capture data from incoming emails and deliver processed data to any email address as attachments. Perfect for automating data collection from customer inquiries, distributing reports and analytics, and maintaining seamless data flow across email-based business processes.
Power email data operations with Nexla's Email connector. Intelligently parse email content, extract structured data from attachments, and transform raw email data into actionable insights. Built-in email parsing engines handle complex formats, while automated data transformation ensures consistent output across all email sources. With enterprise-grade security, compliance features, and detailed audit trails, Nexla ensures your email data operations are both powerful and fully governed.
Features
Type: Email
- Convert structured and unstructured data from emails into ready-to-use data products
- Deliver data from any system to any email address as attachments
- Schema inference that automatically detects content structure and creates appropriate data schemas
Nexla's email connector enables seamless bi-directional data integration, allowing you to effortlessly set up automated data flows that ingest both structured and unstructured data from email sources or automatically send organized data to any email address as attachments. Data detected from incoming emails—whether from structured files or unstructured sources like PDF attachments—is automatically organized into ready-to-use Nexsets, while outbound email flows can deliver curated data insights directly to stakeholders' inboxes.
Use as a data source
Email data sources are a simple way to create flows based on data contained in emails. Simply create an email source, define forwarding rules to the uniquely generated email ID, and activate the data source. Then, Nexla will monitor the email ID for incoming data and map the new data into a new or existing Nexset.
This section provides step-by-step instructions for creating a new Email data source that will allow Nexla to ingest data from your email account and organize it into a ready-to-use Nexset.
- To create a new Email data source, after selecting the new data data flow type, select the the Email connector, and click the Add Credential tile. This will open the screen below, where you can configure a new email data source:
Create a New Email Data Source
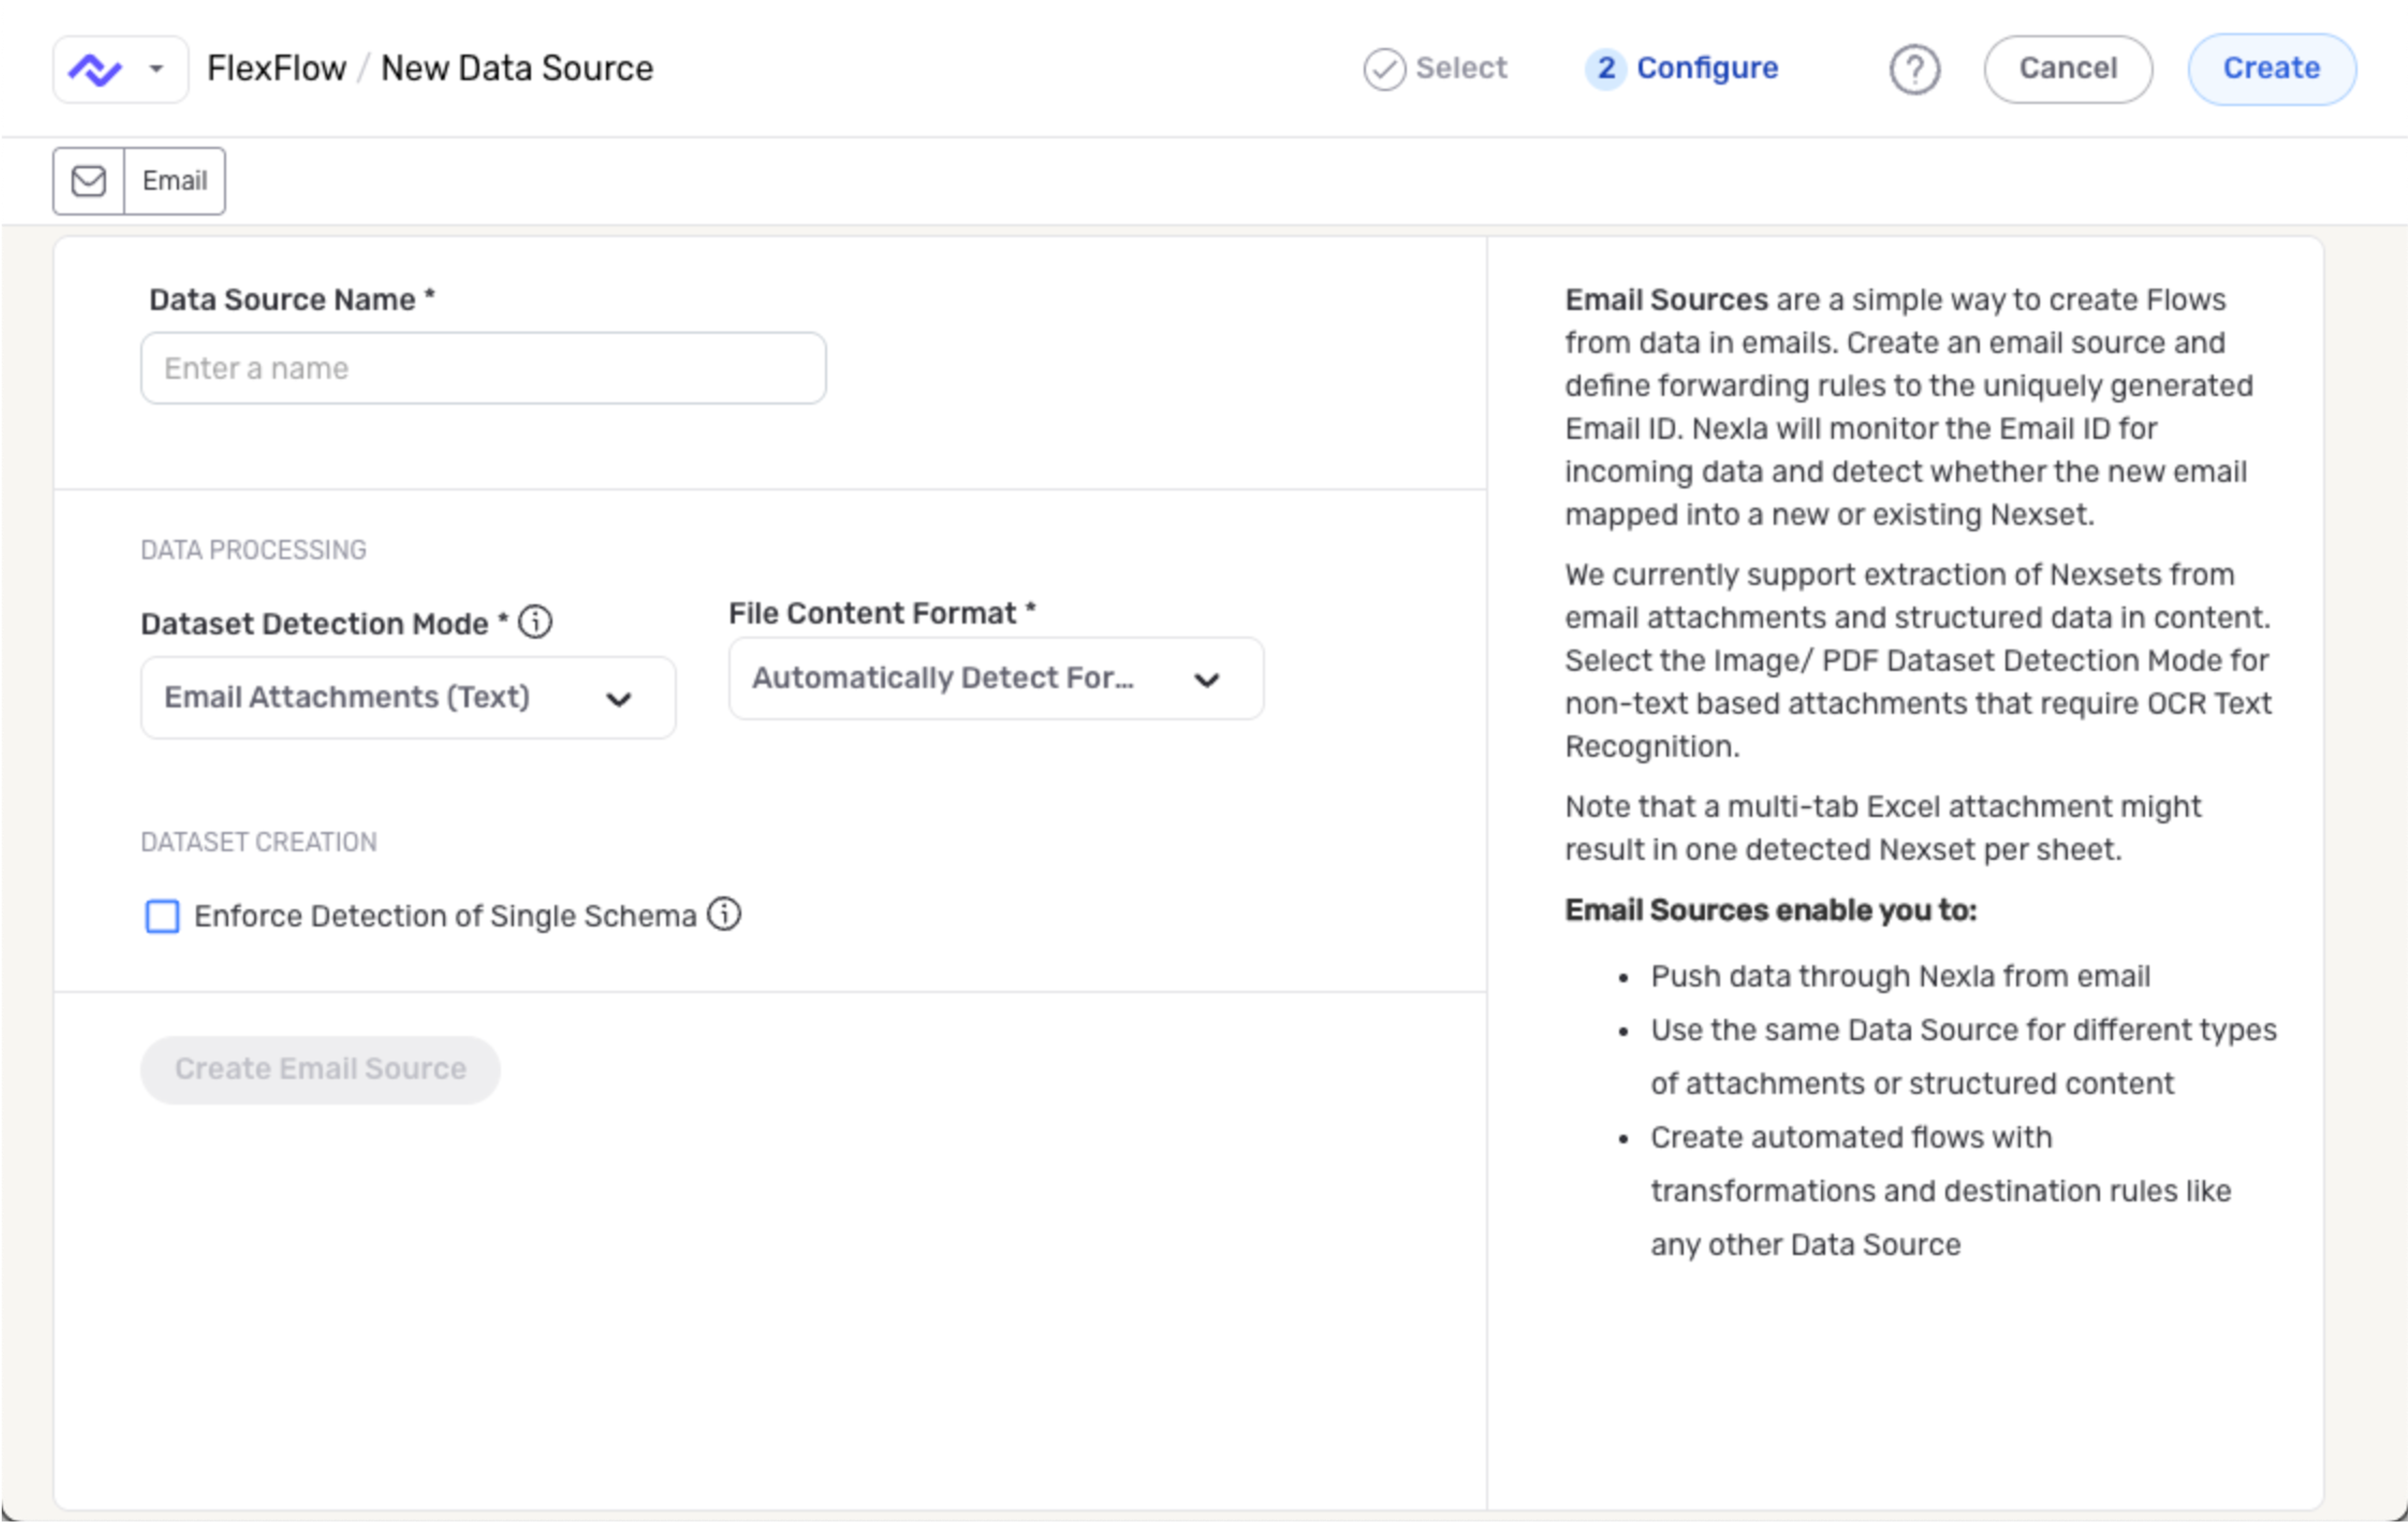
Data Source Name
- Enter a name for the email source in the Data Source Name field.
Data Processing & Format
-
Define which part of the email Nexla should read to detect new data by selecting an option from the Dataset Detection Mode pulldown menu. Expand the boxes below to learn more information about each option.
-
Nexla is automatically configured to detect the format in which each file should be parsed. Optionally, to force all files from this email source to be parsed in a specified format, select the corresponding option from the File Content Format pulldown menu.
The pre-selected Automatically Detect Format option is appropriate for most use cases, including those in which the email source contains files in more than one format.
Single Schema Detection
-
To configure Nexla to detect a single schema when reading data from this email source, select Yes from the Enforce Detection of Single Schema pulldown menu.
When the detection of a single schema is enforced for this email source, new data will result in the growth of that schema. Newly detected data that is unrelated to the schema will be quarantined for reprocessing.
Generate Email ID
-
Click the Generate Email ID button to generate a unique email ID for this email source.
-
Copy the email ID and paste it into Notepad or a similar easily accessible location. This ID will be used to forward emails to Nexla.
The generated email ID is unique to this email source—a new ID is generated for each email source added to a Nexla account.
Save & Create the Email Source
- Click Create in the top-right corner of the screen to save & create the email data source; then, continue to Email Forwarding.
Email Forwarding
-
Log into the email account that will be used with the data source, and configure the account to forward emails to the generated email ID. See the email provider's documentation for instructions on how to set up email forwarding rules.
-
Once email forwarding is configured, Nexla will scan the source for new email content at fixed intervals, and it will organize newly detected data into one or more Nexsets.
-
Typically, a 10-15 minute delay may occur between an email appearing in the associated email account and ingestion into a Nexset.
-
Use as a destination
Nexla's bi-directional connectors allow data to flow both to and from any location, making it simple to create an email destination in any data flow. For email destinations, Nexset data is delivered to the specified email address as an attachment in the selected format, along with a fully customizable email subject and body.
-
Click the + icon on the Nexset that will be sent to the email destination, and select the Send to Destination option from the menu.
-
Select the Email connector from the list of available data destinations. This will open the screen below, where you can configure a new email destination:
Create a New Email Destination
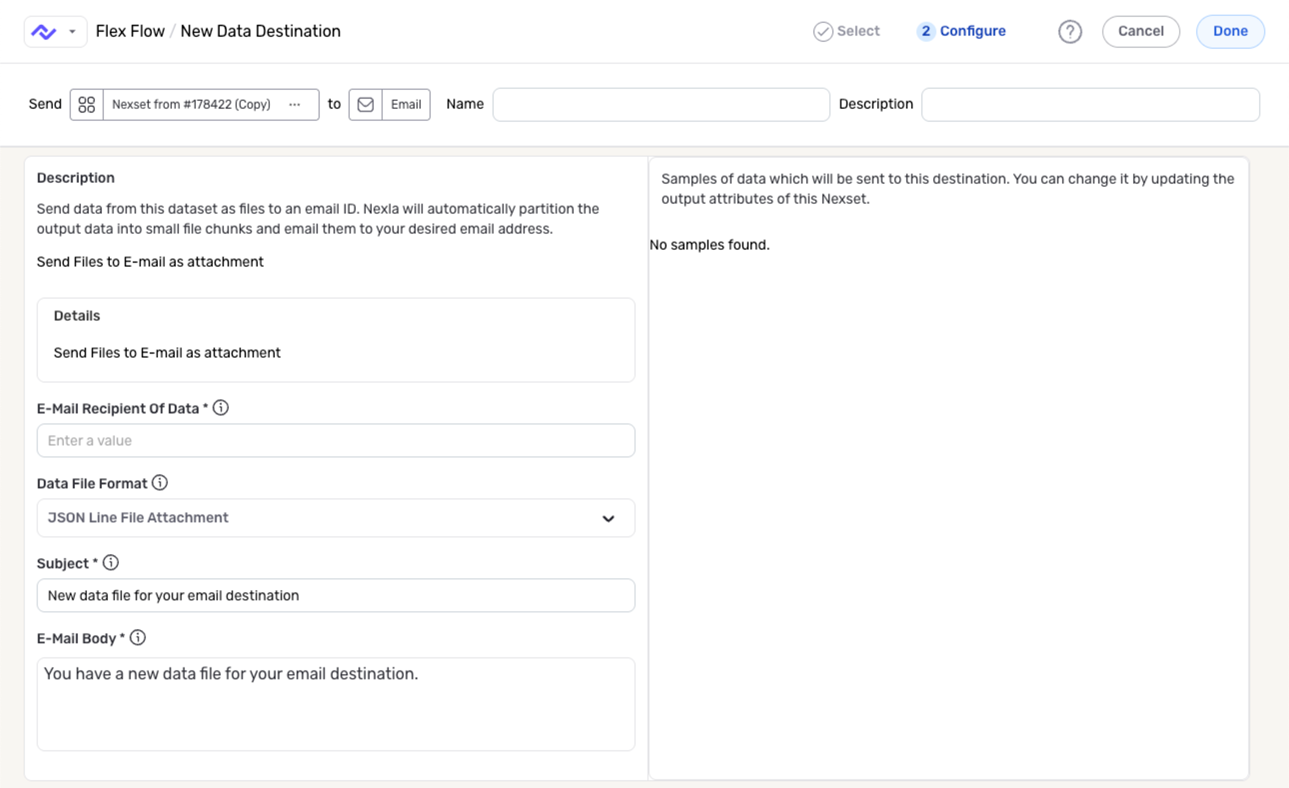
-
Enter a name for the email destination in the Name field and a short, meaningful description in the Description field.
-
Enter the email address to which the data will be sent in the E-Mail Recipient of Data field.
-
Select the preferred attachment format from the Data File Format pulldown menu. The Nexset data will be packaged into an attachment in the selected format for delivery to the specified email address. Preview samples of the Nexset data in the selected format are displayed in the panel on the right.
-
Enter a custom, informative subject line and body for the email in the Subject and E-Mail Body fields, respectively.
Nexla provides a default email subject line and body text for email destinations, and the destination can be created without customizing these fields. However, entering a custom subject line and body text is recommended to ensure that the recipient can easily recognize & identify the email upon delivery.
-
Click the Done button in the upper right corner of the screen to save and create the destination. To send the data to the configured email address, open the destination resource menu, and select Activate.
The Nexset data will not be sent to the email address until the destination is activated. Destinations can be activated immediately or at a later time, providing full control over data movement.