Databricks
Databricks
Nexla's bi-directional connectors can both send data to and receive data from any data system. This means that once a user has created or gained access to a credential for any data system, building any data flow to ingest data from or send data to a location within that data system requires only a few simple steps.
Authentication
This section provides step-by-step instructions for creating a new Databricks credential that will allow Nexla to authenticate to your Databricks account.
- To create a new Databricks credential, after selecting the data source/destination type, click the Add Credential tile to open the Add New Credential overlay.
New Credential Overlay – Databricks
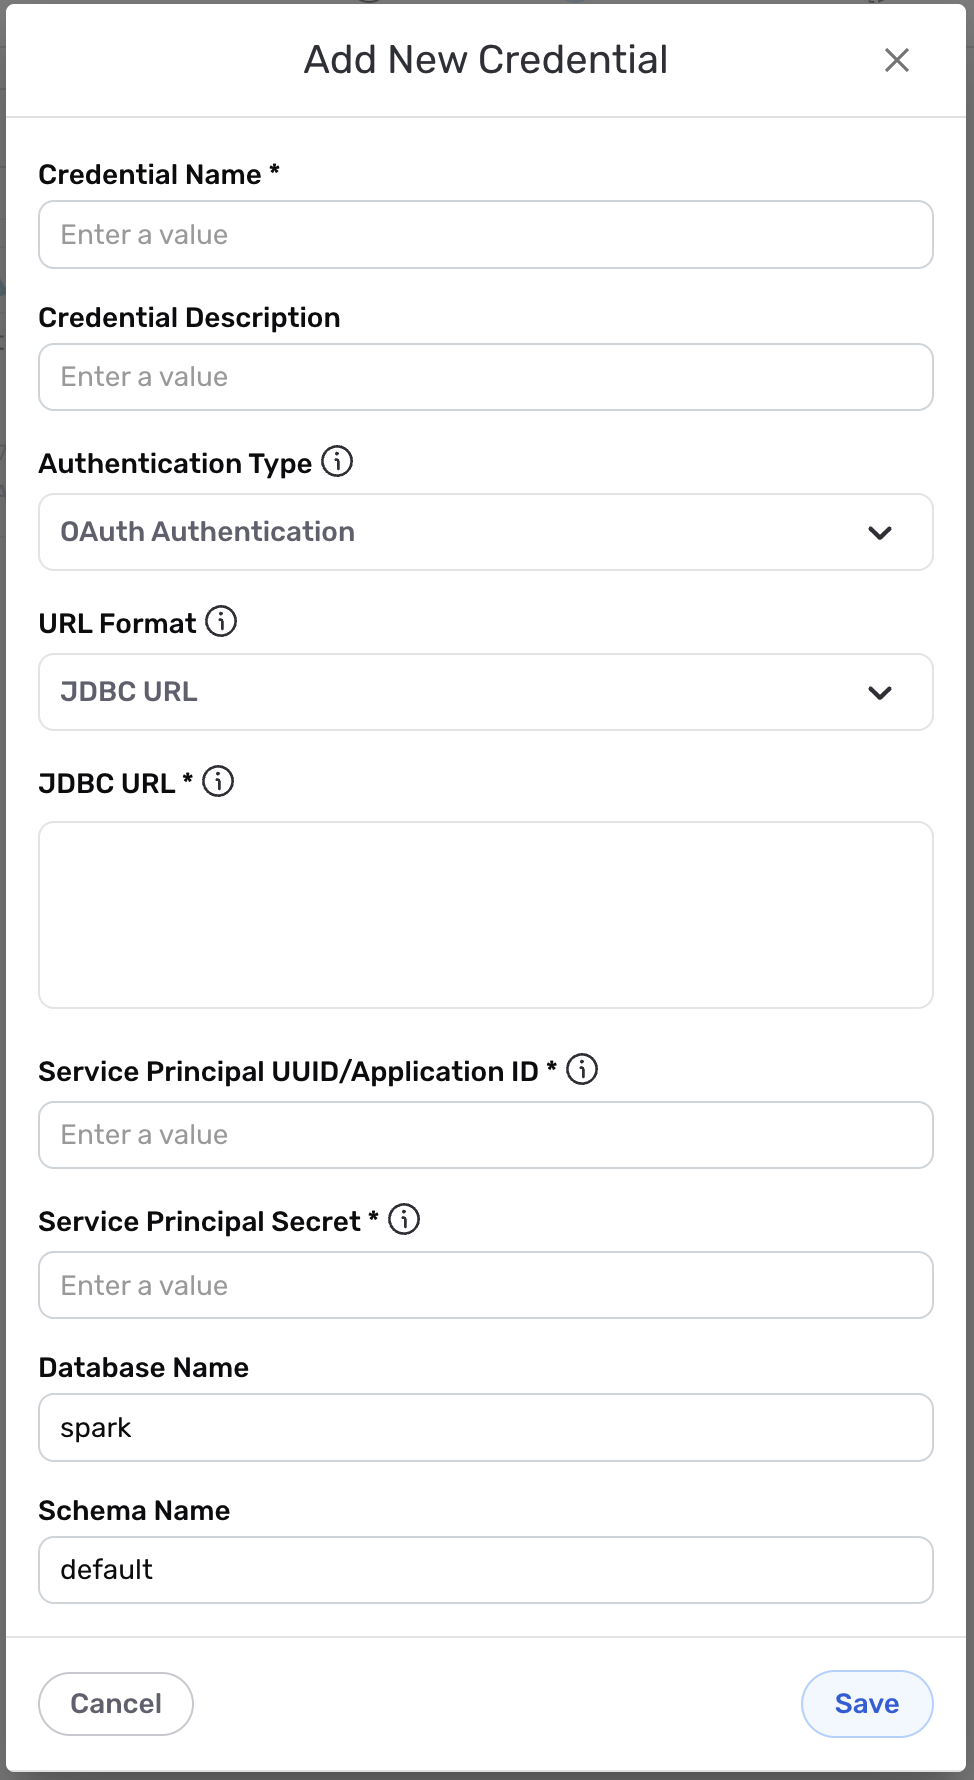
Credential Name & Description
-
Enter a name for the credential in the Credential Name field and a short, meaningful description in the Credential Description field.
Resource DescriptionsResource descriptions should provide information about the resource purpose, data freshness, etc. that can help the owner and other users efficiently understand and utilize the resource.
Authentication Details
- Select the authentication method that will be used to connect to the Databricks account from the Authentication Type pulldown menu, and follow the corresponding instructions in the box below to configure associated credential settings.
Configure Authentication Settings
- OAuth Authentication
- Token-Based Authentication
Authenticate with Databricks using the OAuth 2.0 protocol – recommended for use with production environments
Databricks authentication information can be entered as a JDBC URL or as HTTP path parts that Nexla will automatically combine to create the connection string. Select the preferred option for this credential from the URL Format pulldown menu, and follow the instructions below to enter the authentication information.
Enter the JDBC URL or HTTP path parts required for authentication:
- JDBC URL
- HTTP Path Parts
Enter the JDBC URL of the Databricks location in the JDBC URL field. The URL should be in the form of
jdbc:databricks:/...orjdbc:spark:/....Ensure that the URL does not include the
AuthMechandAuth_Flowparameters. Connection strings copied from the Databricks console often include these parameters, and they should be removed before saving the credential.
Enter the following information in the displayed fields:
Host – Hostname of the Databricks database without the connection protocol (typically an IP address or text in the format
company.domain.com)Port – Cluster port number used for the Databricks connection
HTTP Path – HTTP path of the Databricks SQL endpoint
The HTTP path can be found under JDBC Settings in the Databricks console and is typically in the form of
sql/protocolv1/o/<id>/0916-102516-naves603.Service Principal UUID/Application ID – Service principal UUID or application ID of the Databricks warehouse
Service Principal Secret – Service principal secret of the Databricks warehouse
Enter the service principal UUID or application ID of the Databricks warehouse this credential will be used to access in the Service Principal UUID/Application ID field.
Enter the service principal secret of the Databricks warehouse this credential will be used to access in the Service Principal Secret field.
Authenticate with Databricks using a personal access token
Databricks authentication information can be entered as a JDBC URL or as HTTP path parts that Nexla will automatically combine to create the connection string. Select the preferred option for this credential from the URL Format pulldown menu, and follow the instructions below to enter the authentication information.
Enter the JDBC URL or HTTP path parts required for authentication:
- JDBC URL
- HTTP Path Parts
Enter the JDBC URL of the Databricks location in the JDBC URL field. The URL should be in the form of
jdbc:databricks:/...orjdbc:spark:/....Ensure that the URL does not include the
AuthMechandAuth_Flowparameters. Connection strings copied from the Databricks console often include these parameters, and they should be removed before saving the credential.
Enter the following information in the displayed fields:
Host – Hostname of the Databricks database without the connection protocol (typically an IP address or text in the format
company.domain.com)Port – Cluster port number used for the Databricks connection
HTTP Path – HTTP path of the Databricks SQL endpoint
The HTTP path can be found under JDBC Settings in the Databricks console and is typically in the form of
sql/protocolv1/o/<id>/0916-102516-naves603.Username – Username for the Databricks account
Password – Password for the Databricks account
Database Information
-
Enter the name of the Databricks database that will be accessed with this credential in the Database Name field.
-
If this credential will be used to access data that is also contained in a schema (typically used to organize individual use cases, projects, or team sandboxes), enter the name of the schema in the Schema Name field.
Save the Credential
-
Once all of the relevant steps in the above sections have been completed, click the Save button at the bottom of the overlay to save the configured credential.
-
The newly added credential will now appear in a tile on the Authenticate screen during data source/destination creation and can be selected for use with a new data source or destination.
Data Source
To ingest data from a Databricks location, follow the instructions in Section 2 of Common Setup for Databases & Data Warehouses.
Data Destination
To send data to a Databricks location, follow the instructions in Section 3 of Common Setup for Databases & Data Warehouses.