Authorization
Hubspot
Prerequisites
Before creating a HubSpot credential, you need to have a HubSpot account and create an OAuth2 application in your HubSpot account settings to obtain OAuth2 credentials (Client ID and Client Secret). The OAuth2 credentials are required to authenticate with the HubSpot API.
To obtain OAuth2 credentials, you need to create an OAuth2 application in your HubSpot account settings. Once the application is created, you can obtain the Client ID and Client Secret. The OAuth2 credentials include a Client ID and Client Secret that are used to authenticate API requests. You can also configure access scopes to control what permissions the application has. The default scopes provide access to all HubSpot objects and operations, but you can modify the scopes if your app has limited access to HubSpot. For detailed information about setting up OAuth2 credentials and creating OAuth2 applications, refer to the HubSpot API documentation.
Create a HubSpot Credential
- To create a new HubSpot credential, after selecting the data source/destination type, click the Add Credential tile to open the Add New Credential overlay.
New Credential Overlay – HubSpot API
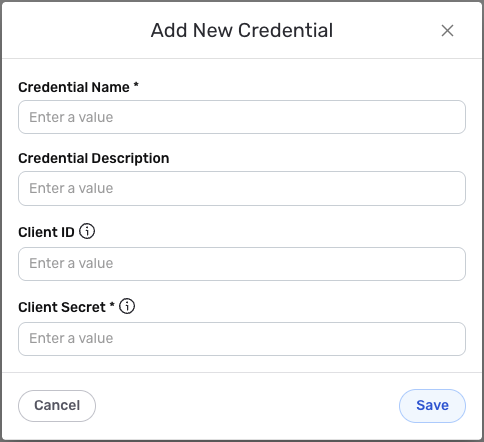
Credential Name & Description
-
Enter a name for the credential in the Credential Name field and a short, meaningful description in the Credential Description field.
Resource descriptions are recommended but are not required. They should be used provide information about the resource purpose, data freshness, etc. that can help the owner and other users efficiently understand and utilize the resource.
OAuth2 Authentication
HubSpot uses OAuth2 authentication to securely access the HubSpot API. OAuth2 is an industry-standard authorization protocol that allows applications to access user data without requiring users to share their passwords.
-
Enter your HubSpot Client ID in the Client ID field. This is the Client ID you obtained from your HubSpot OAuth2 application settings.
-
Enter your HubSpot Client Secret in the Client Secret field. This is the Client Secret you obtained from your HubSpot OAuth2 application settings.
-
Click the Authorize button to begin the OAuth2 authorization flow. This will redirect you to HubSpot's authorization page where you will be asked to sign in with your HubSpot account and grant permissions to Nexla to access your HubSpot data.
During the OAuth2 authorization flow, you will be redirected to HubSpot's authorization page. You must sign in with a HubSpot account that has access to the HubSpot organization you want to connect. After signing in, you will be asked to grant permissions to Nexla to access your HubSpot data. The default scopes provide access to all HubSpot objects and operations, including contacts, companies, deals, lists, and more. Once you grant permissions, you will be redirected back to Nexla, and the authorization will be completed automatically.
-
After completing the OAuth2 authorization flow, Nexla will automatically obtain and store the access token and refresh token needed to authenticate API requests. The access token is used to authenticate each API request, and the refresh token is used to obtain new access tokens when the current access token expires.
OAuth2 access tokens expire after a certain period for security reasons. Nexla automatically refreshes expired access tokens using the refresh token, so you typically do not need to re-authorize unless you revoke access or the refresh token expires. The access token is sent in the
Authorizationheader with theBearerprefix for all API requests to the HubSpot API. The default scopes provide comprehensive access to HubSpot objects and operations. If your app has limited access to HubSpot, you may need to modify the scopes. For detailed information about OAuth2 authentication, token management, and available scopes, see the HubSpot API documentation.
Alternative Authentication Methods
Nexla also provides alternative authentication methods for HubSpot:
- Nexla Public App Authentication (Read Only): Use this authentication method to connect to HubSpot using the Nexla public app. This application requests read-only access to all HubSpot objects.
- Nexla Public App Authentication (Read/Write): Use this authentication method to connect to HubSpot using the Nexla public app. This application requests read and write access to all HubSpot objects.
These alternative methods use pre-configured OAuth2 applications managed by Nexla, which can simplify the setup process. However, using your own OAuth2 application (the method described above) provides more control over permissions and is recommended for production use.
Save the Credential
-
Once all of the relevant steps in the above sections have been completed, click the Save button at the bottom of the overlay to save the configured credential.
-
The newly added credential will now appear in a tile on the Authenticate screen during data source/destination creation and can be selected for use with a new data source or destination.