Authorization
YouTube
Prerequisites
Before creating a YouTube credential in Nexla, you need to set up an OAuth 2.0 integration in the Google Cloud Console and obtain the required credentials. This integration enables programmatic access to the YouTube Data API without requiring user interaction for each request.
OAuth 2.0 Setup
OAuth 2.0 authentication provides secure, token-based access to the YouTube Data API with automatic token refresh. The OAuth flow allows Nexla to access your YouTube account on your behalf. For detailed information about setting up OAuth 2.0 authentication, see the YouTube Data API documentation.
-
Access Google Cloud Console: Sign in to your Google account and navigate to the Google Cloud Console.
-
Create a Project: Create a new project or select an existing project in the Google Cloud Console. This project will contain your OAuth 2.0 credentials.
-
Enable YouTube Data API: Navigate to APIs & Services > Library in the Google Cloud Console, search for "YouTube Data API v3", and click Enable to enable the API for your project.
-
Create OAuth 2.0 Credentials: Navigate to APIs & Services > Credentials in the Google Cloud Console, and click Create Credentials > OAuth client ID.
-
Configure OAuth Consent Screen: If you haven't configured the OAuth consent screen, you'll be prompted to do so. Complete the consent screen configuration with your application information.
-
Configure OAuth Client: Select Web application as the application type, and configure the authorized redirect URIs. The redirect URI should match the callback URL provided by Nexla during the OAuth flow.
-
Obtain Client Credentials: After creating the OAuth client, copy your Client ID and Client Secret from the credentials page. These credentials are used to authenticate with the YouTube Data API OAuth 2.0 service.
-
Configure API Scopes: Ensure that the following scopes are requested during the OAuth flow:
https://www.googleapis.com/auth/youtube.readonly- Read-only access to YouTube account datahttps://www.googleapis.com/auth/yt-analytics.readonly- Read-only access to YouTube Analytics datahttps://www.googleapis.com/auth/userinfo.email- Access to user email information
Create a YouTube Credential
- To create a new YouTube credential, after selecting the data source/destination type, click the Add Credential tile to open the Add New Credential overlay.
New Credential Overlay – YouTube
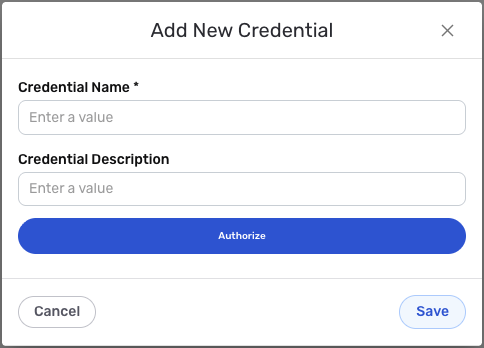
Credential Name & Description
-
Enter a name for the credential in the Credential Name field and a short, meaningful description in the Credential Description field.
Resource descriptions are recommended but are not required. They should be used provide information about the resource purpose, data freshness, etc. that can help the owner and other users efficiently understand and utilize the resource.
OAuth2 Configuration
-
Complete the OAuth authorization flow by following the prompts to authorize Nexla to access your YouTube account. The OAuth flow will automatically handle token exchange and refresh. During the authorization process, you will be redirected to Google to grant permissions to Nexla.
The OAuth 2.0 flow provides secure, token-based access to the YouTube Data API with automatic token refresh. The authorization process requires you to sign in to your Google account and grant permissions to Nexla. For detailed information about YouTube Data API authentication, see the YouTube Data API documentation.
All OAuth configuration settings are automatically handled by Nexla. You only need to complete the authorization flow by clicking the Authorize button and granting permissions to Nexla in the Google authorization page. The OAuth flow will request the following scopes: read-only access to YouTube account data, read-only access to YouTube Analytics data, and access to user email information.
Save the Credential
-
Once all of the relevant steps in the above sections have been completed, click the Save button at the bottom of the overlay to save the configured credential.
-
The newly added credential will now appear in a tile on the Authenticate screen during data source/destination creation and can be selected for use with a new data source or destination.