Nexla React SDK
Embed Nexla-powered integrations directly into your React application. Your end users connect their SaaS accounts — Salesforce, Google Drive, HubSpot, Asana, and hundreds more — without leaving your product. Once connected, Nexla powers the data flows behind the scenes, moving data between your users' accounts and your platform automatically.
The SDK offers three levels of integration, so you can choose the right trade-off between developer lift and experience control:
- Drop-in Components — Pre-built connector grid, connect buttons, and credential modals. The SDK renders everything. Customize the look with theming and CSS variables.
- Hybrid — Mix SDK components with your own UI. Design your own connector cards and page layout; let the SDK handle the credential modal and OAuth flows.
- Headless — Bring your own UI. The SDK provides hooks to load fields and manage state; you render with any HTML elements you choose. Full design control, no SDK UI required.
What Your Users Experience
The integration style you choose determines what your users see and how much of the UI the SDK manages for you:
Styled Components
The SDK renders everything — connector grid, connect buttons, credential modals, and toast notifications. Lowest developer lift. Customize with theming and CSS variables.
Styled Components guide →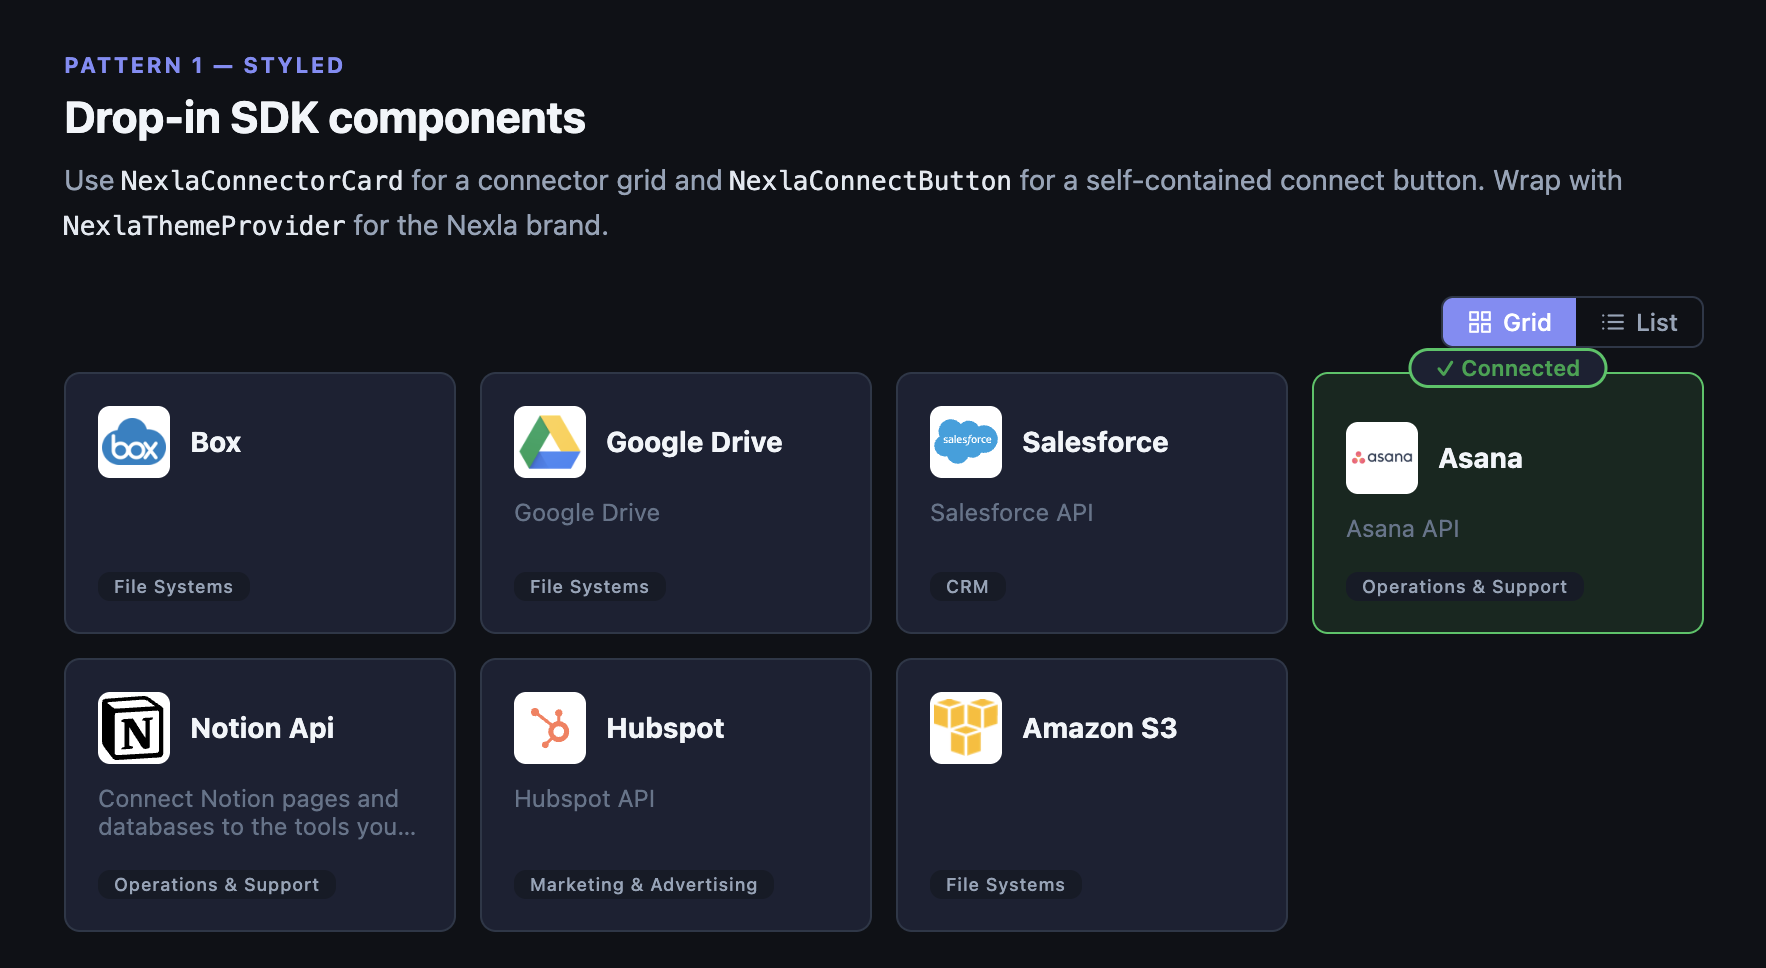
Best of Both Worlds
You design your own connector tiles and page layout. The SDK renders the credential modal and handles OAuth, form fields, and credential management.
Styled Components guide →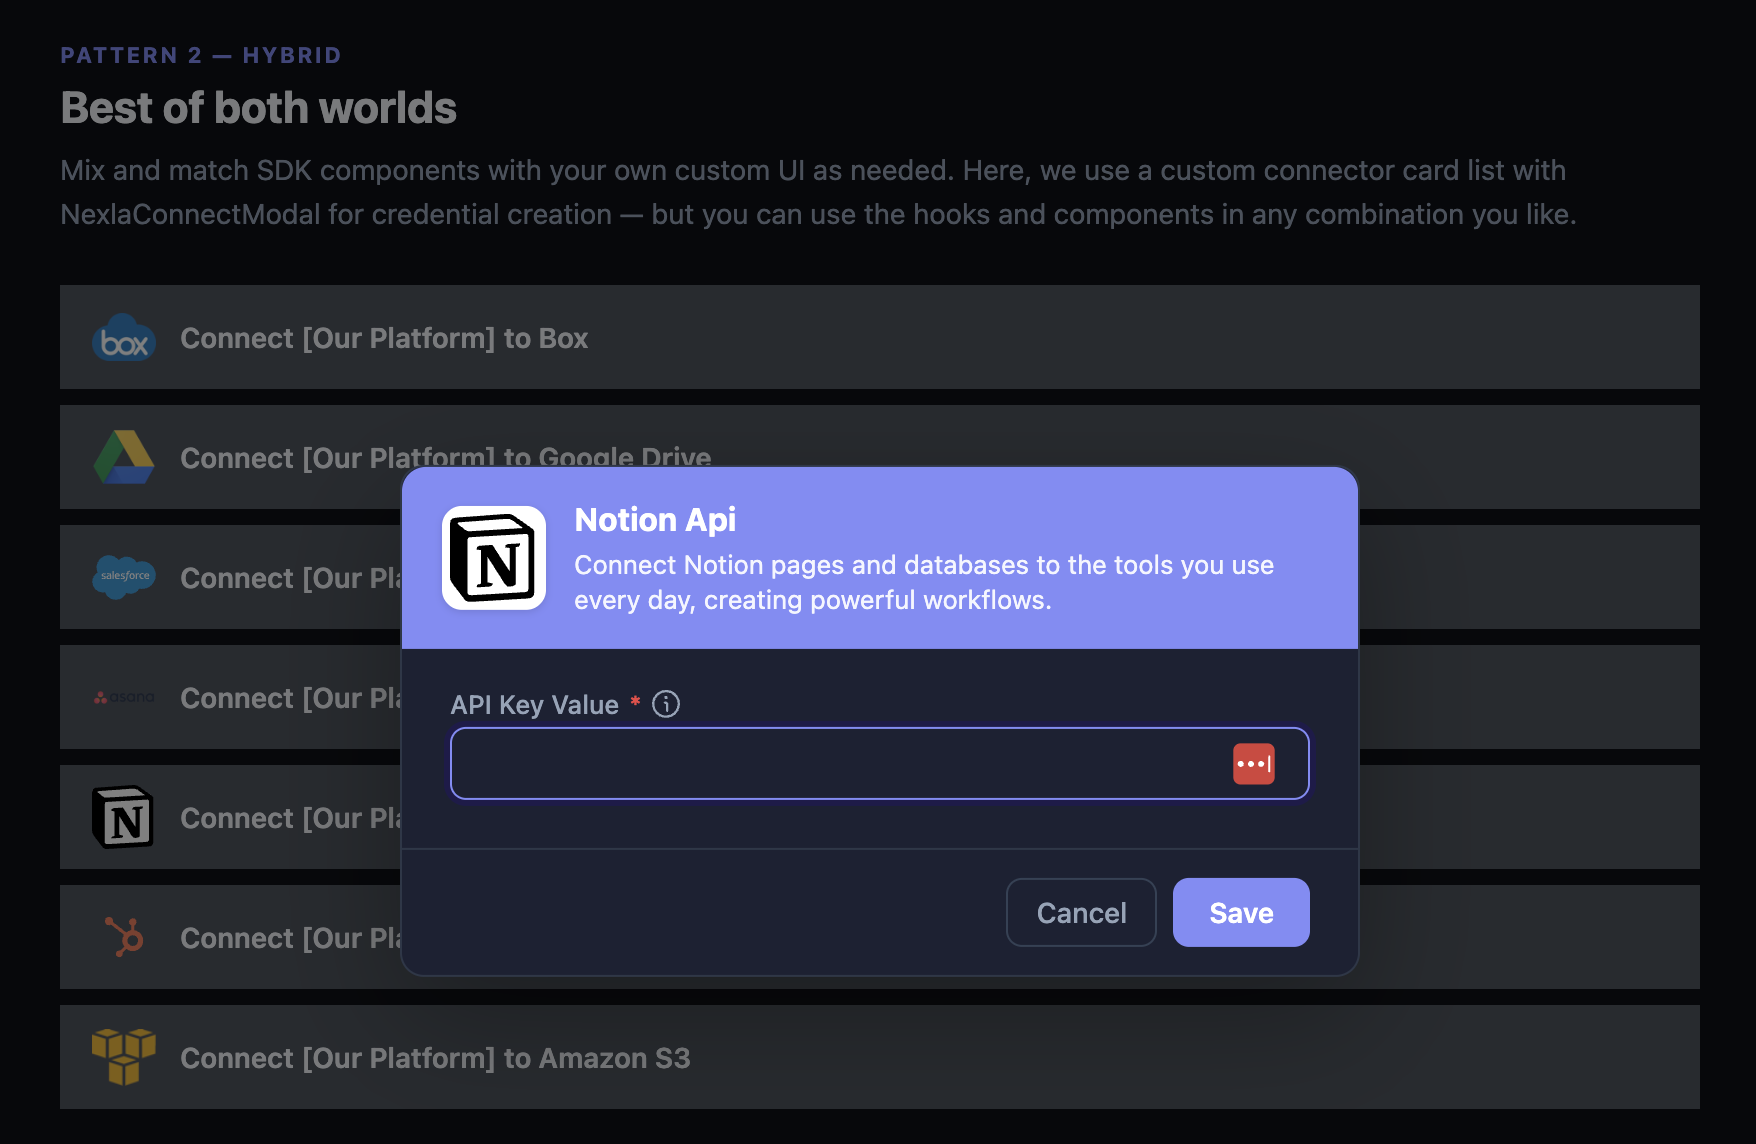
Bring Your Own UI
The SDK provides hooks to load connector fields and manage state. You render with any HTML elements you choose — no SDK UI components required. Full design control.
Headless Hooks guide →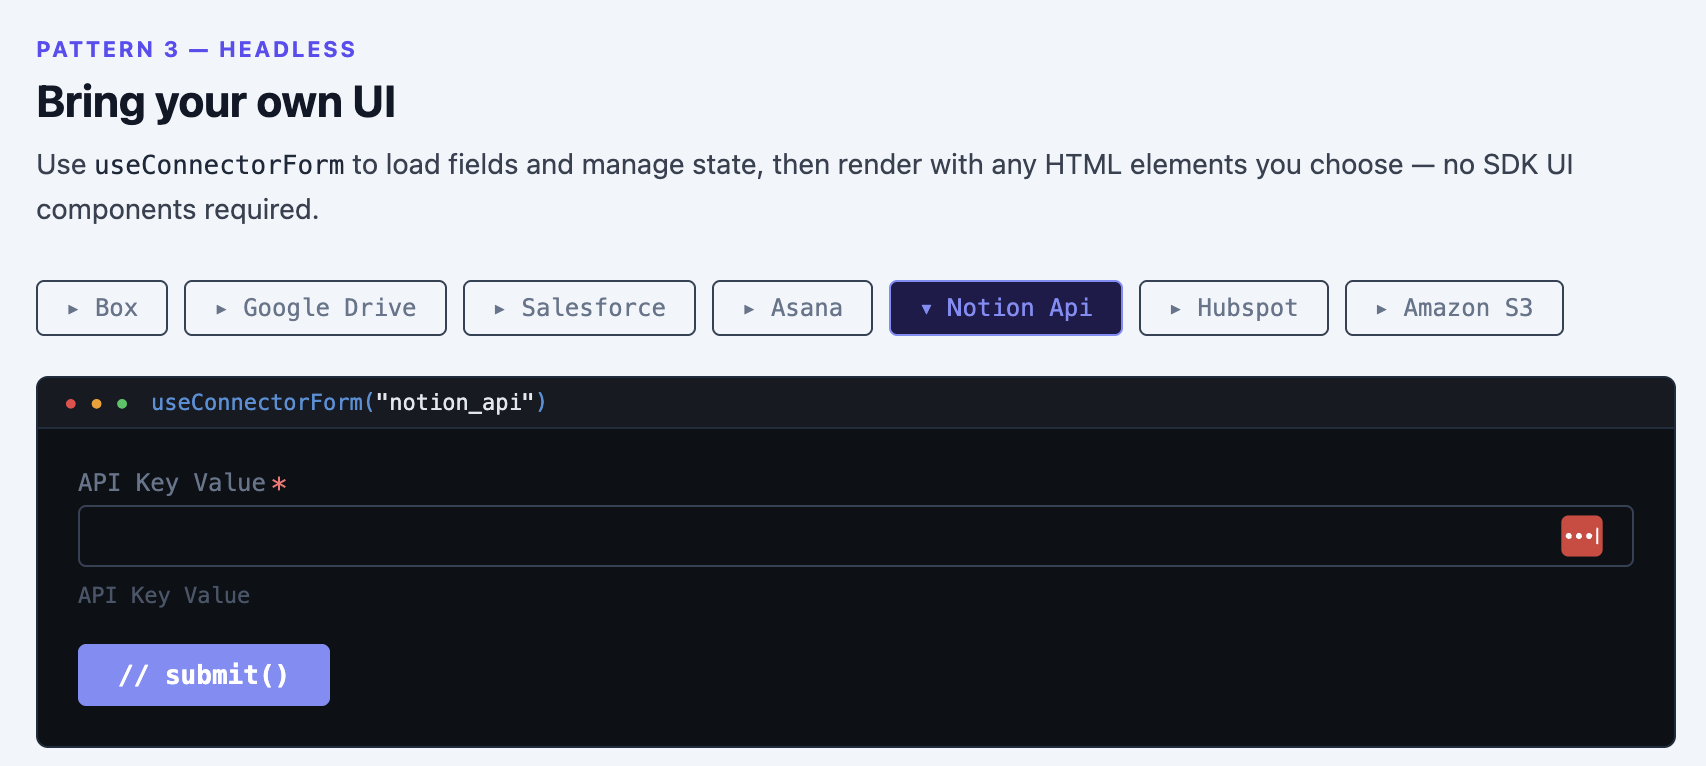
Get Running in 3 Steps
The fastest path uses drop-in components. Install, register, and render:
1. Install the package
npm install @nexla/react-sdk
2. Register an SDK Application in the Nexla UI (details)
3. Add the provider and a connect button
<NexlaConnectProvider
  serviceKey="YOUR_SERVICE_KEY"
  connectors={['CONNECTOR_KEY_1', 'CONNECTOR_KEY_2']}
  applicationId="YOUR_APPLICATION_ID"
  endUserId="YOUR_END_USER_ID"
>
  <NexlaThemeProvider>
    <NexlaConnectButton connector="CONNECTOR_KEY_1" />
  </NexlaThemeProvider>
</NexlaConnectProvider>
That's it. The button renders the connector logo, opens a credential modal on click, and handles OAuth automatically.
What the SDK Handles
- Credentialing — OAuth popups, API-key forms, and multi-method auth templates. All handled automatically per connector.
- Credential management — Connect, list, test, update, and disconnect credentials through hooks or pre-built UI.
- End-user isolation — Credentials are scoped to each end user. Users only see their own connections.
- Session management — Automatic token exchange and background refresh.
- TypeScript-first — Full type safety for all props, hooks, and return types.
Next Steps
| Goal | Start here |
|---|---|
| Set up and see it working | Quick Start |
| Register your SDK Application | Authentication & Setup |
| Explore the full API | API Reference |
| Debug an issue | Troubleshooting |