Authorization
Looker
Prerequisites
Before creating a Looker credential, you need to obtain your Looker API Host URL, Client ID, and Client Secret. These credentials are required to authenticate with the Looker API using token-based authentication.
To obtain your Looker API credentials, follow these steps:
-
Contact your Looker administrator or sign in to your Looker instance with administrator privileges. API credentials are typically managed by Looker administrators.
-
Navigate to Admin > Platform > API in your Looker instance, or ask your Looker administrator to access the API settings section.
-
If you need to create new API credentials:
- Click New API Key or Create Client to create a new API client.
- Provide a name for the API client (e.g., "Nexla Integration") to help identify it later.
- Configure the API client settings as needed. The default settings are typically sufficient for most integrations.
-
After creating or accessing an existing API client, you will receive:
- API Host URL: Your Looker API Host URL, usually of the form
https://{instance-name}.api.looker.comwhere{instance-name}is your Looker instance name. The API Host URL is specific to your Looker instance and is used to construct API endpoint URLs. You can also find this in your Looker instance URL or by checking with your Looker administrator. - Client ID: Your Looker API Client ID, which is a unique identifier for your application or API client. This is displayed in the API client settings.
- Client Secret: Your Looker API Client Secret, which is a secret key that must be kept confidential. The Client Secret is typically displayed only once when the API client is created. If you've lost your Client Secret, you may need to regenerate it or create a new API client.
- API Host URL: Your Looker API Host URL, usually of the form
-
Copy the API Host URL, Client ID, and Client Secret immediately and store them securely, as you will need them to configure your Nexla credential.
The Client ID and Client Secret are used to obtain an access token from the Looker API. The token authentication flow sends a POST request to {api_host_url}/api/login?client_id={client_id}&client_secret={client_secret} to obtain an access token. The access token is then sent in the Authorization header with the Bearer prefix for all API requests to the Looker API. The Looker API provides access to various business intelligence resources including users, looks, queries, and dashboards. Access tokens are valid for a limited time and are automatically refreshed by Nexla when they expire. For detailed information about API credential setup, authentication, and available API endpoints, refer to the Looker API documentation and Looker API authentication guide.
Create a Looker Credential
- To create a new Looker credential, after selecting the data source/destination type, click the Add Credential tile to open the Add New Credential overlay.
New Credential Overlay – Looker
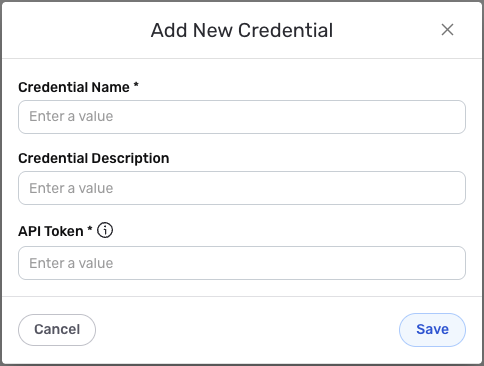
Credential Name & Description
-
Enter a name for the credential in the Credential Name field and a short, meaningful description in the Credential Description field.
Resource descriptions are recommended but are not required. They should be used provide information about the resource purpose, data freshness, etc. that can help the owner and other users efficiently understand and utilize the resource.
Token Authentication
Looker uses token-based authentication for all API requests. The Client ID and Client Secret are used to obtain an access token, which is then sent in the Authorization header with the Bearer prefix to authenticate API requests to the Looker API.
-
Enter your Looker API Host URL in the API Host URL field. This is the API Host URL you obtained from your Looker administrator. The API Host URL is usually of the form
https://{instance-name}.api.looker.comwhere{instance-name}is your Looker instance name. The API Host URL is used to construct API endpoint URLs for your specific Looker instance. Check with your Looker administrator for your API host URLs if you're unsure of the correct format. -
Enter your Looker Client ID in the Client ID field. This is the Client ID you obtained from your Looker administrator. The Client ID is a unique identifier for your application or API client and is used along with the Client Secret to obtain an access token for API authentication. The Client ID is not sensitive and can be shared, but it should be kept secure to prevent unauthorized use.
-
Enter your Looker Client Secret in the Client Secret field. This is the Client Secret you obtained from your Looker administrator. The Client Secret is used along with the Client ID to obtain an access token for API authentication. The Client Secret is sensitive information and must be kept confidential.
Keep your Client Secret secure and do not share it publicly. The Client Secret provides access to your Looker account data and should be treated as sensitive information. If your Client Secret is compromised, you should immediately contact your Looker administrator to regenerate it. Your Looker API credentials (API Host URL, Client ID, and Client Secret) can be obtained from your Looker administrator. The Client ID and Client Secret are used to obtain an access token by sending a POST request to
{api_host_url}/api/login?client_id={client_id}&client_secret={client_secret}. Nexla automatically obtains and refreshes the access token as needed. The access token is sent in theAuthorization: Bearer {access_token}header for all API requests to the Looker API. The access token is valid for a limited time and is automatically refreshed when it expires. For detailed information about finding your API credentials, setting up authentication, and available API endpoints, see the Looker API documentation.
Save the Credential
-
Once all of the relevant steps in the above sections have been completed, click the Save button at the bottom of the overlay to save the configured credential.
-
The newly added credential will now appear in a tile on the Authenticate screen during data source/destination creation and can be selected for use with a new data source or destination.