Notification Settings
Nexla maintains and provides detailed monitoring information about all resources within your account, which can be delivered via platform- and resource-level notifications. Typically, notifications are generated for events or status changes associated with a particular resource or resource type. For example, Nexla can be configured to generate a notification to your account when any of your Nexsets are shared with another user or when a specific data source is read.
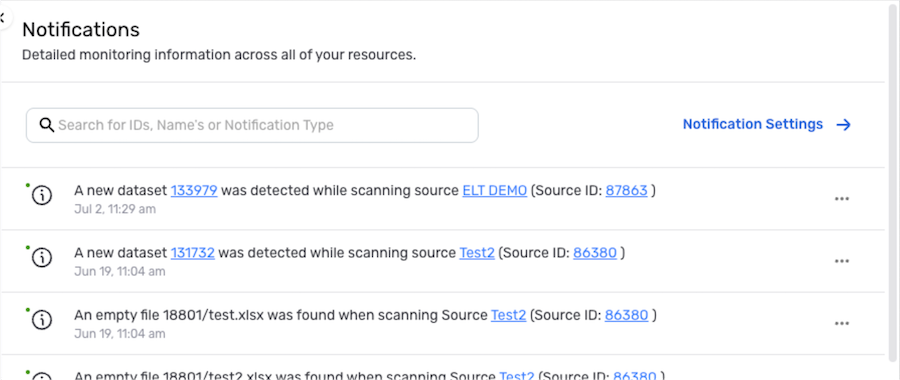
Notifications and the information that they contain make it easy to monitor and manage your data & account activities. Monitoring endpoints for some notification types can also be set up as data sources in your Nexla account, allowing you to automate data flows based on monitoring events.
Notification settings available at the account & resource levels allow you to fully customize the type(s) of notifications generated for your account, set the generation frequency for each notification type, and specify how each type of notification should be delivered.
For more information about the types of notifications that Nexla provides, see Nexla Notification Types.
View/Manage Unread Notifications
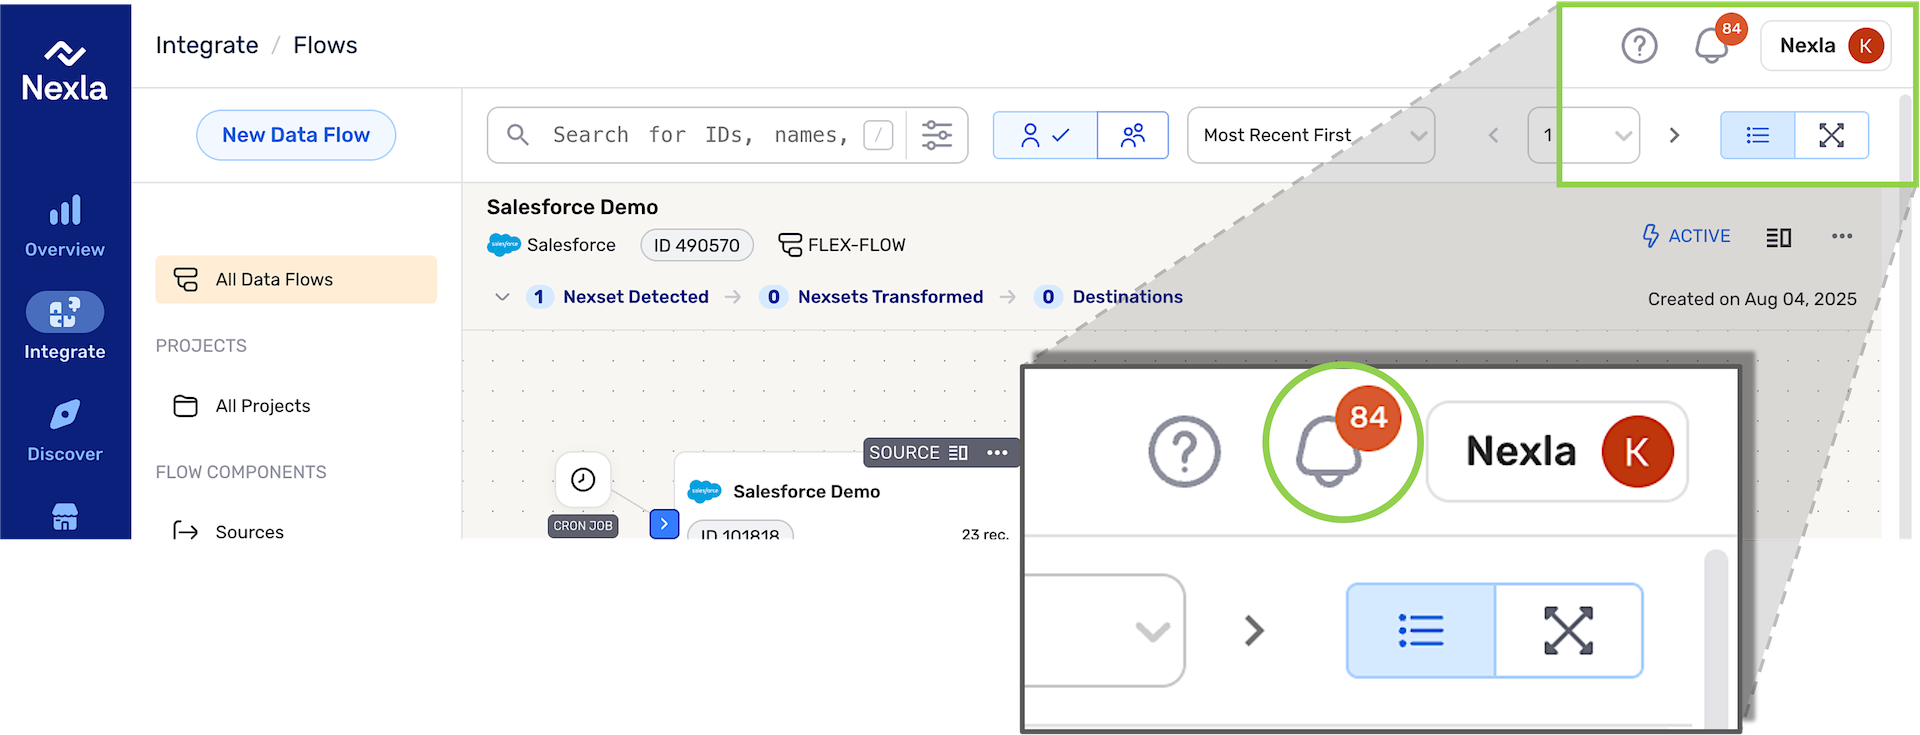
The menu at the top of the Nexla UI includes a notifications icon (indicated in the image above) that displays the total number of unread notifications generated for your account. Click on this icon to open the notifications overlay, which provides easy access to notifications viewing and settings options.
Notifications Overlay
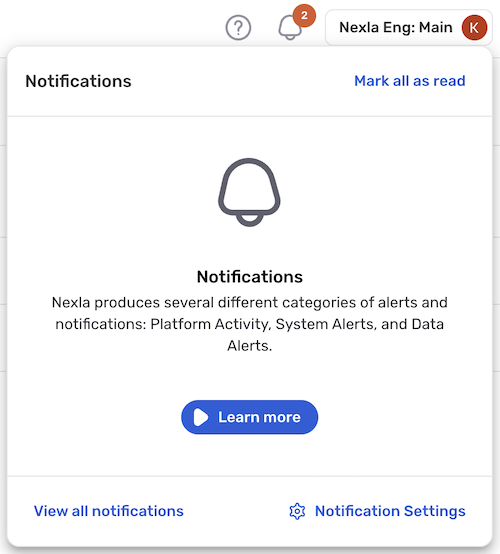
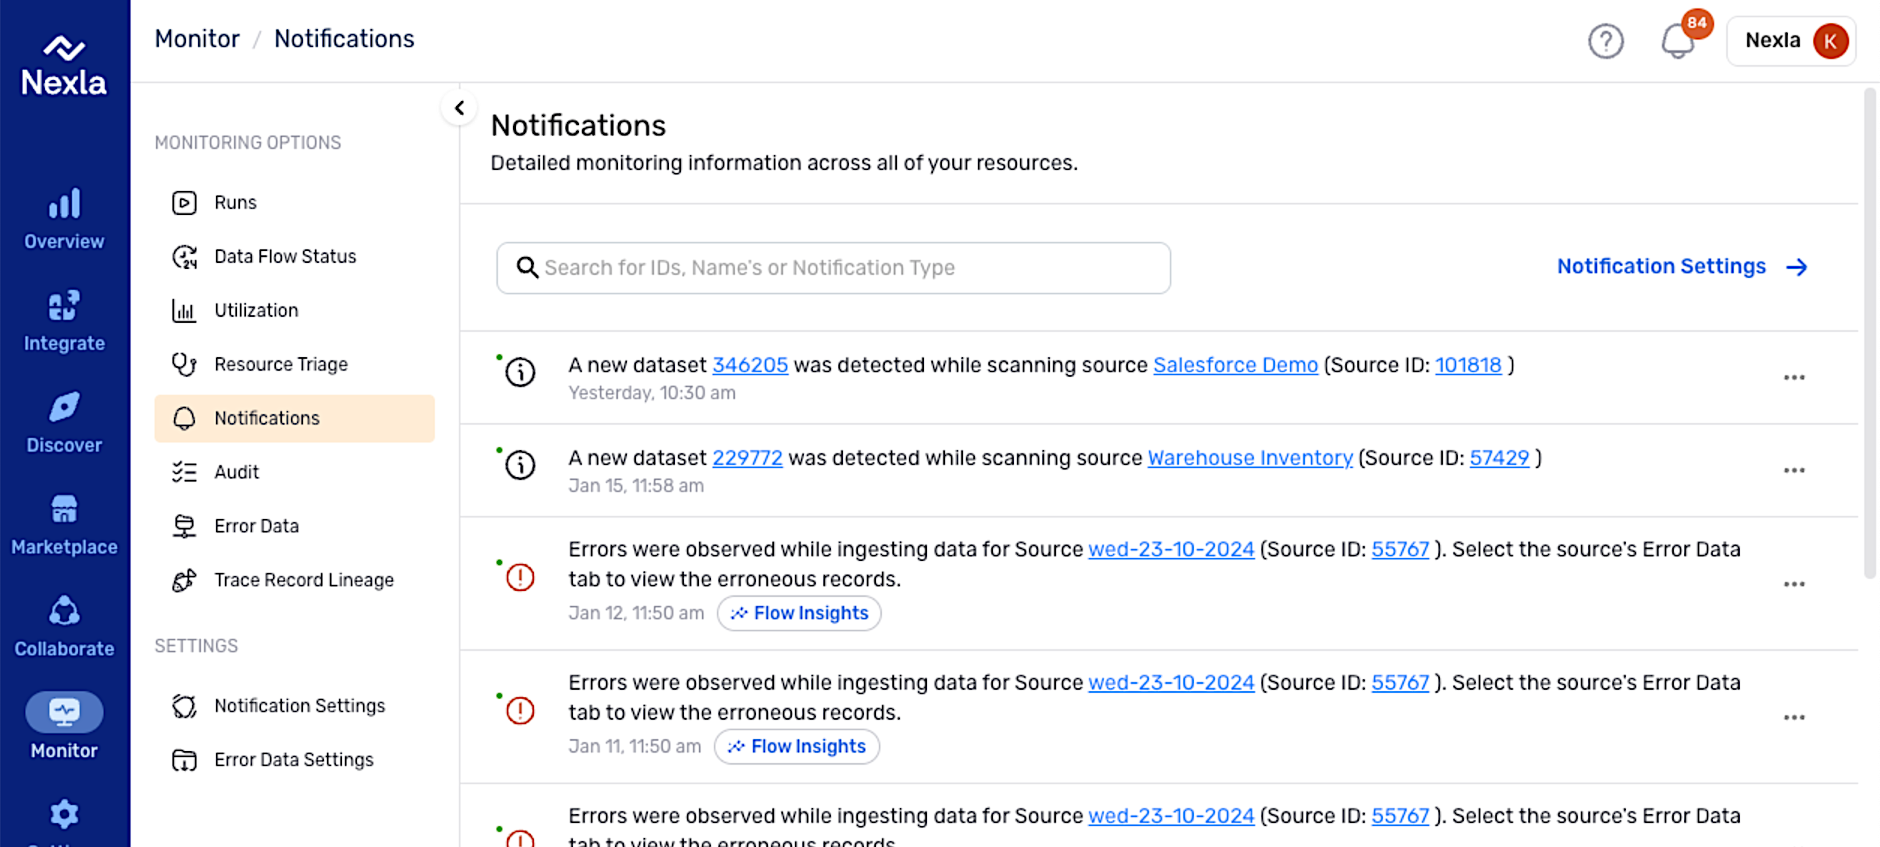
- Click View all notifications at the bottom of the overlay to open the Notifications screen. This screen displays a list of all notifications that have been generated for your account, along with direct links to associated resources and insights.
Notifications Screen
The Notifications screen displays all notifications generated for your Nexla account. Each notification includes links to associated resources as well as flow insights when applicable. Nexla's notifications are designed to provide easy access to all of the information you need to stay informed about your data and account activities. The included direct links to relevant resources & insights also help expedite error troubleshooting processes.
Notifications Screen
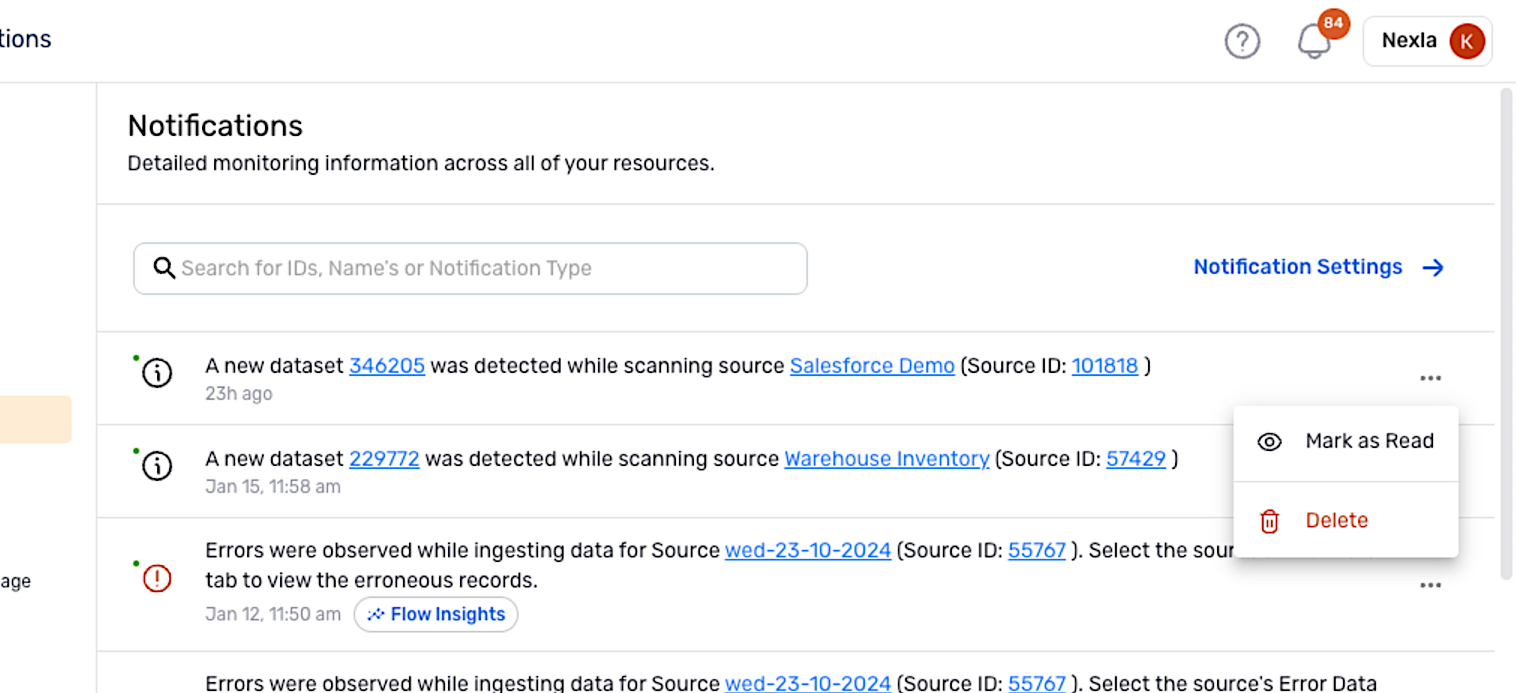
Click the three-dot icon to the right of a listed notification to open the notification management menu. In this menu, select Mark as read to mark the notification as read, or select Delete to delete and remove the notification from the list.
Notification Menu – Notifications Screen
Search/Filter Notifications
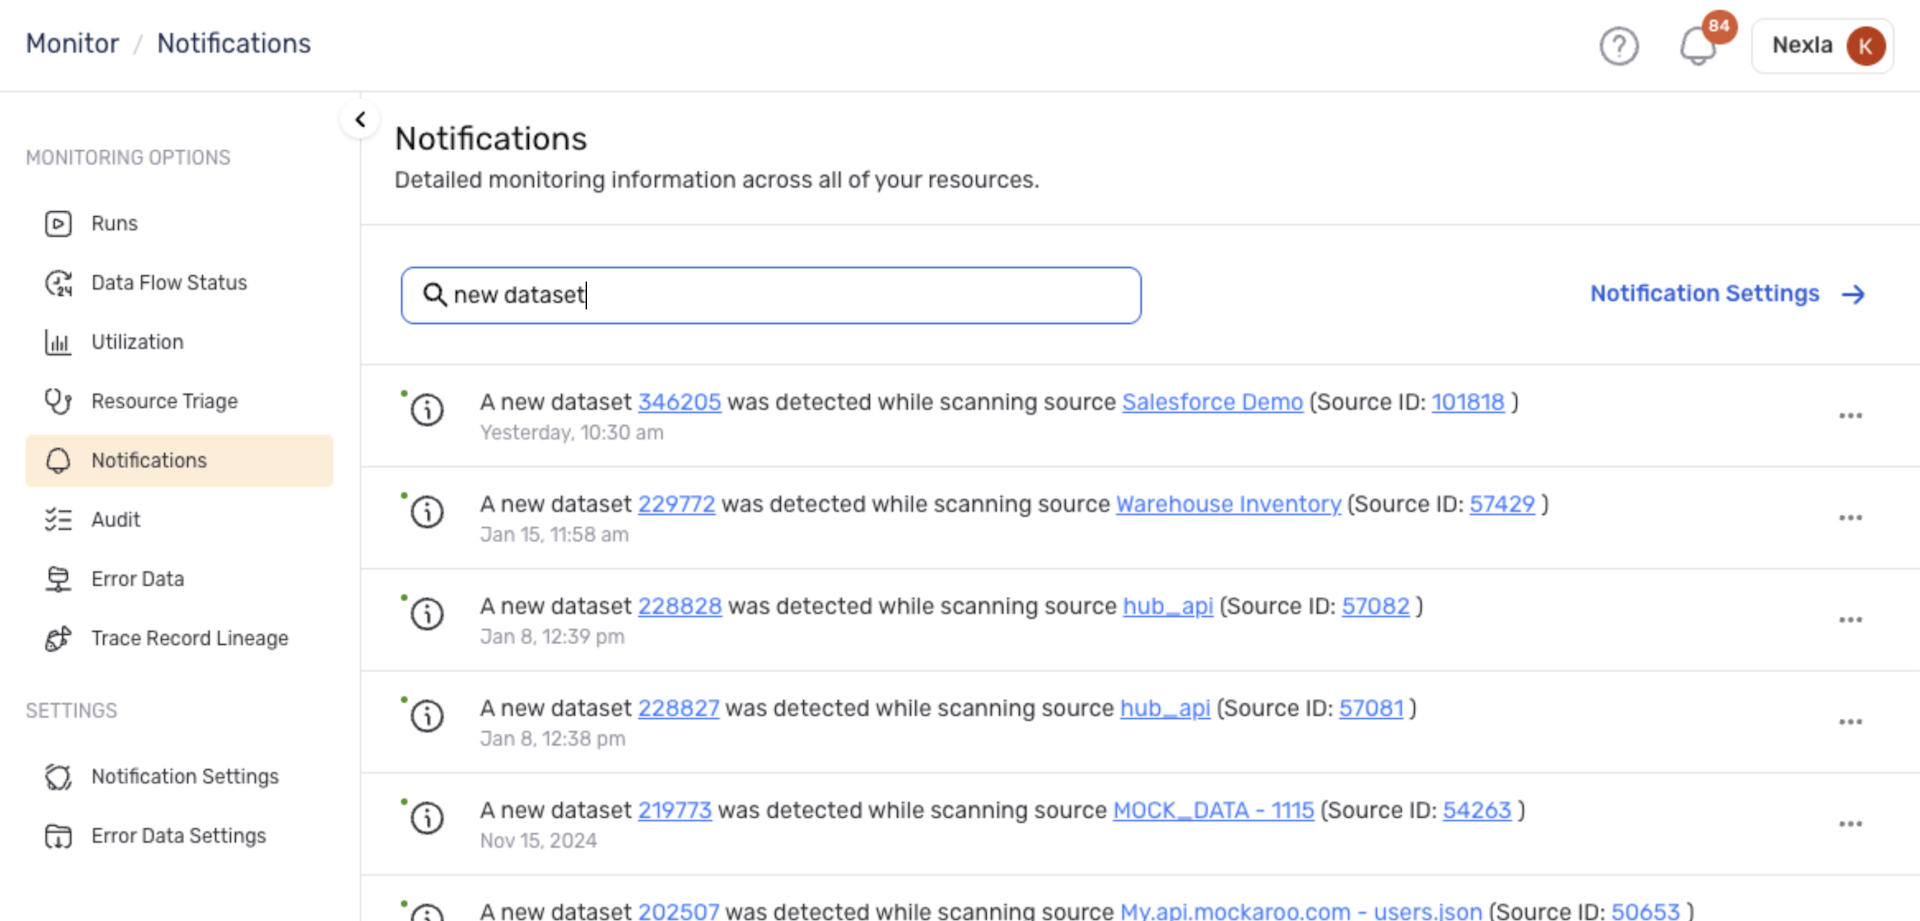
The Notifications screen includes a search bar that allows you to quickly find notifications associated with a specific data source, Nexset, data flow, or destination. Additionally, this search feature can be used to locate and view all notifications of a particular type.
-
Enter the name or ID of one or more resources in the search bar to filter the notifications list to display only notifications associated with the specified resource(s).
-
To view all notifications of a certain type, enter the notification type or a portion of the notification text in the search bar (e.g., "Error", "new dataset", etc.).
Notifications Search
View/Manage Resource Notifications
Notifications associated with a particular resource can also be accessed directly from the resource information panel.
To view all notifications generated for a data source, destination, Nexset, or data flow, click the Details icon on the resource to open its information panel, and select the Notifications tab. This tab displays all notifications associated with the selected resource, including links to associated resources & insights and notification management options.
Notifications Search
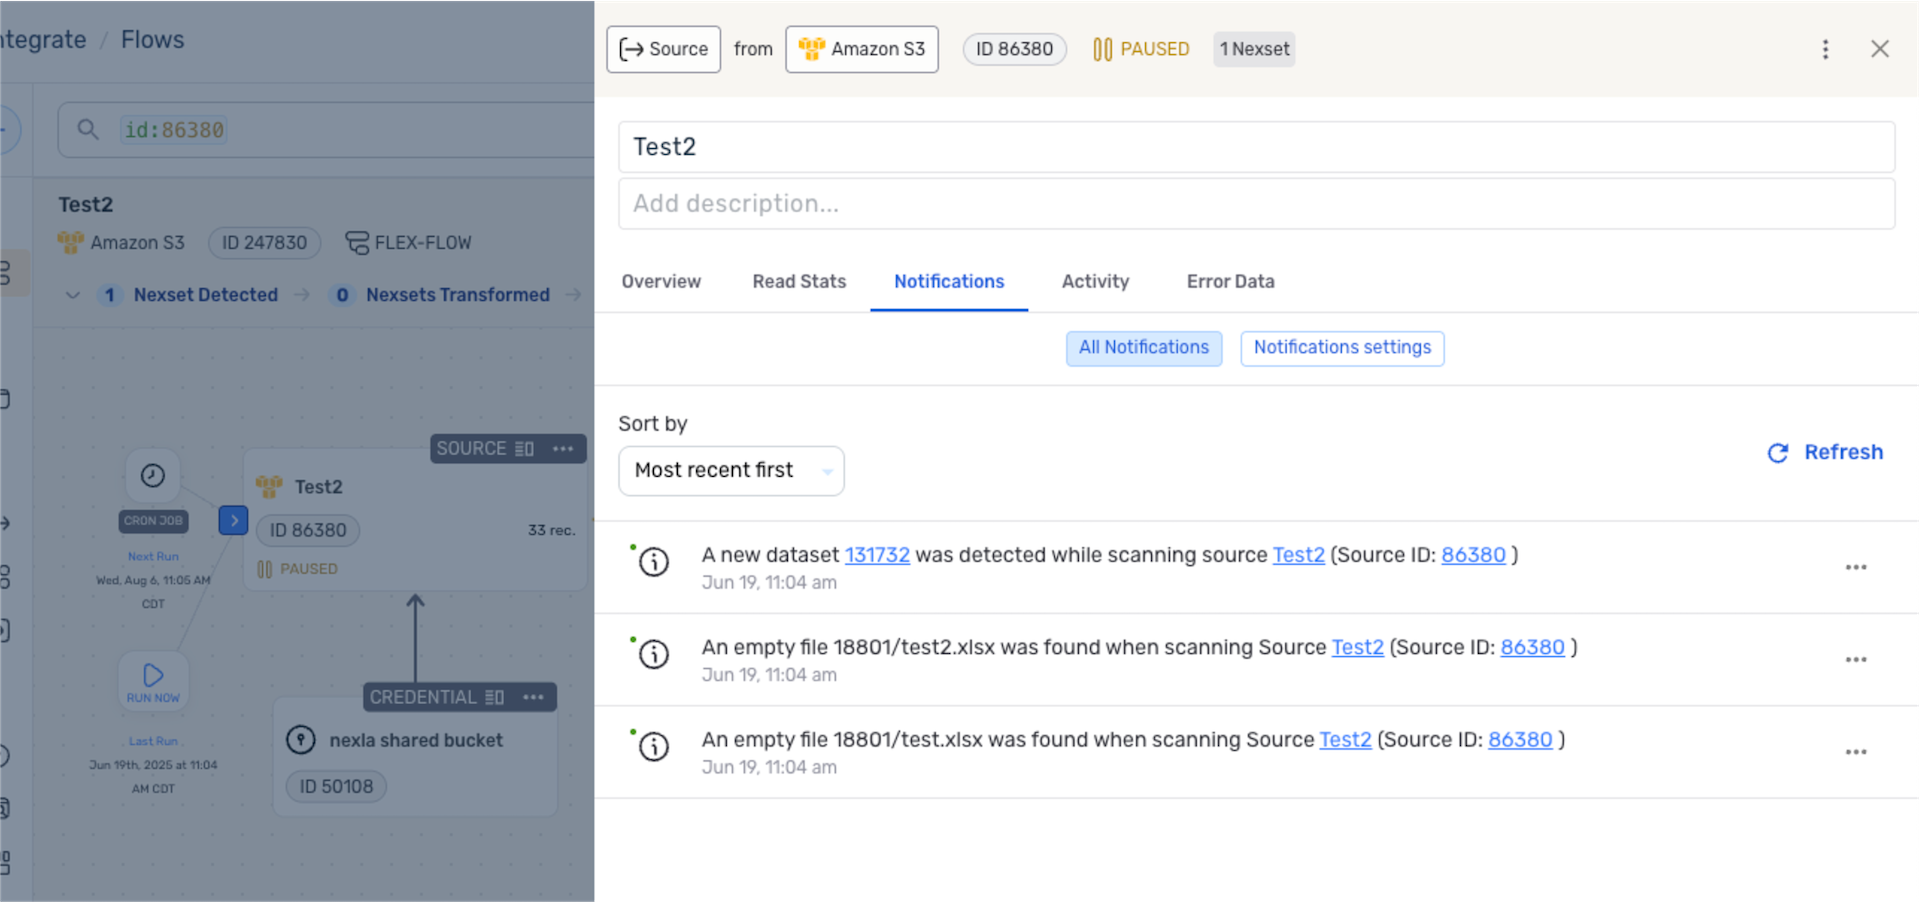
- To change the sorting order of the listed notifications, select an option from the Sort By pulldown menu. By default, newer notifications are displayed at the top of the list, but the Oldest first option can be used to view resource notifications in order from oldest to newest.
Notification Settings
In Nexla, notification settings can be configured to fully customize the type(s) & frequency of generated notifications as well as how generated notifications are delivered. These settings can be applied at the account or resource level.
Account-Level
-
To access account-level notification settings, navigate to Settings > Notification Settings from the platform menu.
-
The Notification Settings screen includes multiple tabs that can be used to configure notification settings at different levels. Select a tab to access the corresponding notification settings.
- Platform Activity – This tab provides access to settings for platform-level activity notifications (Nexset sharing, account creation, etc.).
- System Alerts – This tab provides access to settings for user data system-level notifications (Nexset creation, schema changes, etc.).
- Data Alerts – This tab provides access to settings for data-level notifications (data volume changes, data source reads, etc.).
Notification Settings
-
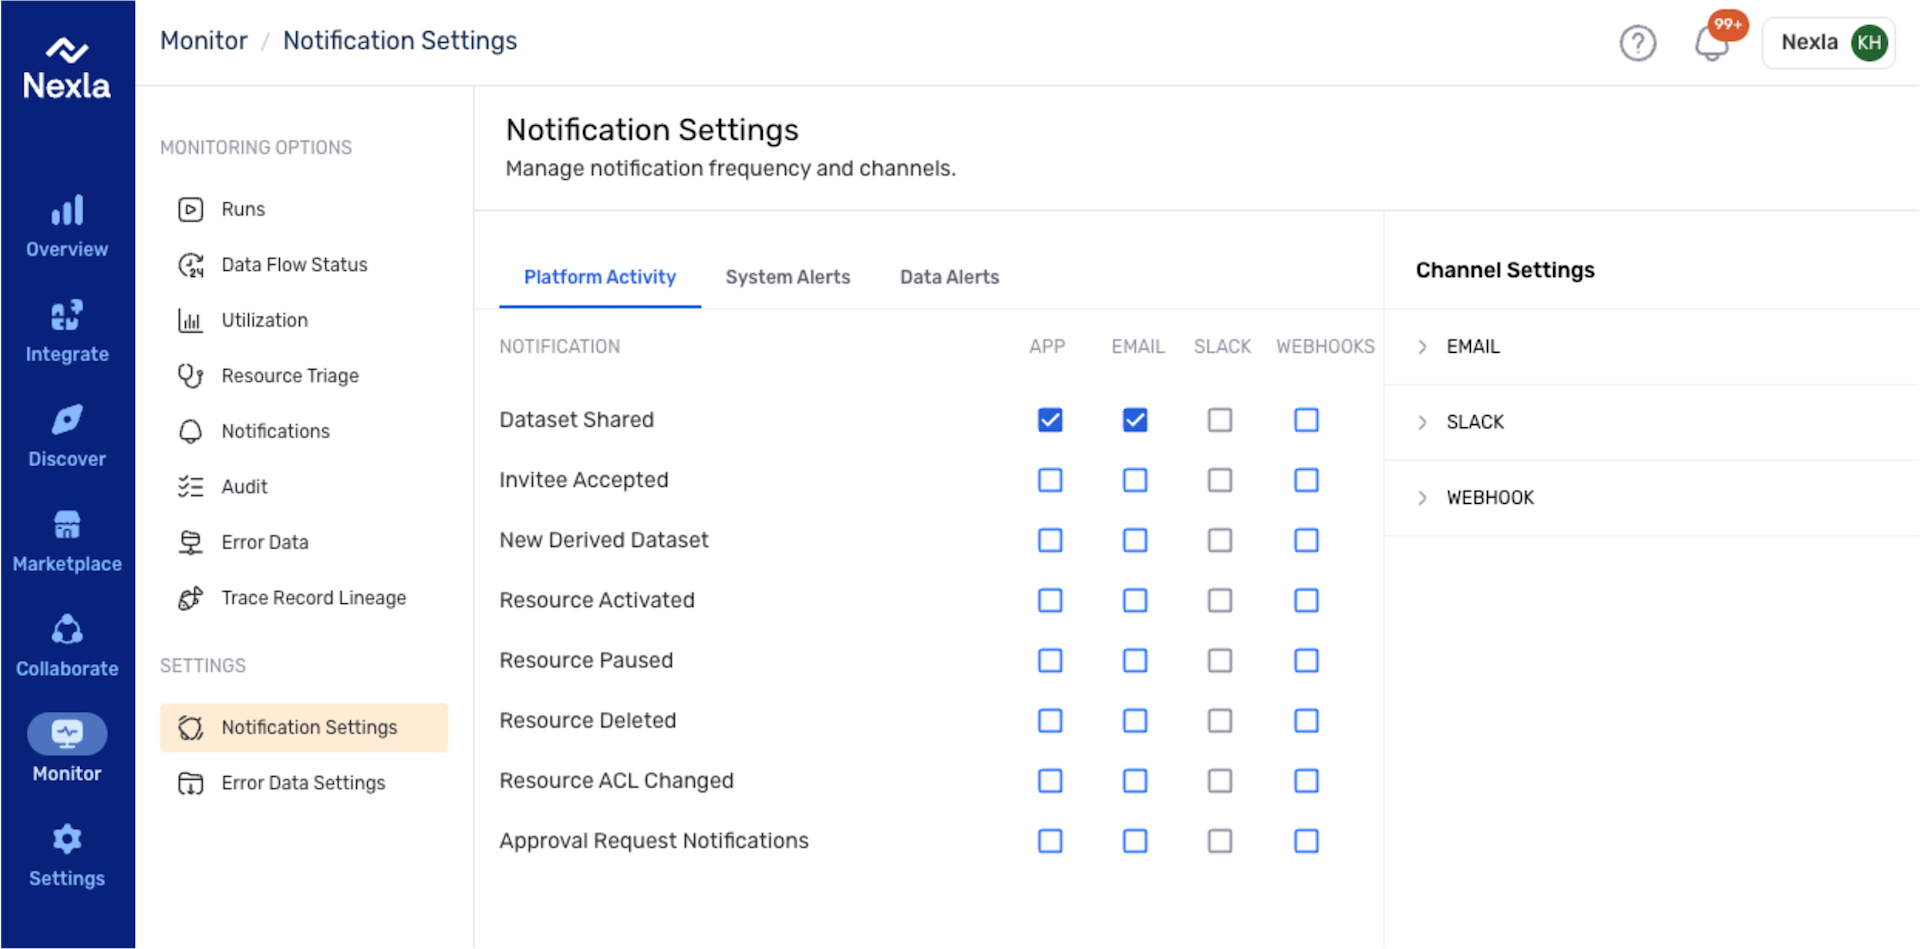
All available notification types for the selected tab are listed in the Notification column, and the columns to the right of each notification type correspond to the available notification delivery methods. To configure Nexla to generate a particular notification type for your account, check the box to the right under the desired delivery method.
-
For example, in the image above, Nexla is configured to generate notifications when a Nexset is shared with another user, and these notifications will be delivered within the Nexla platform and via email.
-
Nexla can be configured to deliver each type of notification by any number of the available delivery methods—use the checkboxes to enable as many or as few delivery channels as needed.
-
To disable notifications of a particular type, ensure that no delivery method boxes are checked for that notification type.
-
Delivery Methods
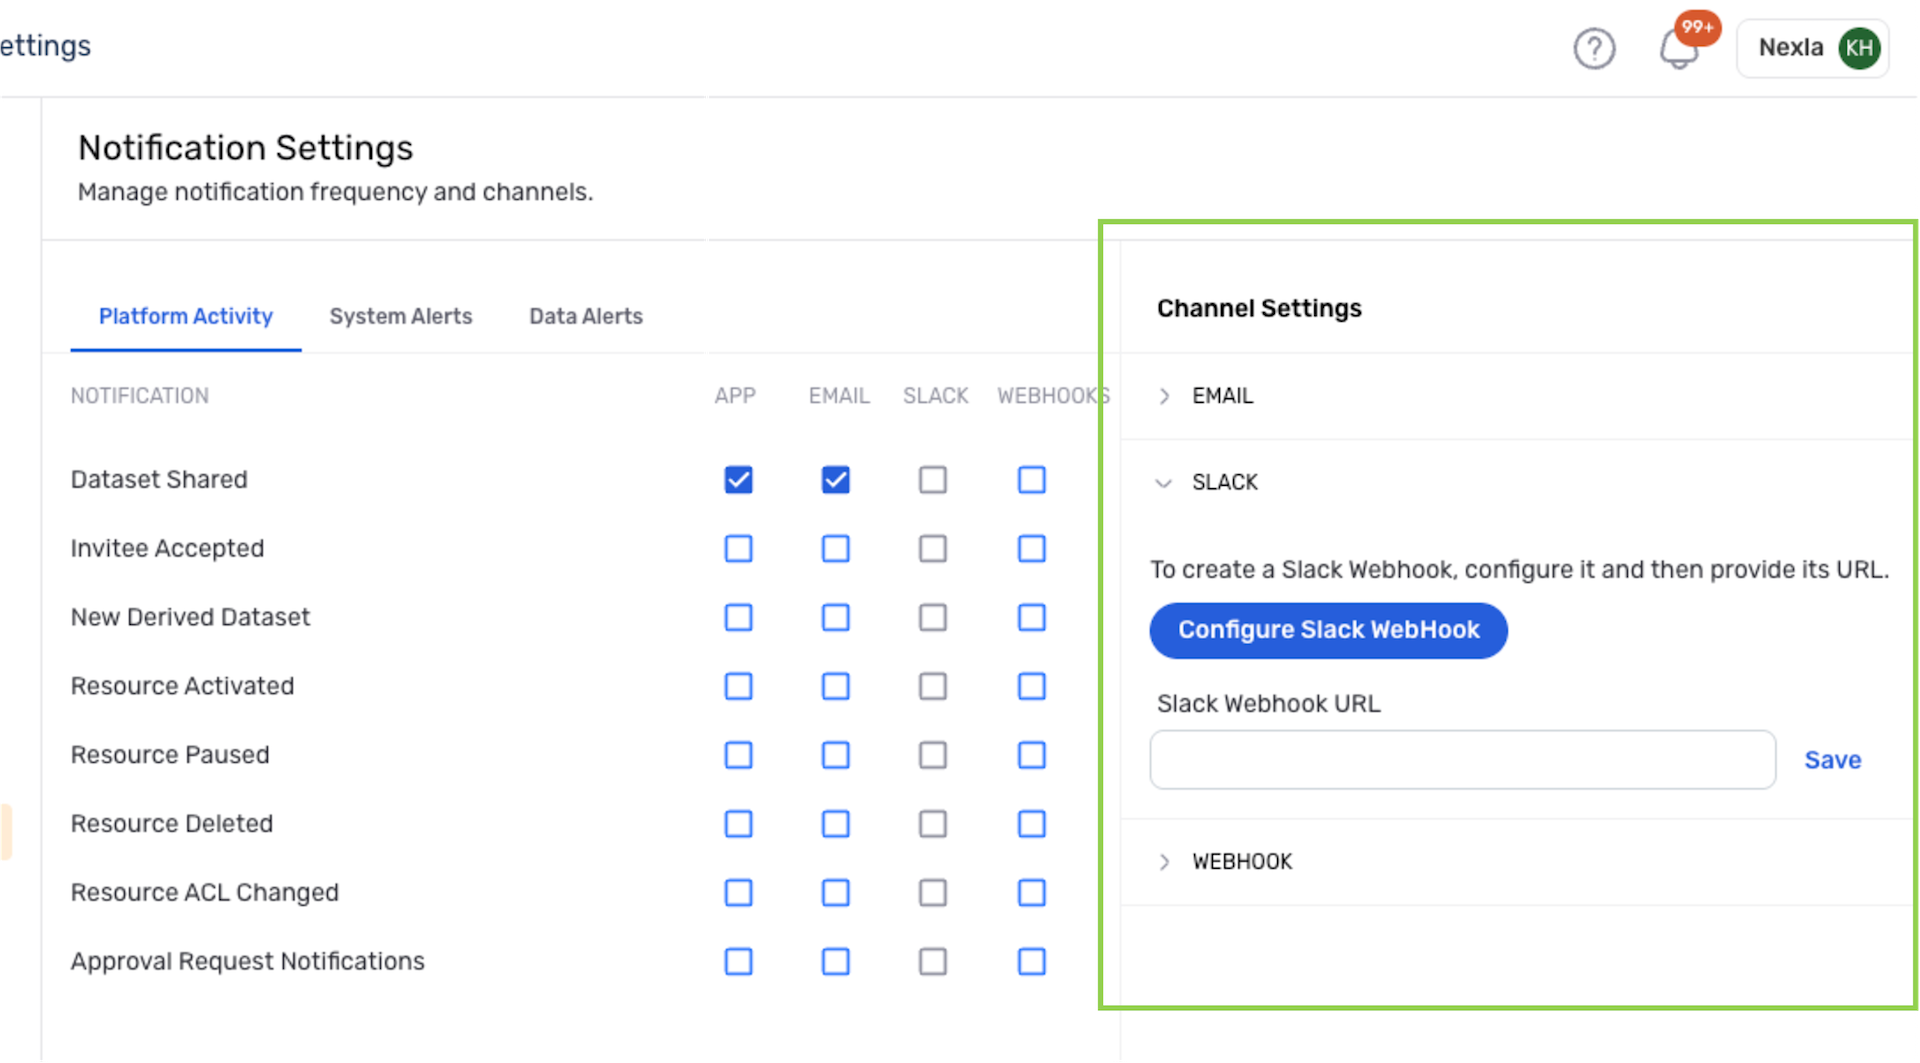
Delivery channel settings can be used to customize how and where Nexla delivers notifications via email, Slack, or webhook. To access these notification delivery settings, click on a delivery method under Channel Settings to view & edit the available settings. Expand a delivery method below to see more information.
Notification Delivery Channel Settings
Resource-Level (Data Volume)
Custom data volume alerts can also be configured at the resource level for individual data sources to provide additional insight into data read volume & changes.
Additional information about data volume alerts and more detailed setup instructions can be found on the Source Data Alerts page.
-
To configure a data volume alert for a data source, locate the data source, and click the Details icon to open the resource information panel.
-
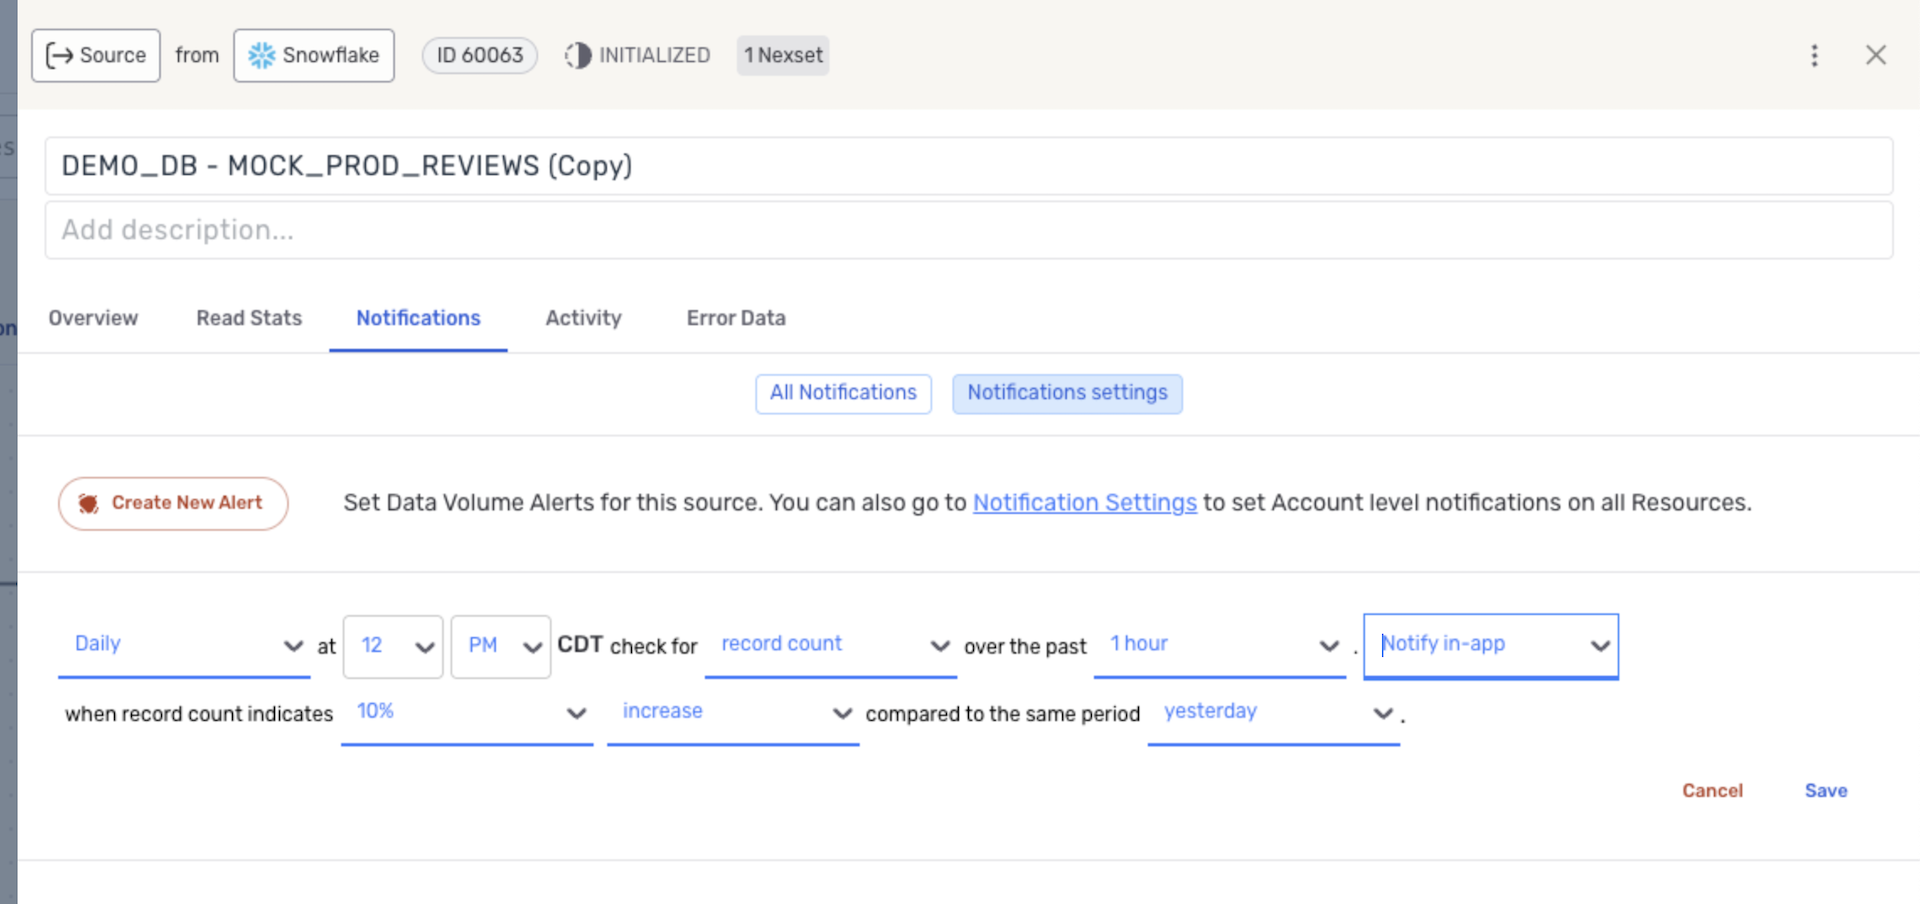
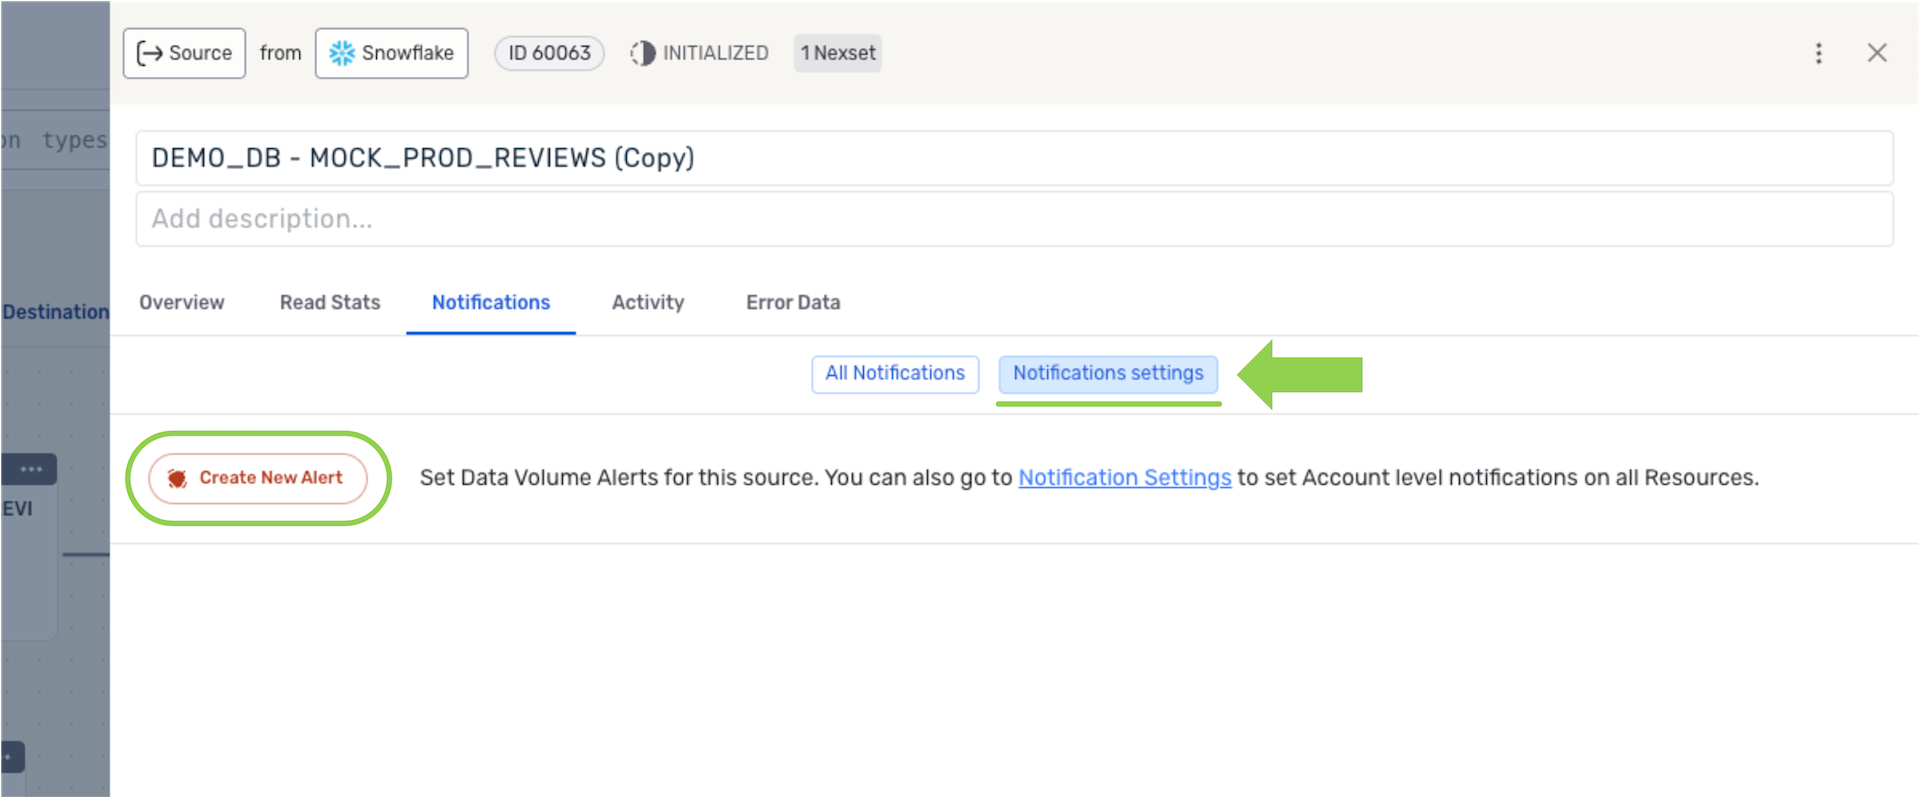
Navigate to the Notifications tab, select the Notifications Settings option near the top of the panel, and click the Create New Alert button.
Create New Data Volume Alert
-
Use the pulldown menus to configure the alert frequency, time period, threshold, delivery method, and other associated settings. Then, click Save to create & activate the alert. Nexla will now generate & deliver data volume alerts according to the configured settings.
Configure the Data Volume Alert
