Integrate Nexla with data.world
Enrich your data.world data catalog by using Nexla's App Integration with data.world.
Once an organization member with Nexla administrator status links and activates Nexla's data.world App Integration, all members of the organization will have the ability to register any of their Nexsets within the connected data.world account.
This article describes how organization members can maintain links between Nexsets and data.world resources. The article also provides instructions for the one-time integration setup steps to be performed by an organization administrator.
1. Set Up and Activate data.world App Integration
This integration process creates a link between Nexsets within the organization's Nexla account and corresponding analysis resources in data.world.
Two main setup steps must be executed to configure this integration. Both steps can be completed by an organization administrator within a few minutes.
Step 1 (Section 1.1 – Section 1.5): In the data.world UI, create a new Analysis resource type along with relevant metadata fields.
A data.world administrator will create a new analysis resource, assign metadata form properties to this resource, apply the new metadata profile to the desired data.world organization, and generate a credential and collection in the desired organization.
Step 2 (Section 1.6 – Section 1.8): In the Nexla UI, configure Nexla's data.world App Integration with the relevant credentials and property names for entities created in Step 1.
1.1 data.world: Set Up a Metadata Profile in the Catalog-Config Organization
The steps in this section must be performed in the data.world UI by a data.world administrator.
A. Create a Nexla Nexset Analysis Type
-
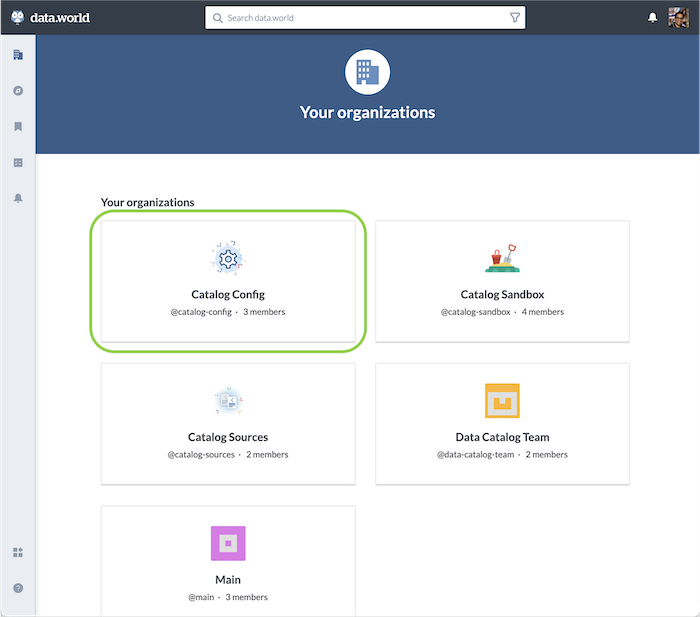
Log in to data.world, and open the Organization selection screen. Select the Catalog Config organization.
-
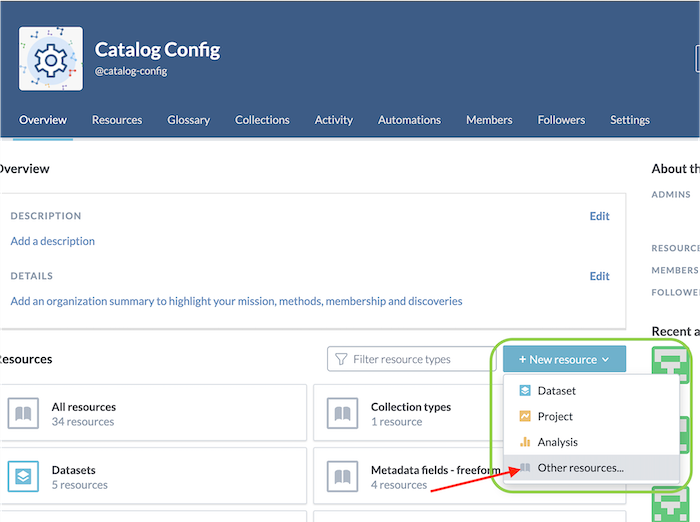
Click
 to open the resource creation menu, and select "Other Resources".
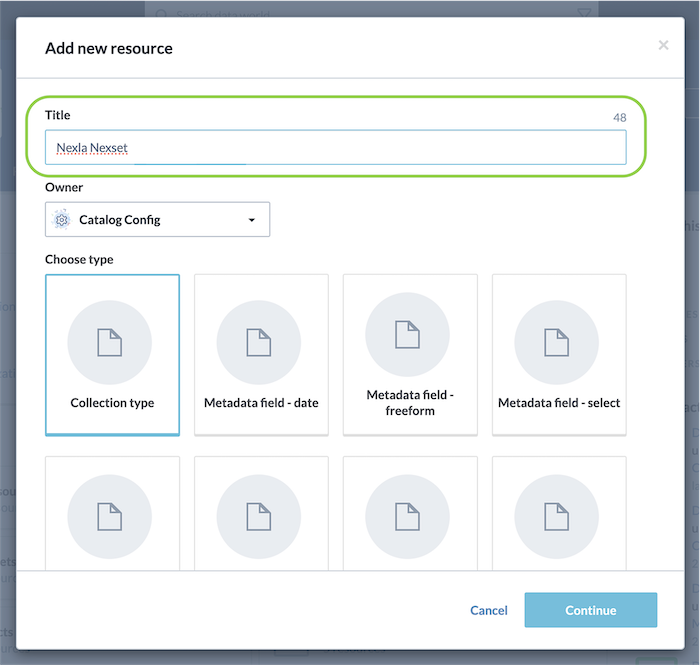
This will open the "Add new resource" popup form.
-
In the resource addition form, enter "Nexla Nexset" in the Title field.
-
Under the Choose type heading, select "Type".

-
Click
 in the bottom right corner of the resource addition form to create the new resource.
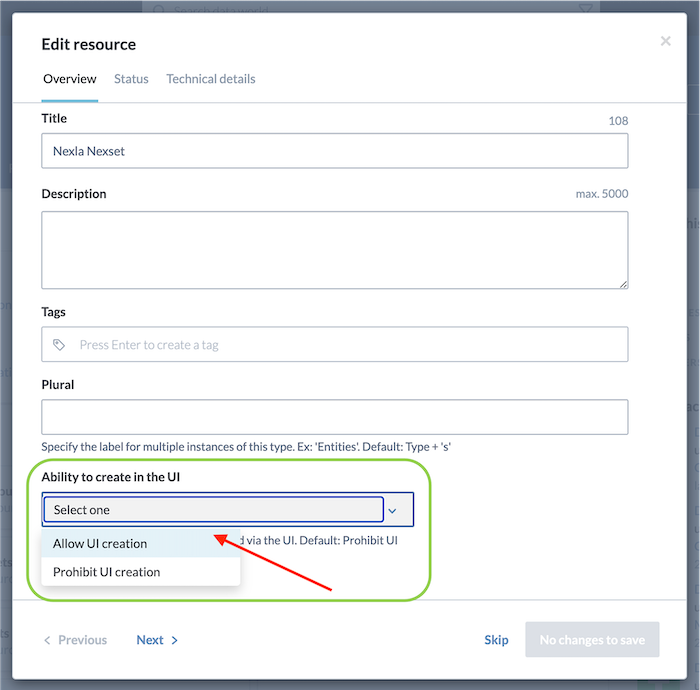
This will open the "Edit resource" popup form.
-
In the resource editing form, select "Allow UI Creation" from the Ability to Create in the UI dropdown menu.
-
Click "Save" in the bottom right corner of the resource editing form to save the selection.
-
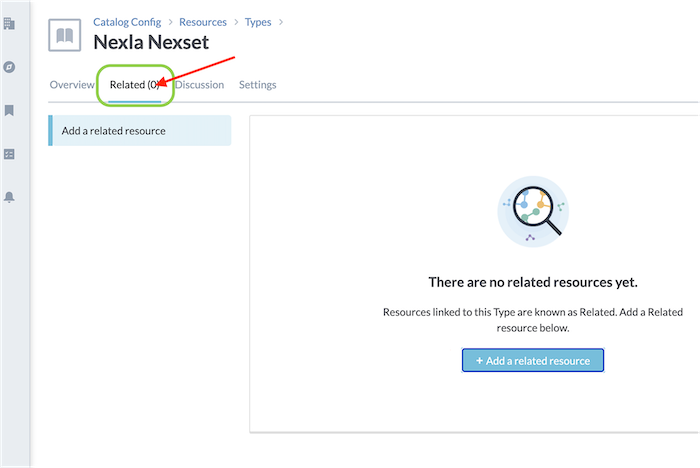
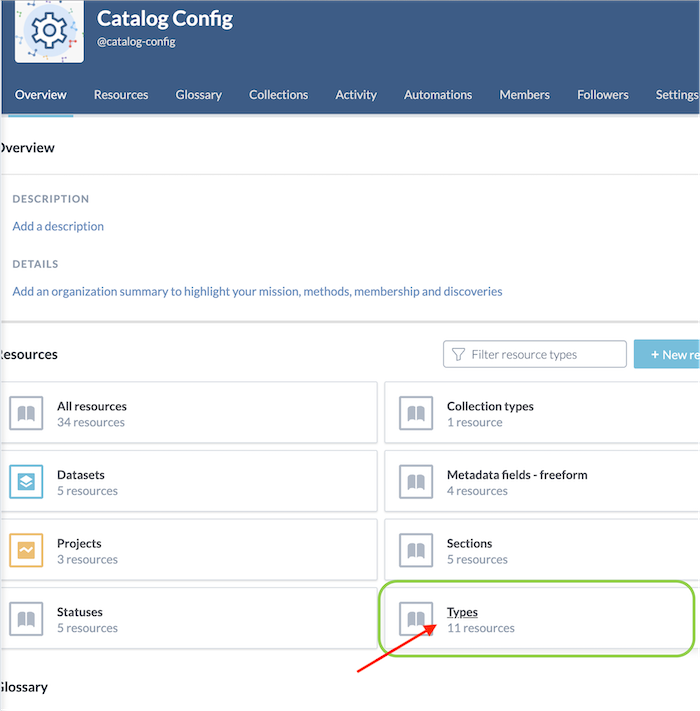
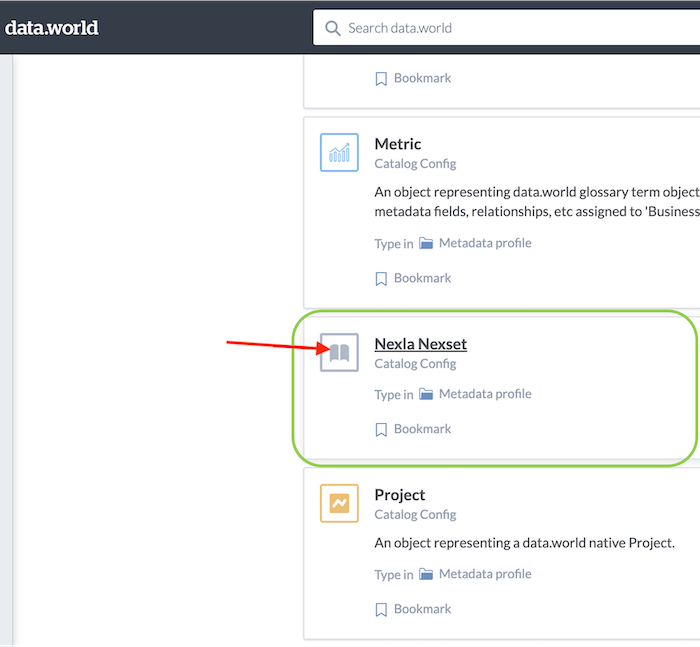
In the Catalog Config Overview page, select Types, and locate the newly created Nexla Nexset type. This new entity will be linked to the Analysis type.
-
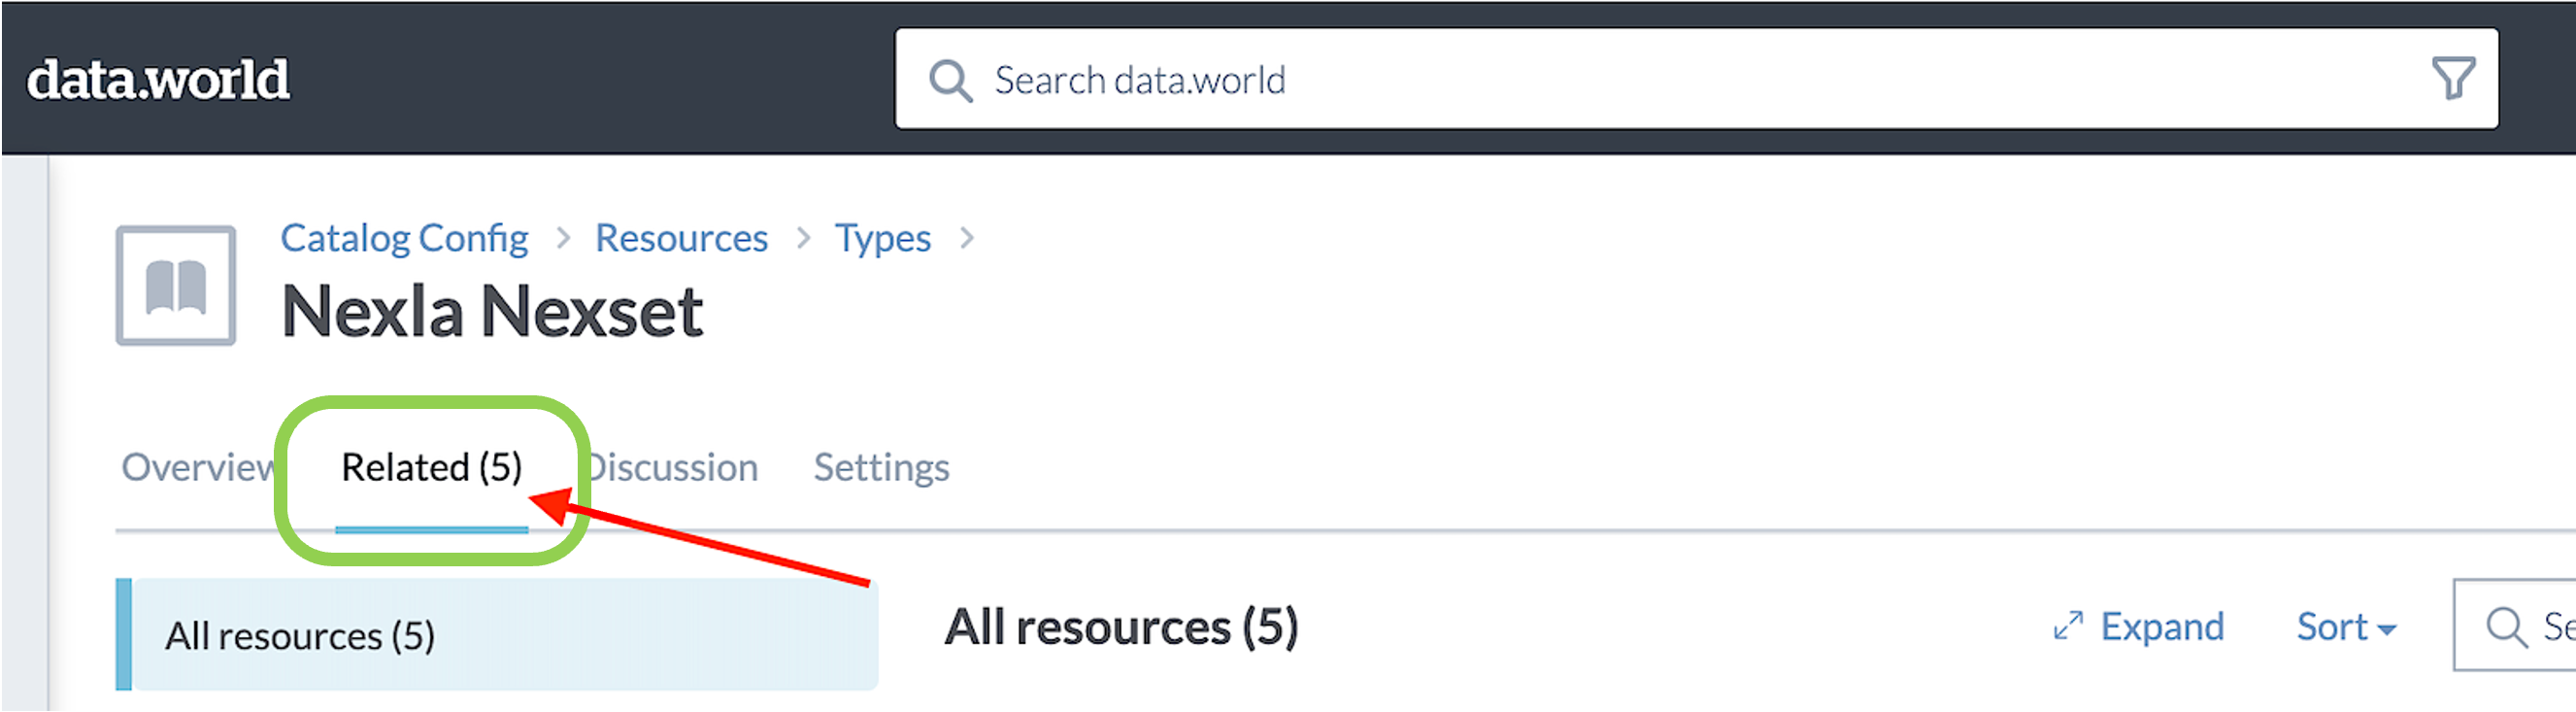
Select the Related tab.
-
Click
 to add a new related resource.
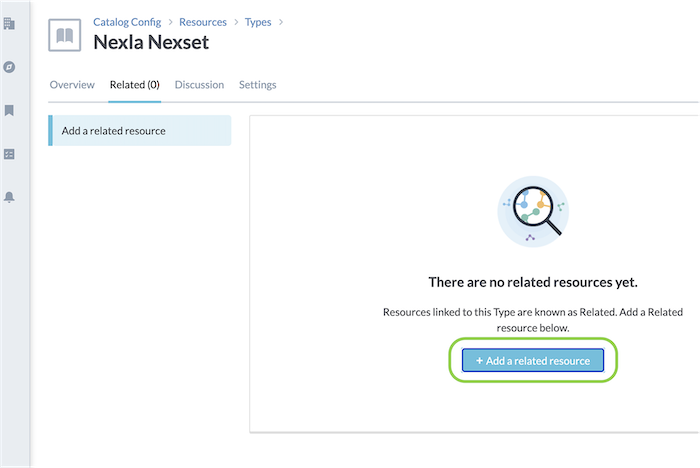
-
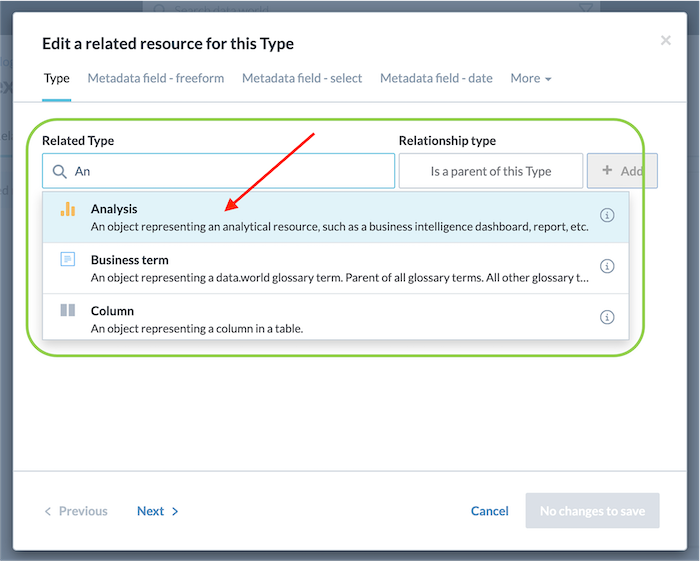
In the popup form, type and select "Analysis" in the Related Type field.
-
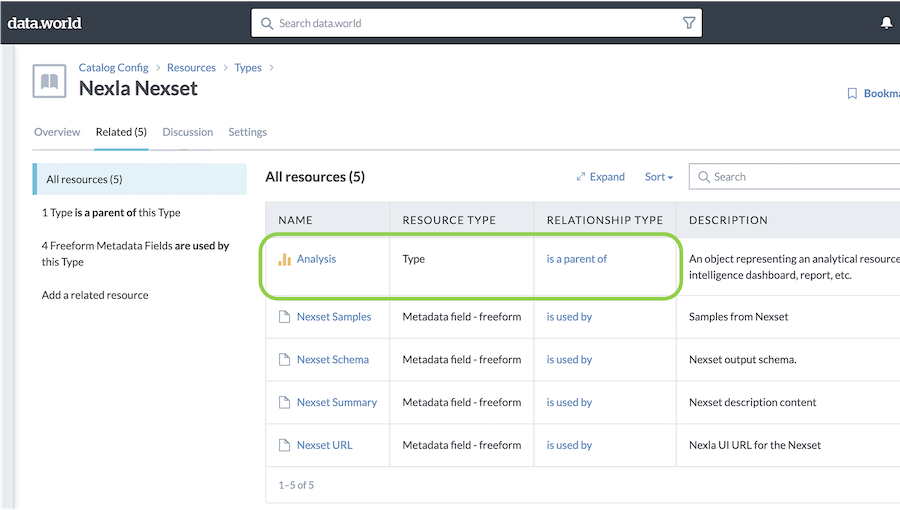
Ensure that "Is a parent of this Type" is populated in the Relationship Type field.
-
Click
 to add the new relationship.
 -
Click "Save" in the bottom right corner of the popup form to save the settings.
The rule "Analysis is the parent type of Nexla Nexset" has now been defined.
-
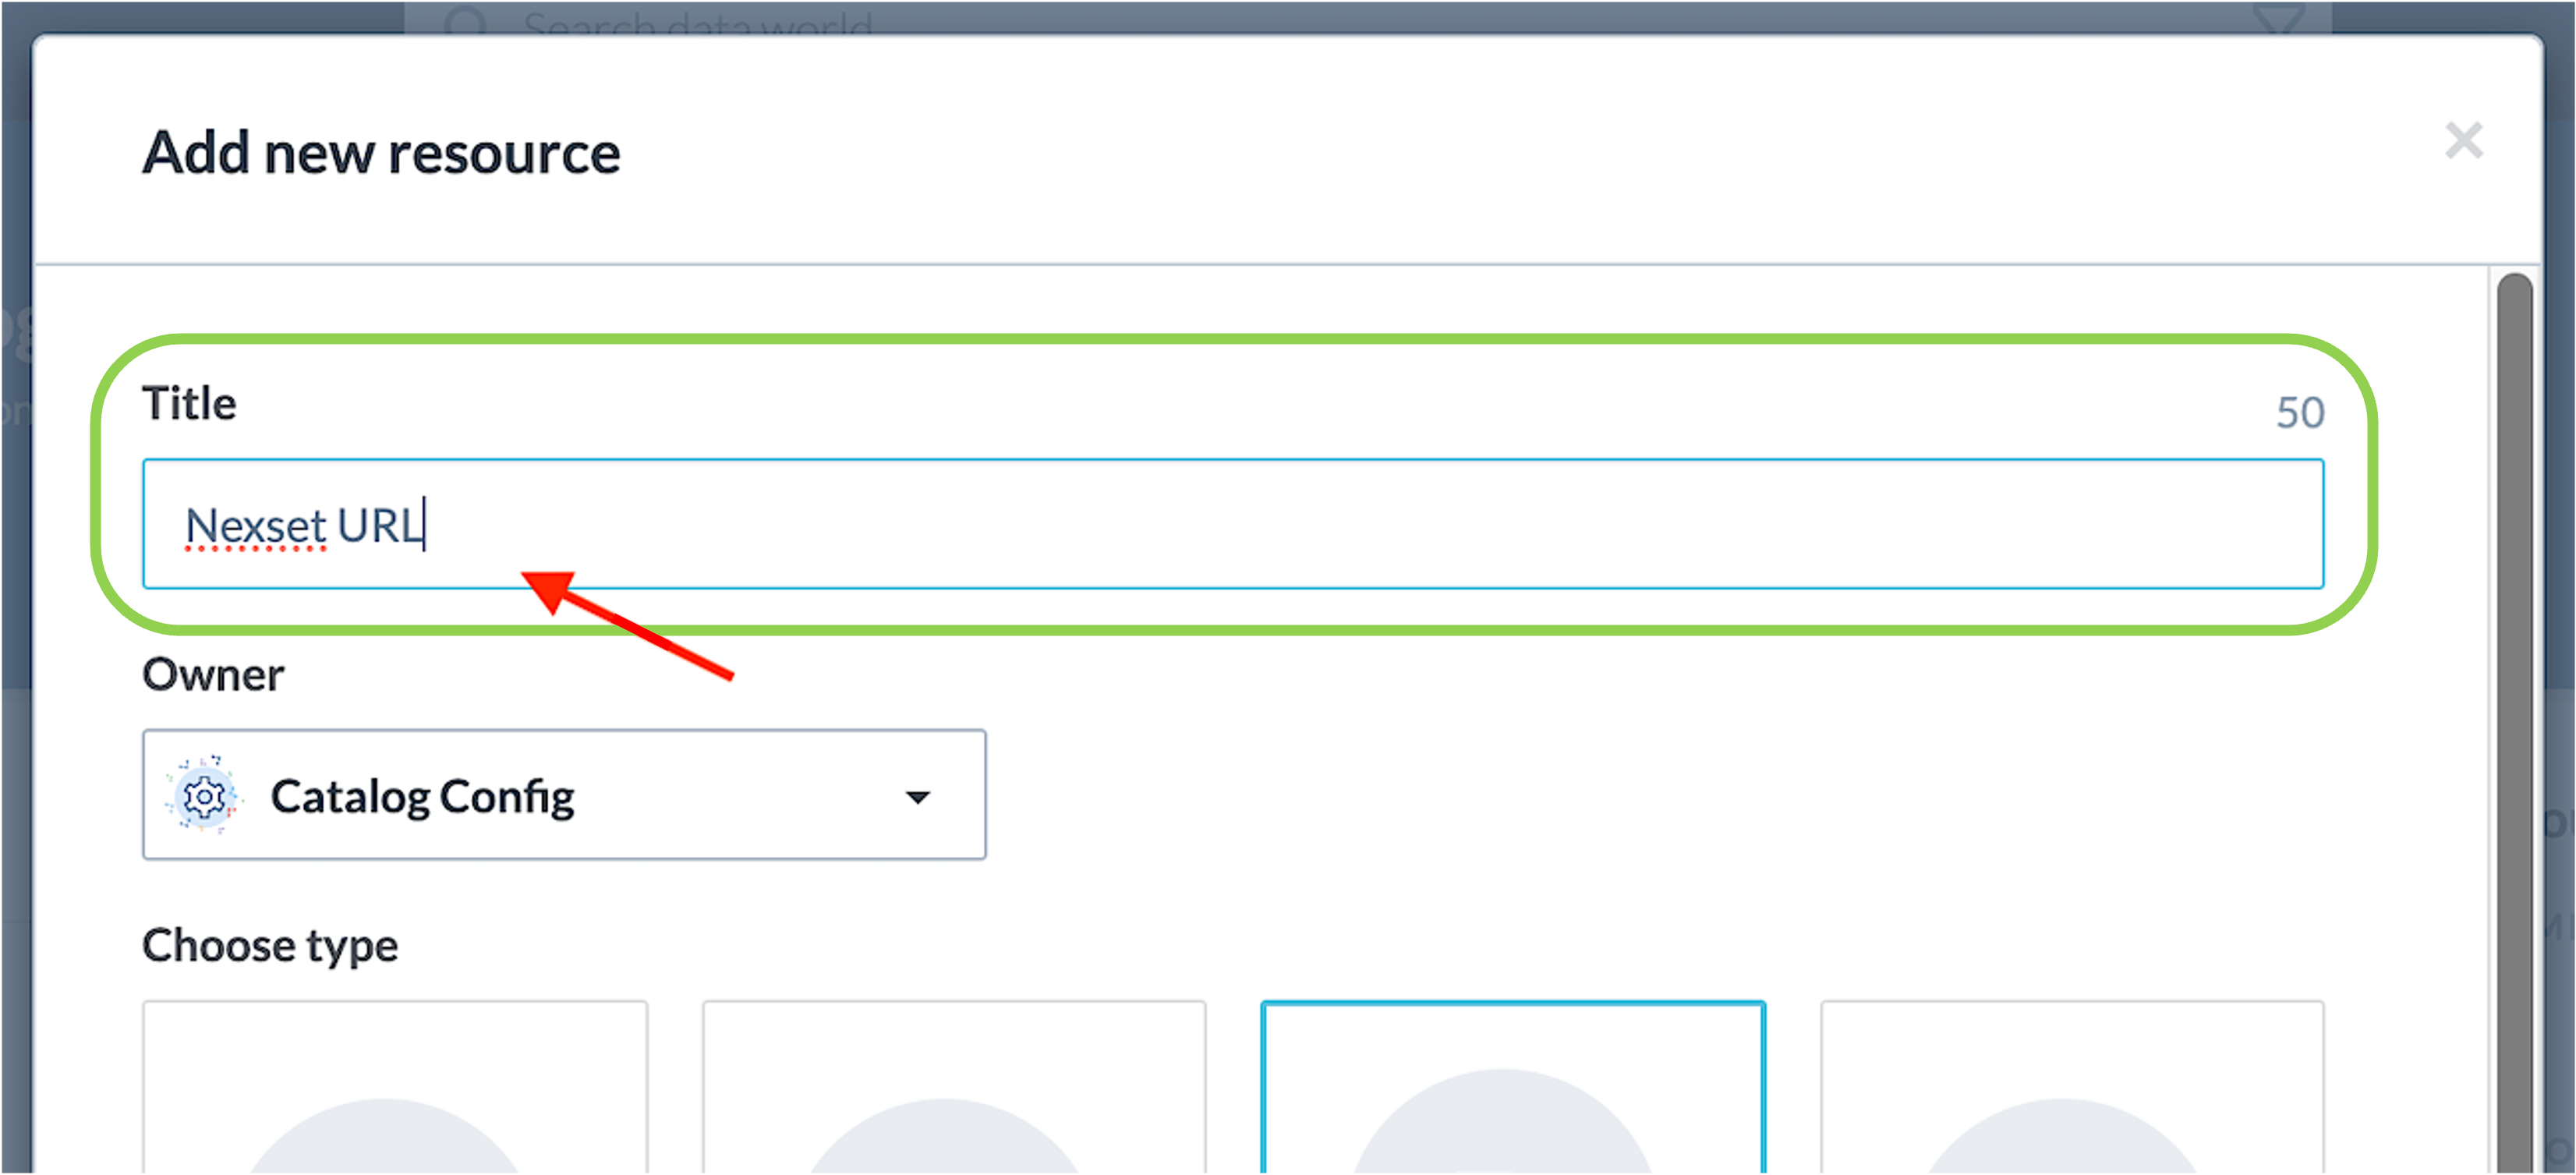
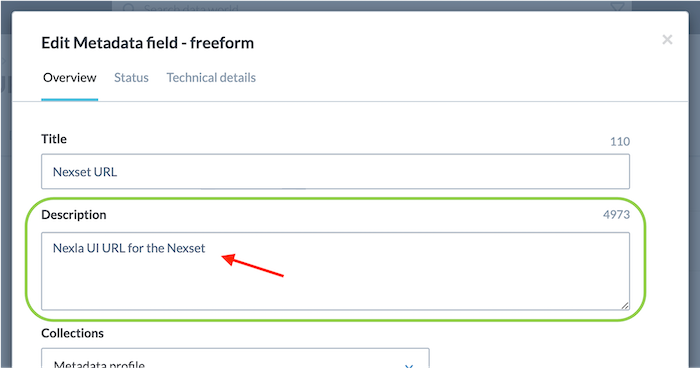
B. Create the Nexset URL Metadata Field
The Nexset URL metadata field will contain the link to the Nexset in the Nexla UI.
-
In the Catalog Config Overview page, again click
to open the resource creation menu, and select "Other Resources".This will open the "Add new resource" popup form.
-
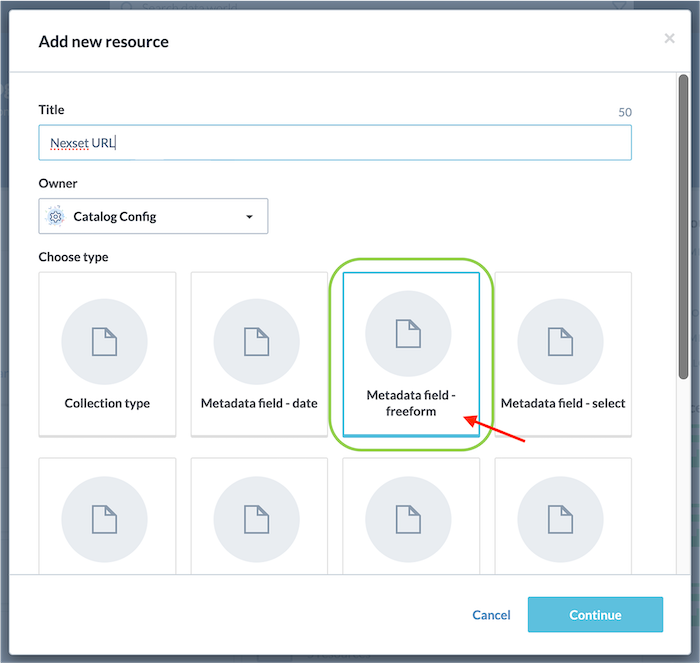
In the resource addition form, enter "Nexset URL" in the Title field.
-
Under the Choose type heading, select "Metadata field - freeform".
-
Click
in the bottom right corner of the resource addition form to create the new resource.This will open the "Edit resource" popup form.
-
In the resource editing form, enter "Nexla UI URL for the Nexset" in the Description field.
-
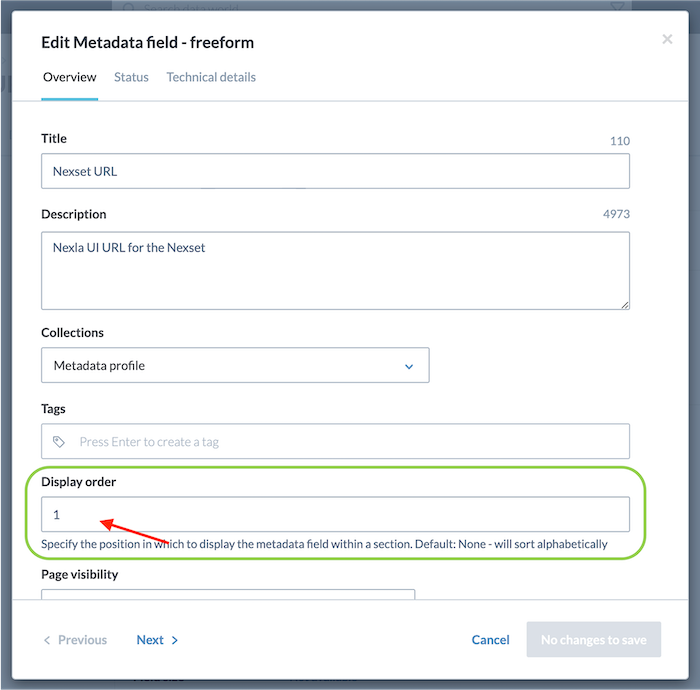
Enter "1" in the Display Order field.
-
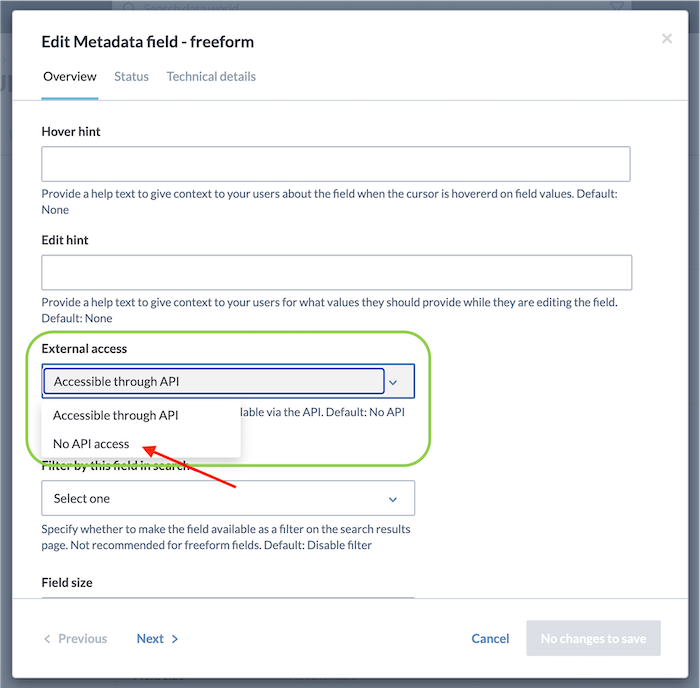
Select "Accessible through API" from the External Access pulldown menu.
-
Click "Save" in the bottom right corner of the resource editing form to save the settings.
-
In the Catalog Config Overview page, select Types, and locate the newly created Nexset URL entity. This new entity will be linked to the Nexla Nexset type.
-
Select the Related tab.
-
Click
to add a new related resource.
-
In the popup form, type and select "Nexla Nexset" in the Related Type field.
-
Ensure that "Uses this Metadata field" is populated in the Relationship Type field.

-
Click
to add the new relationship. -
Click "Save" in the bottom right corner of the popup form to save the settings.
The rule "Nexla Nexset uses Nexla URL" has now been defined.
-
C. Create the Nexset Summary Metadata Field
The Nexset Summary metadata field will contain the rich-text description of the Nexset.
-
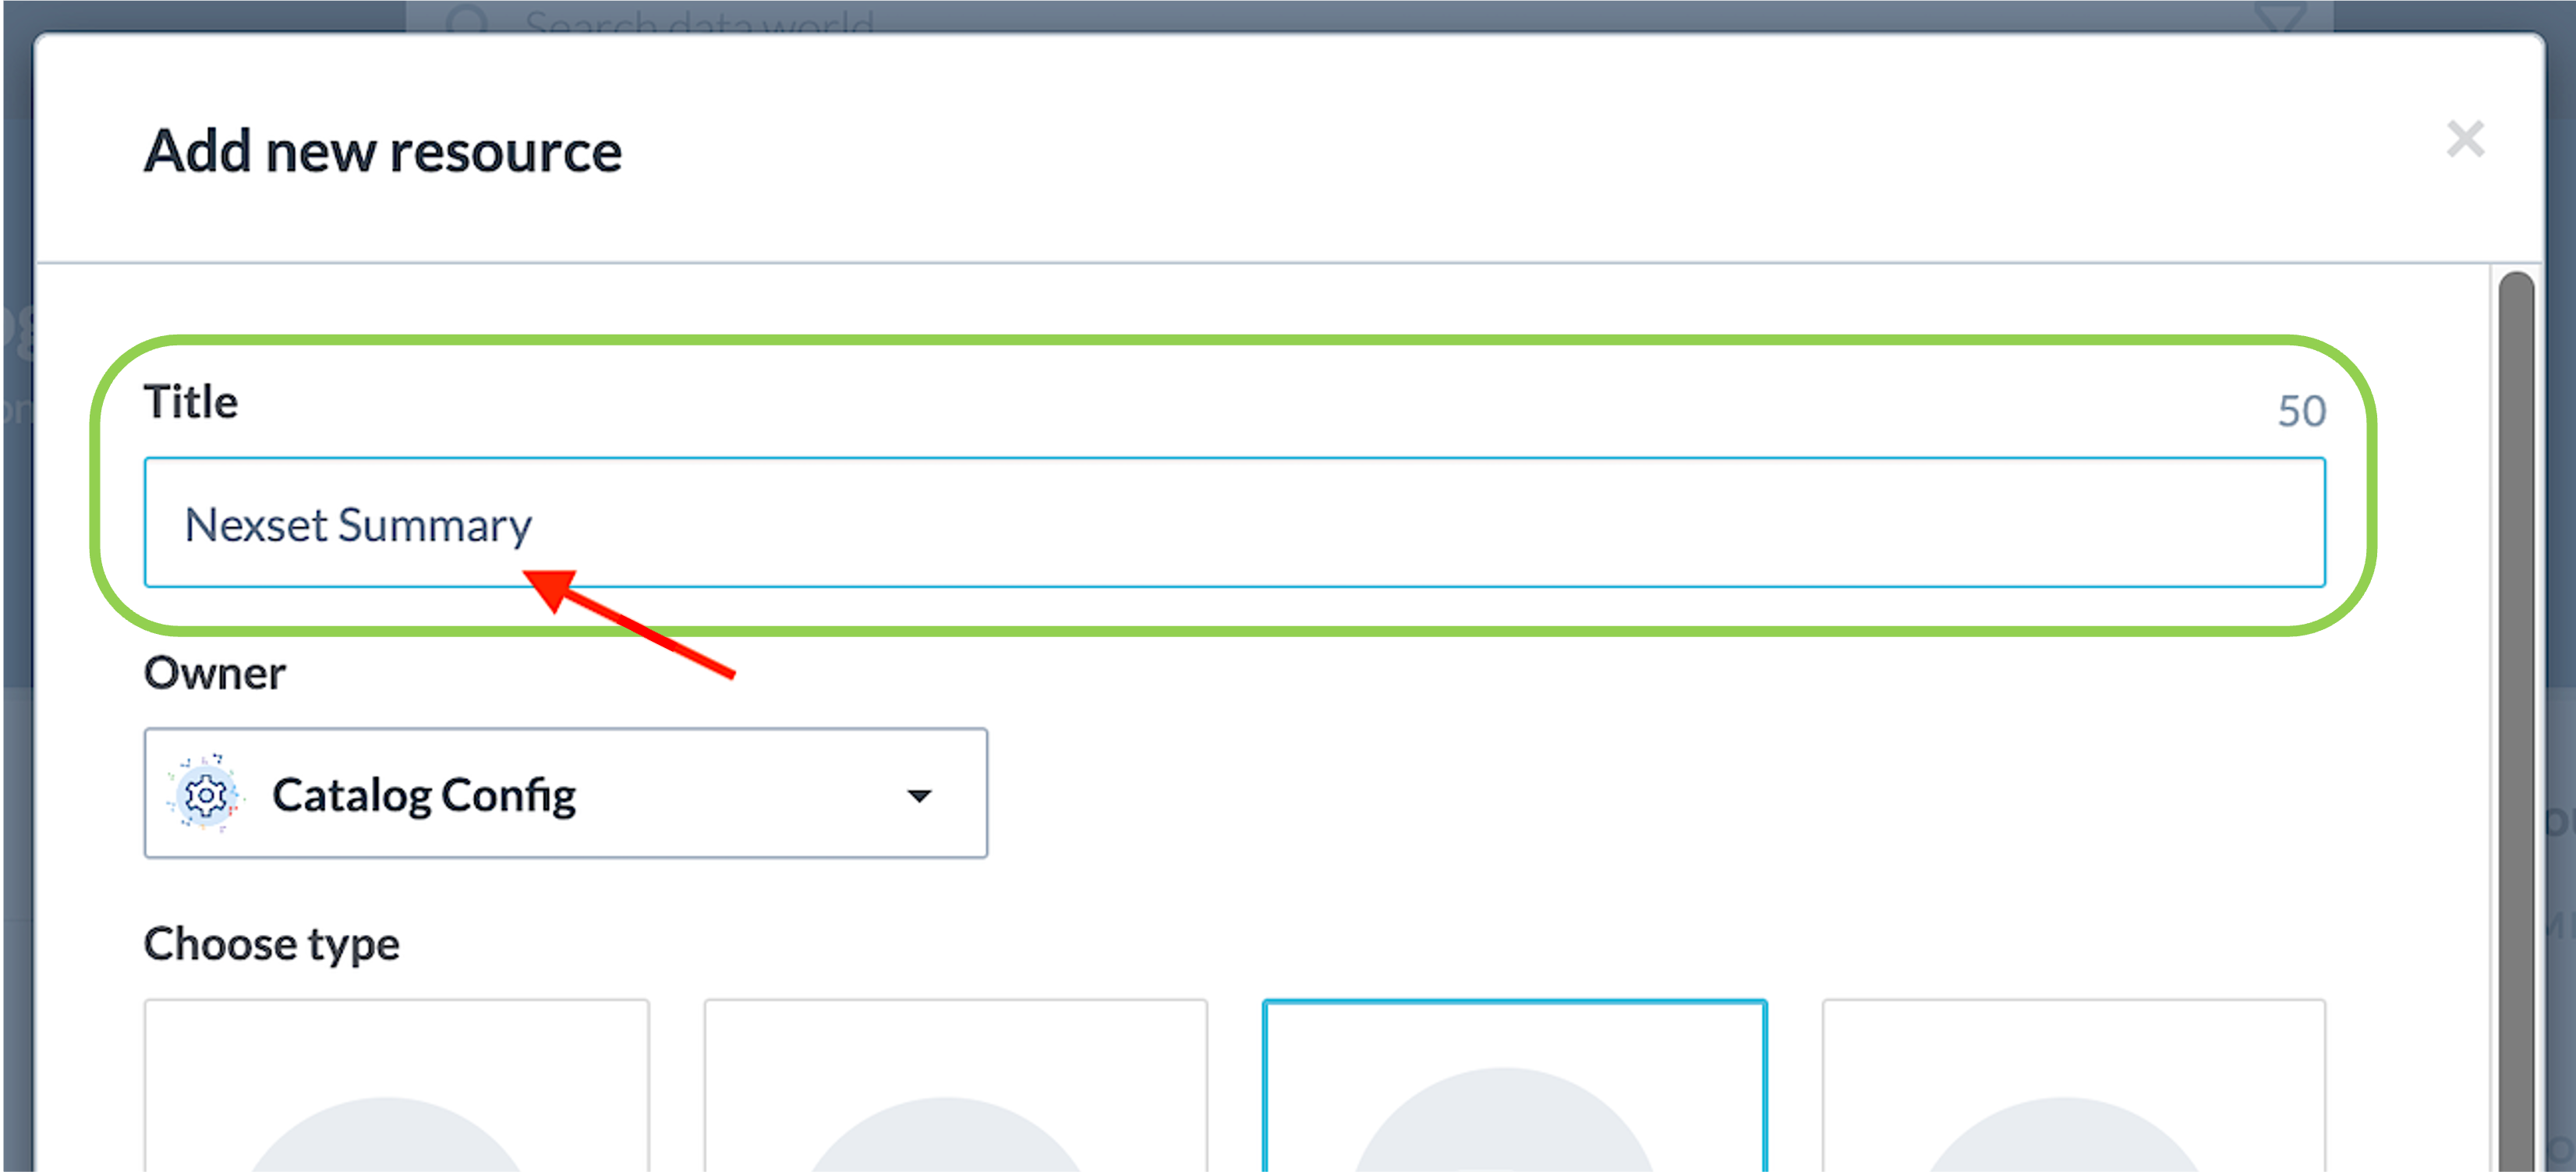
In the Catalog Config Overview page, again click
to open the resource creation menu, and select "Other Resources".This will open the "Add new resource" popup form.
-
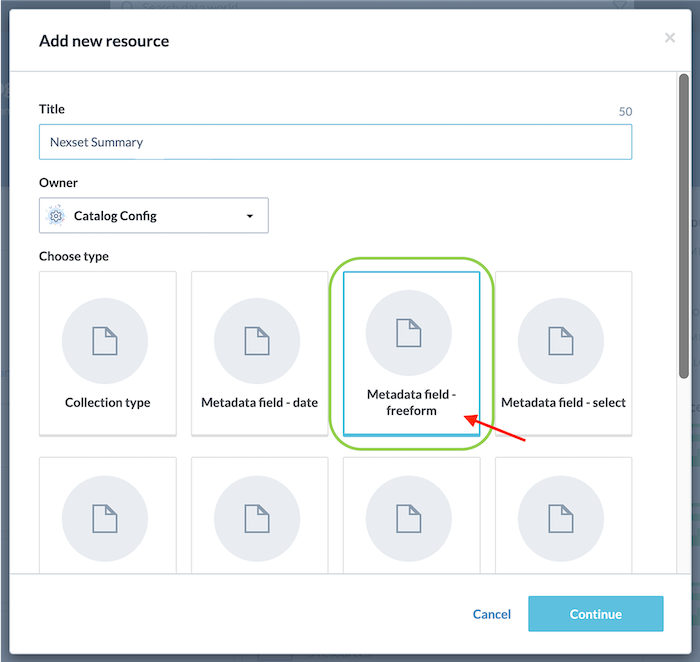
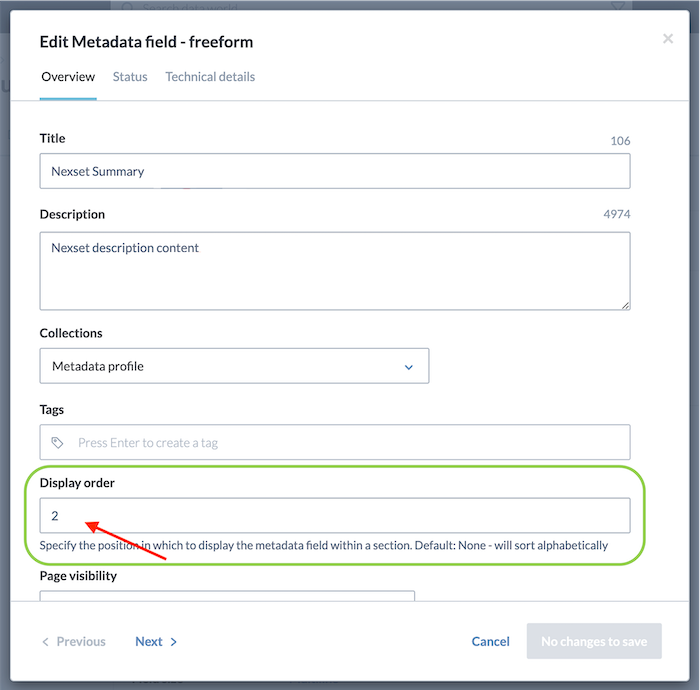
In the resource addition form, enter "Nexset Summary" in the Title field.
-
Under the Choose type heading, select "Metadata field - freeform".
-
Click
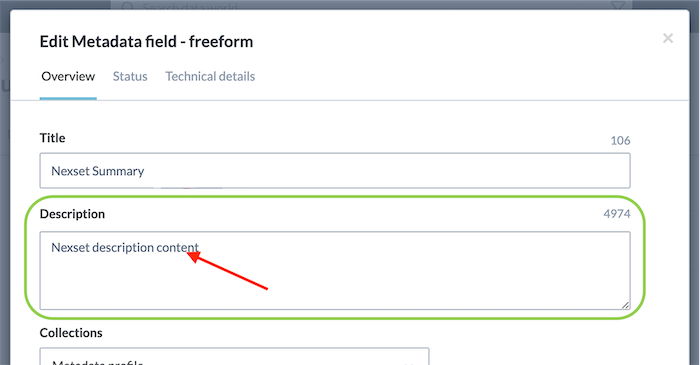
in the bottom right corner of the resource addition form to create the new resource.This will open the "Edit resource" popup form.
-
In the resource editing form, enter "Nexset description content" in the Description field.
-
Enter "2" in the Display Order field.
-
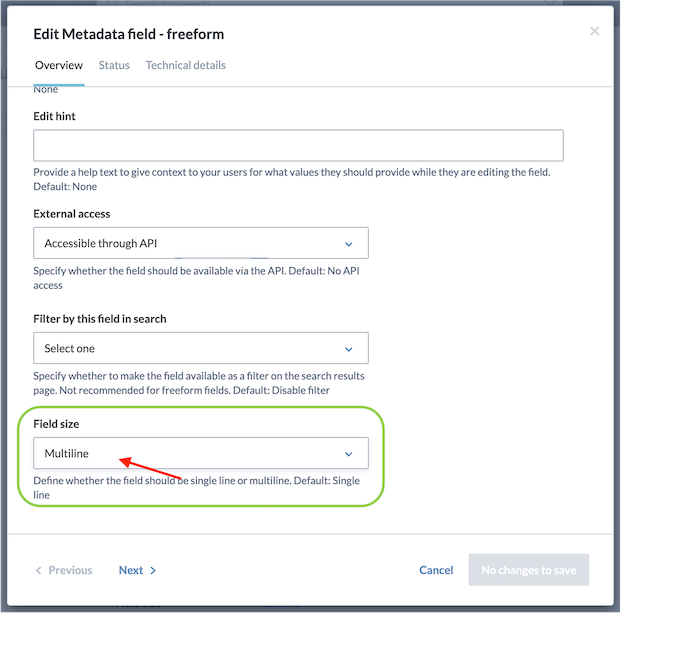
Select "Accessible through API" from the External Access pulldown menu.
-
Select "Multiline" from the Field Size pulldown menu.
-
Click "Save" in the bottom right corner of the resource editing form to save the settings.
-
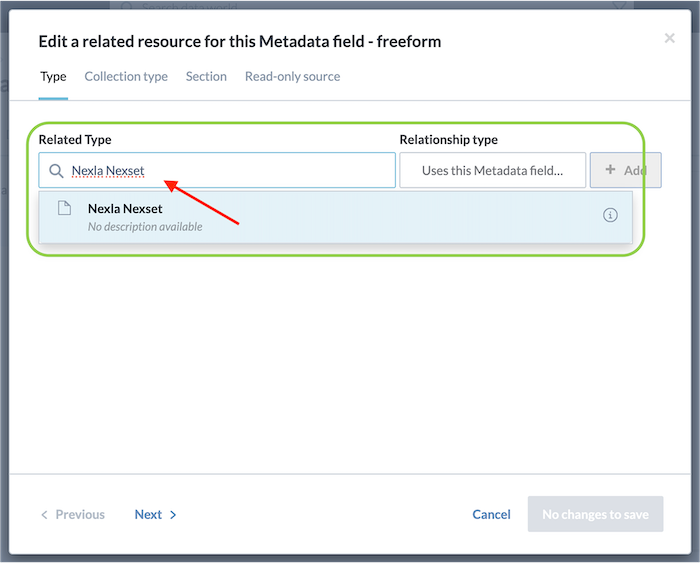
In the Catalog Config Overview page, select Types, and locate the newly created Nexset Summary entity. This new entity will be linked to the Nexla Nexset type.
-
Select the Related tab.
-
Click
to add a new related resource. -
In the popup form, type and select "Nexla Nexset" in the Related Type field.
-
Ensure that "Uses this Metadata field" is populated in the Relationship Type field.
-
Click
to add the new relationship. -
Click "Save" in the bottom right corner of the popup form to save the settings.
The rule "Nexla Nexset uses Nexset Summary" has now been defined.
-
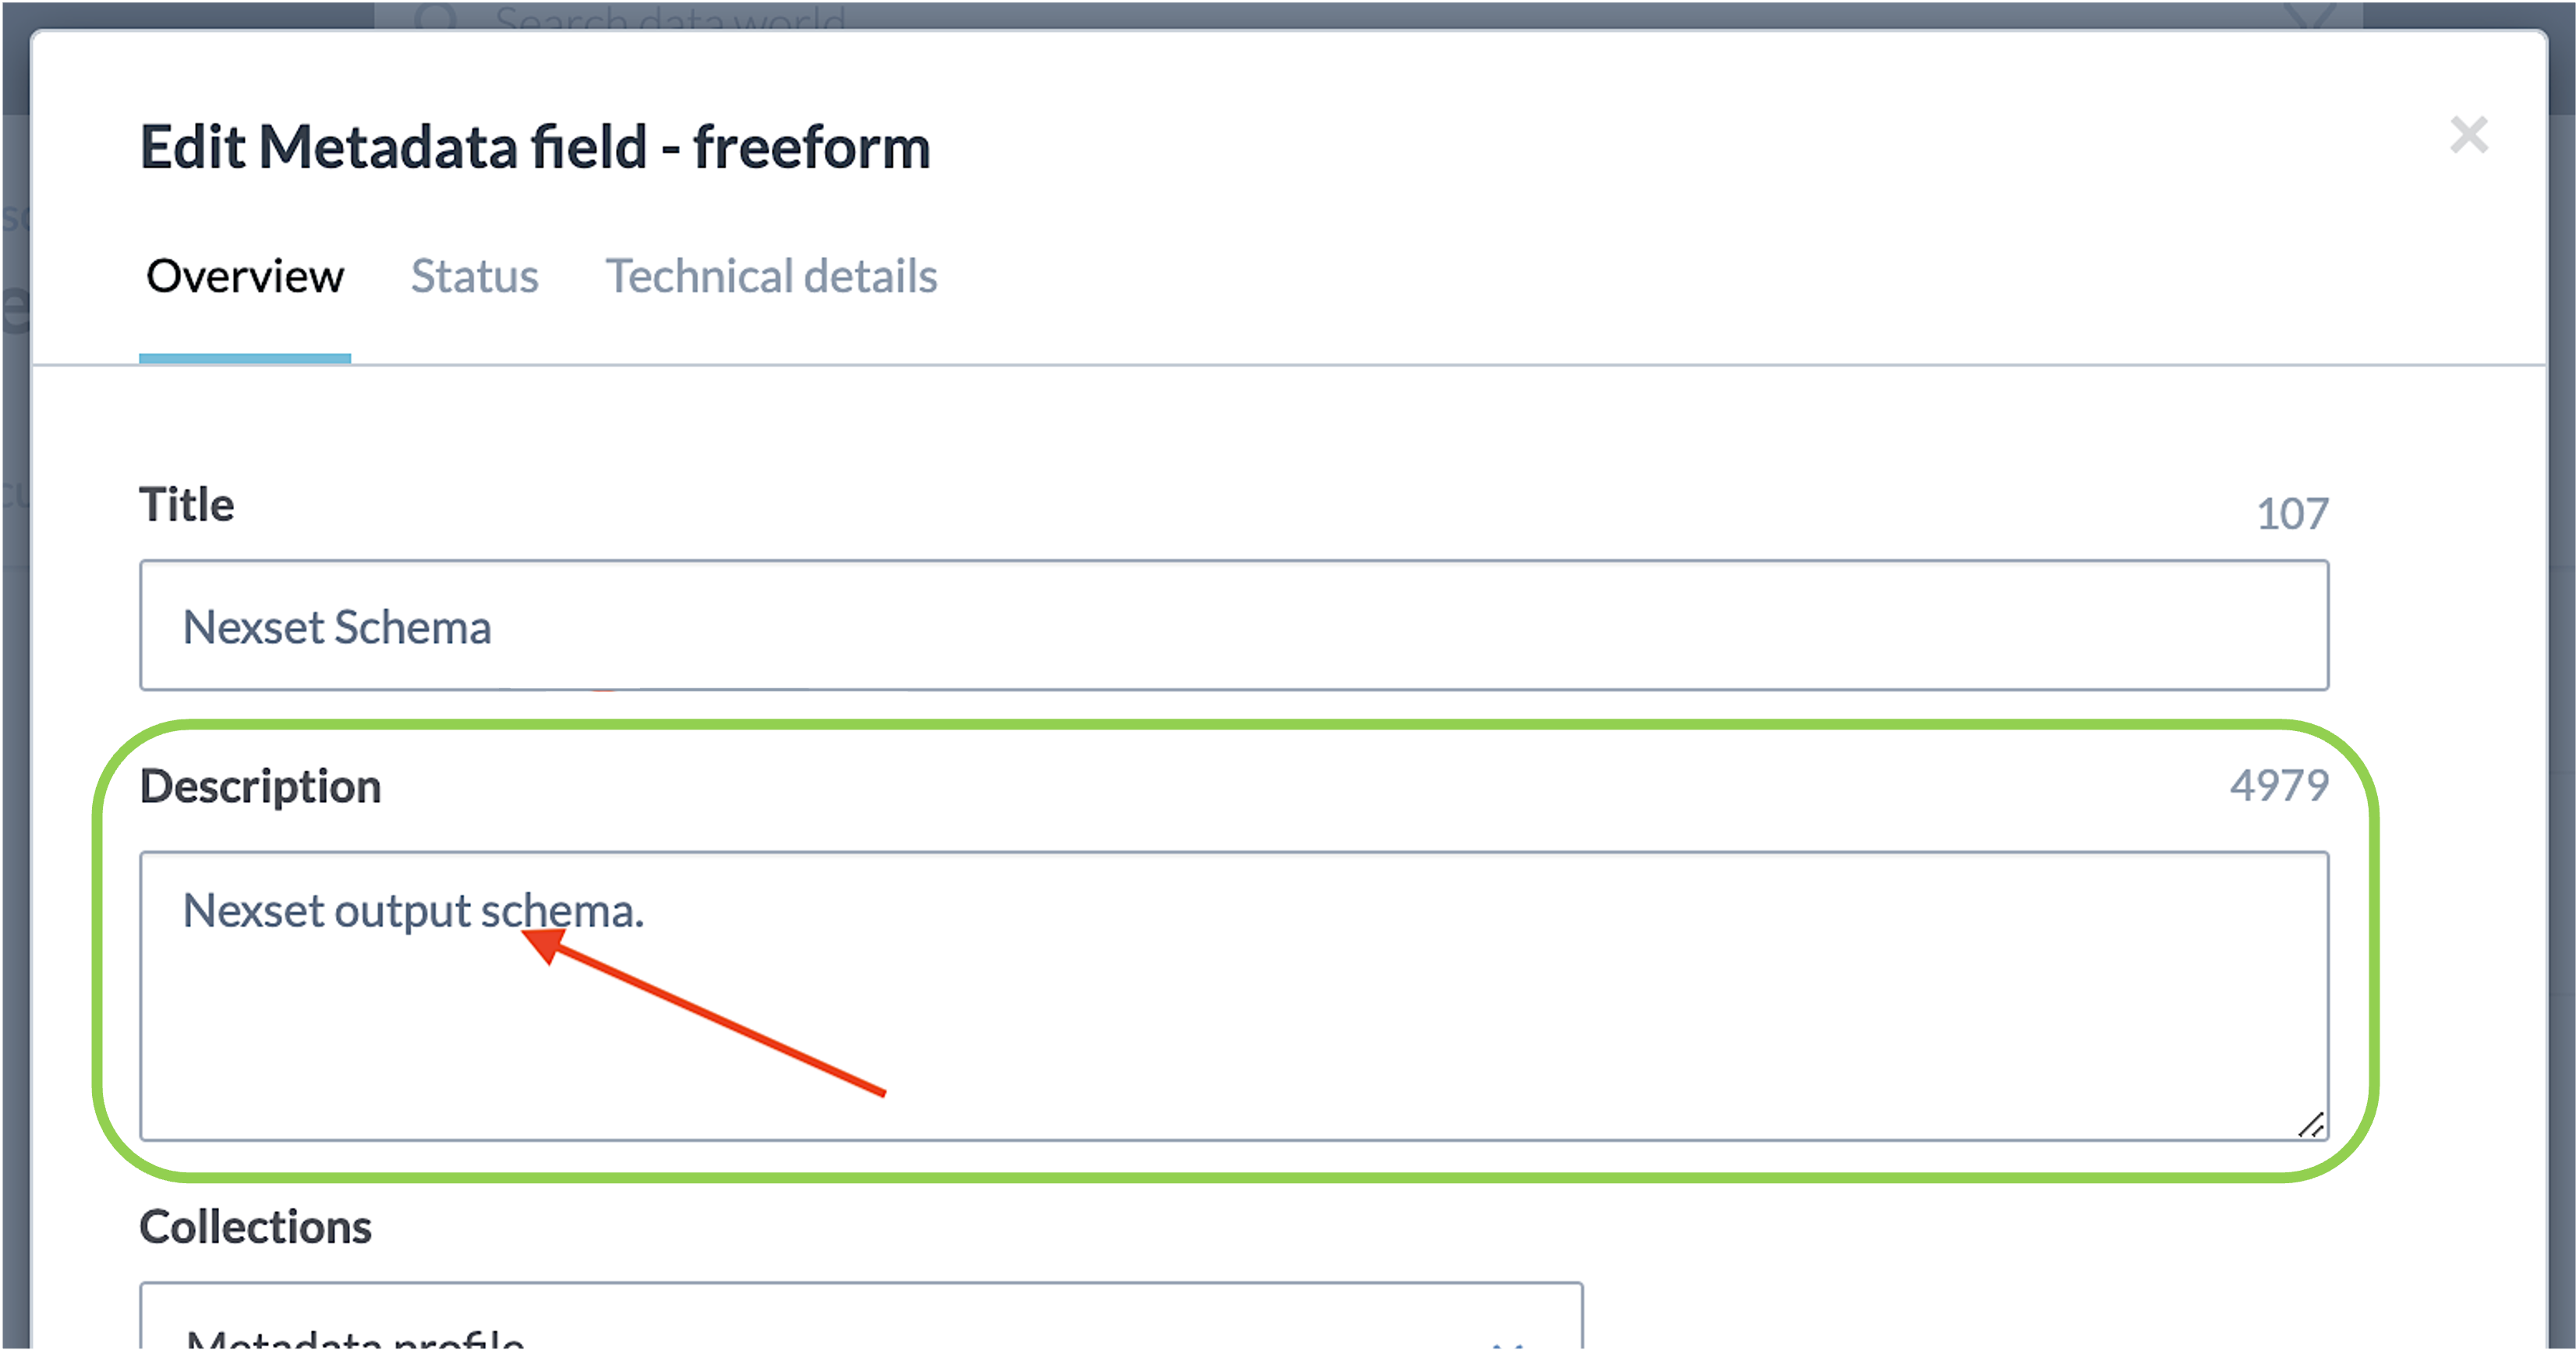
D. Create the Nexset Schema Metadata Field
The Nexset Schema metadata field will contain the schema of the Nexset.
-
In the Catalog Config Overview page, again click
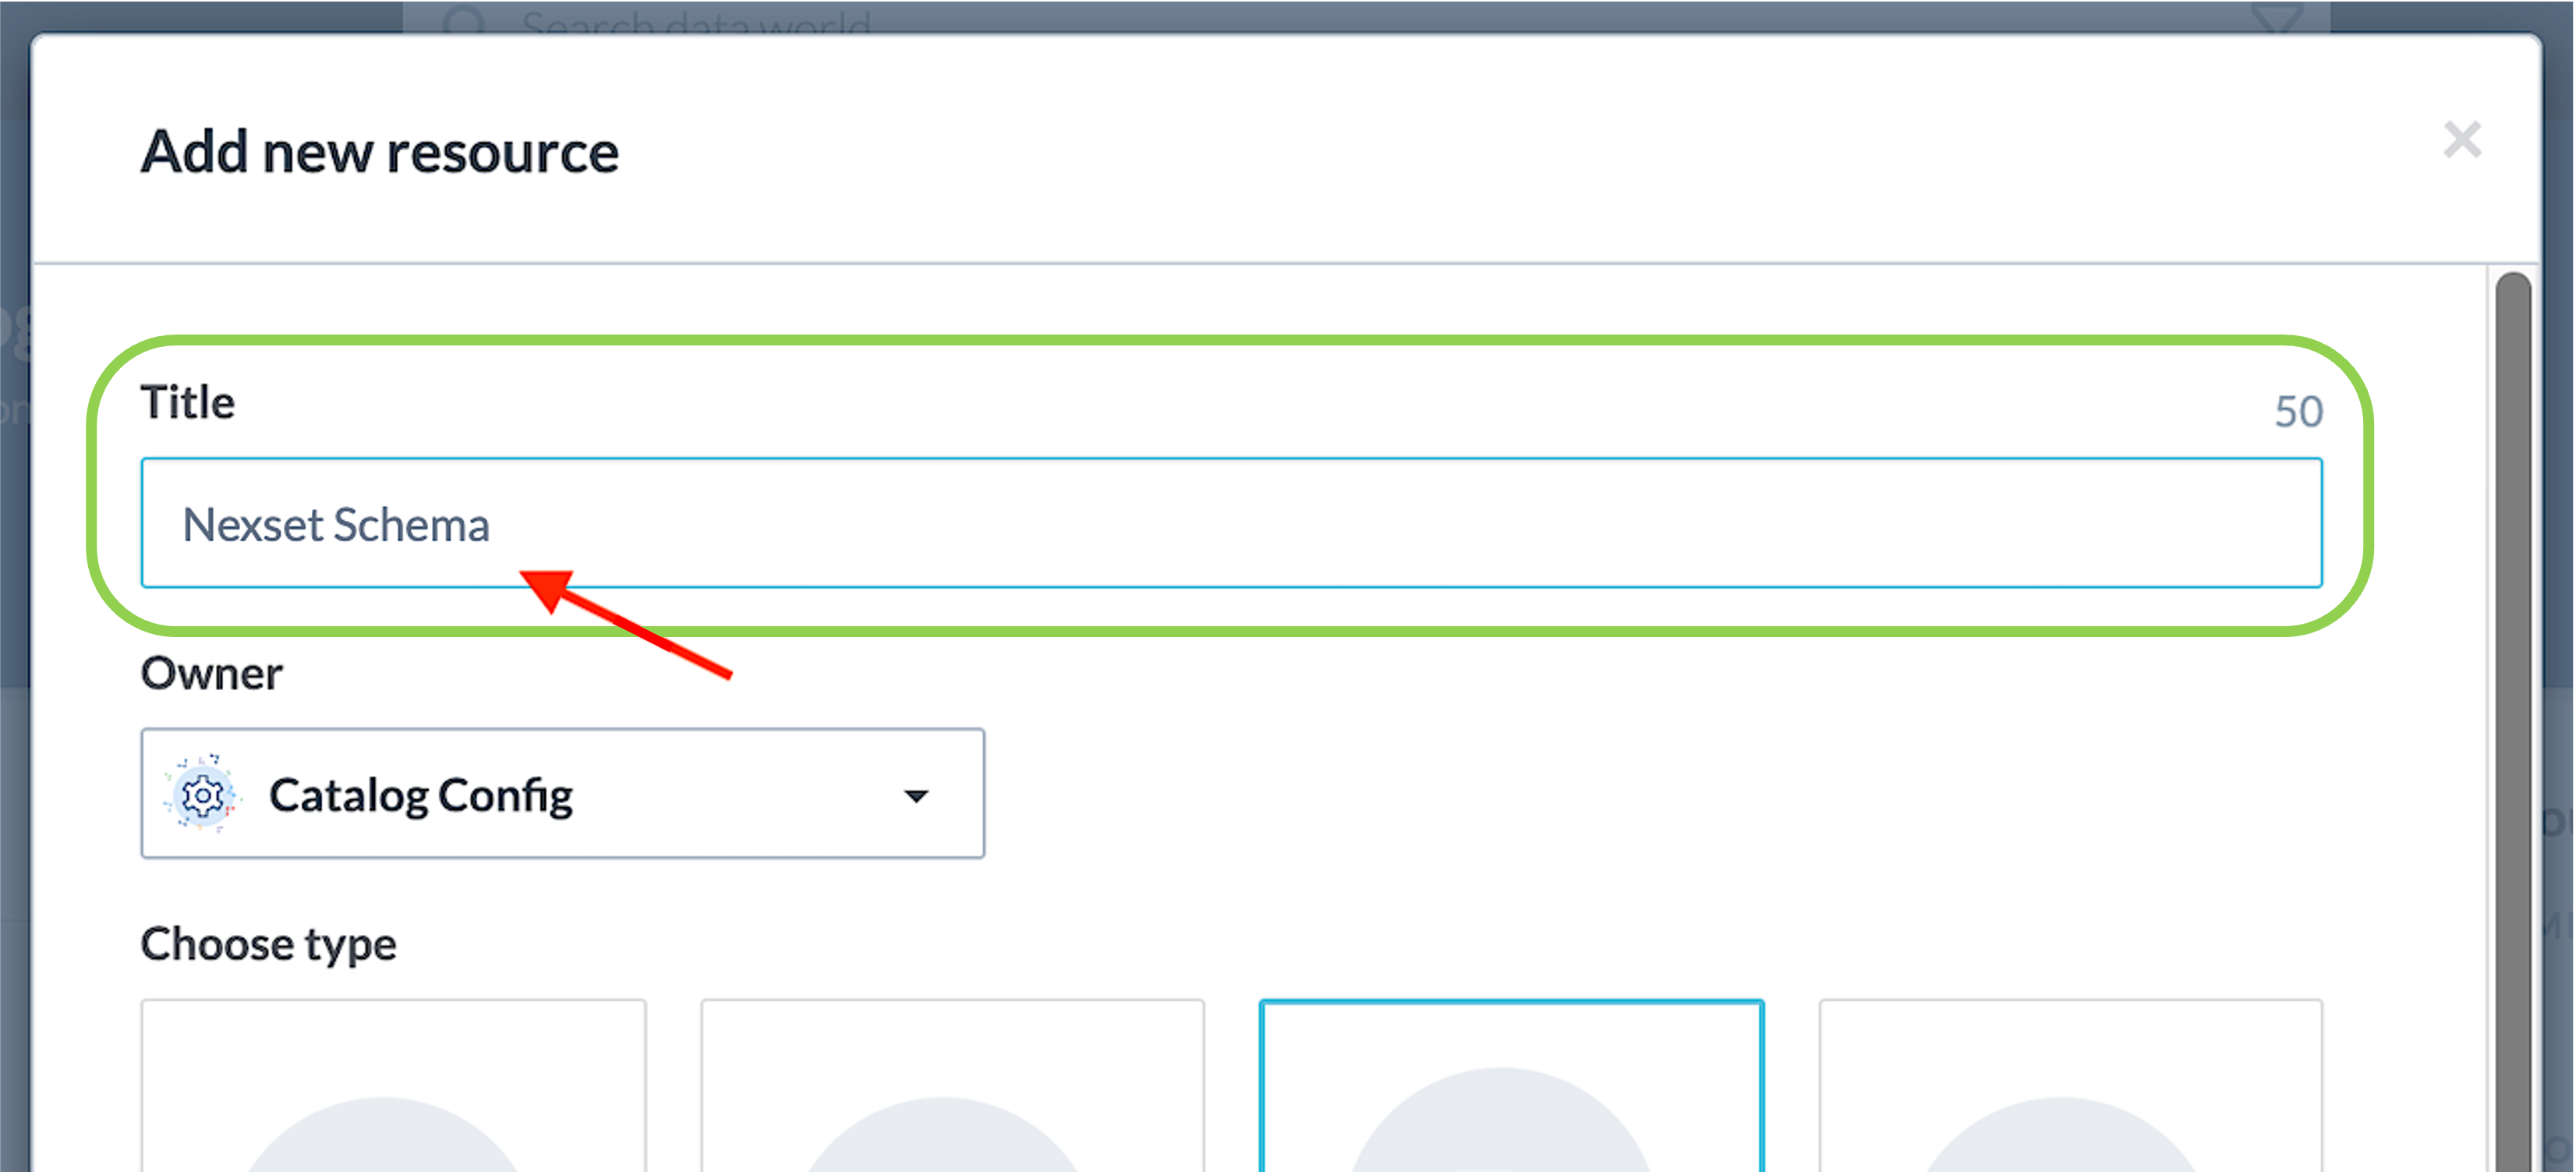
to open the resource creation menu, and select "Other Resources".This will open the "Add new resource" popup form.
-
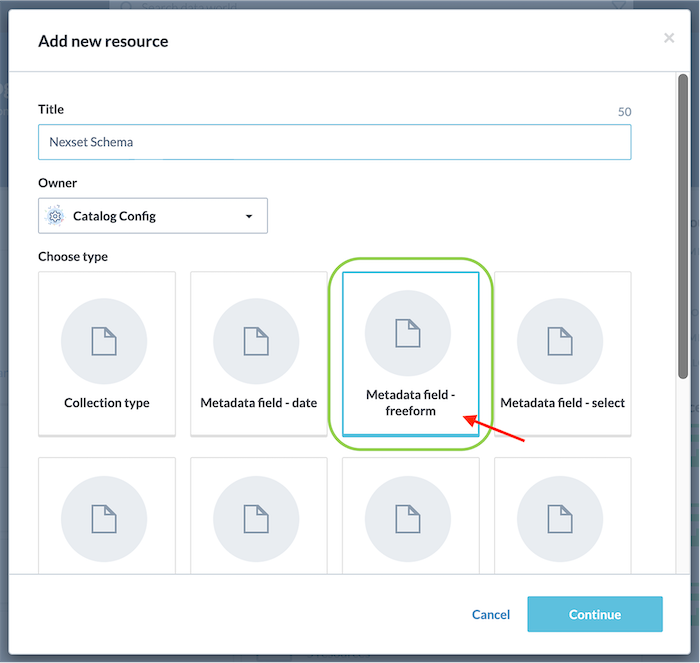
In the resource addition form, enter "Nexset Schema" in the Title field.
-
Under the Choose type heading, select "Metadata field - freeform".
-
Click
in the bottom right corner of the resource addition form to create the new resource.This will open the "Edit resource" popup form.
-
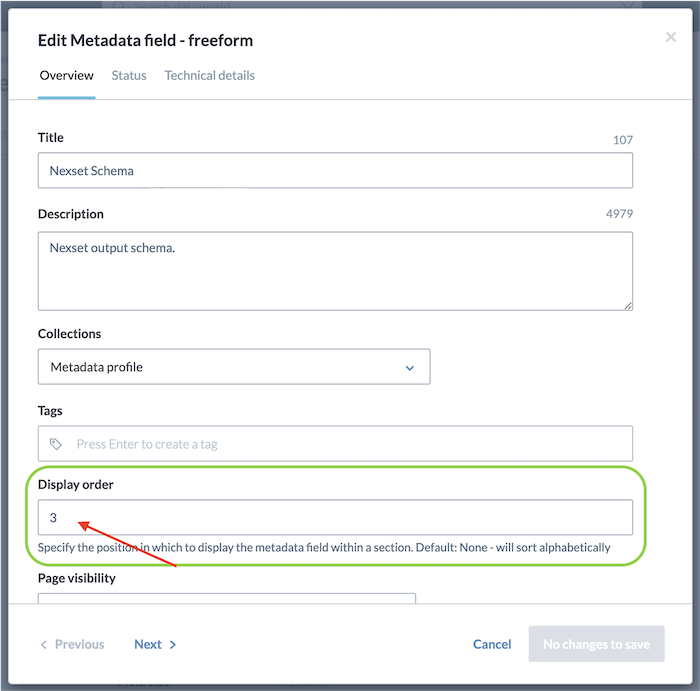
In the resource editing form, enter "Nexset output schema" in the Description field.
-
Enter "3" in the Display Order field.
-
Select "Accessible through API" from the External Access pulldown menu.
-
Select "Multiline" from the Field Size pulldown menu.
-
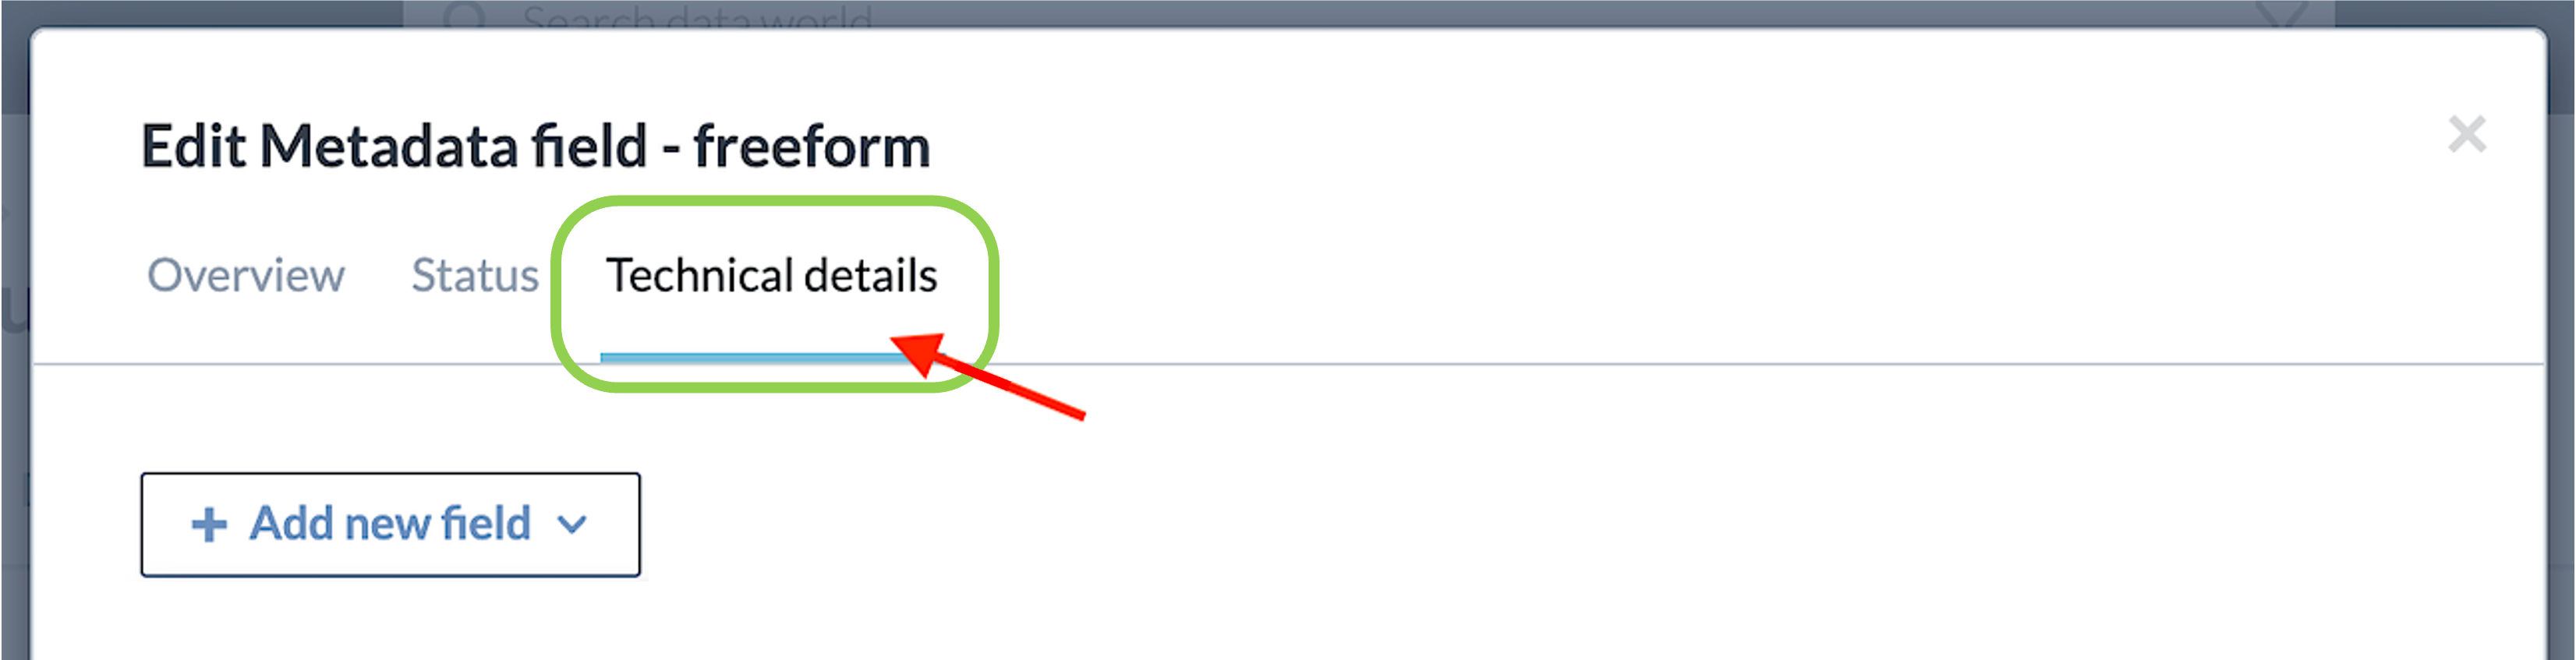
Select the Technical Details tab.
-
Click
 , and select "Presentation Template".
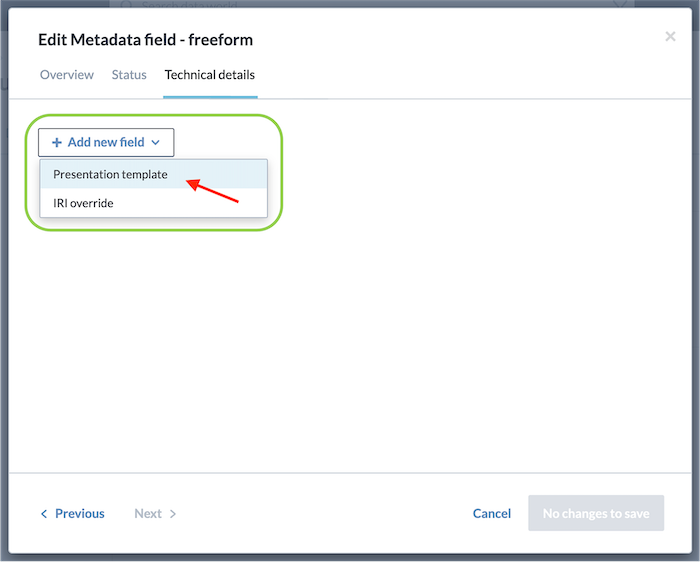
-
Enter
```{{$1}}}```in the Presentation Template input field.
-
Click "Save" in the bottom right corner of the resource editing form to save the settings.
-
In the Catalog Config Overview page, select Types, and locate the newly created Nexset Schema entity. This new entity will be linked to the Nexla Nexset type.
-
Select the Related tab.
-
Click
to add a new related resource. -
In the popup form, type and select "Nexla Nexset" in the Related Type field.
-
Ensure that "Uses this Metadata field" is populated in the Relationship Type field.
-
Click
to add the new relationship. -
Click "Save" in the bottom right corner of the popup form to save the settings.
The rule "Nexla Nexset uses Nexset Schema" has now been defined.
-
E. Create the Nexset Samples Metadata Field
The Nexset Samples metadata field will contain sample data from the Nexset.
-
In the Catalog Config Overview page, again click
to open the resource creation menu, and select "Other Resources".This will open the "Add new resource" popup form.
-
In the resource addition form, enter "Nexset Samples" in the Title field.
-
Under the Choose type heading, select "Metadata field - freeform".
-
Click
in the bottom right corner of the resource addition form to create the new resource.This will open the "Edit resource" popup form.
-
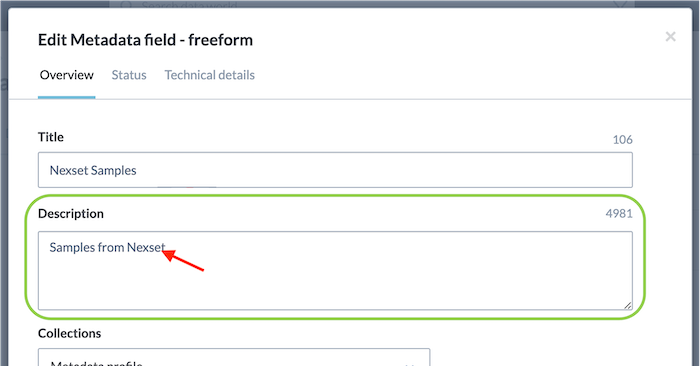
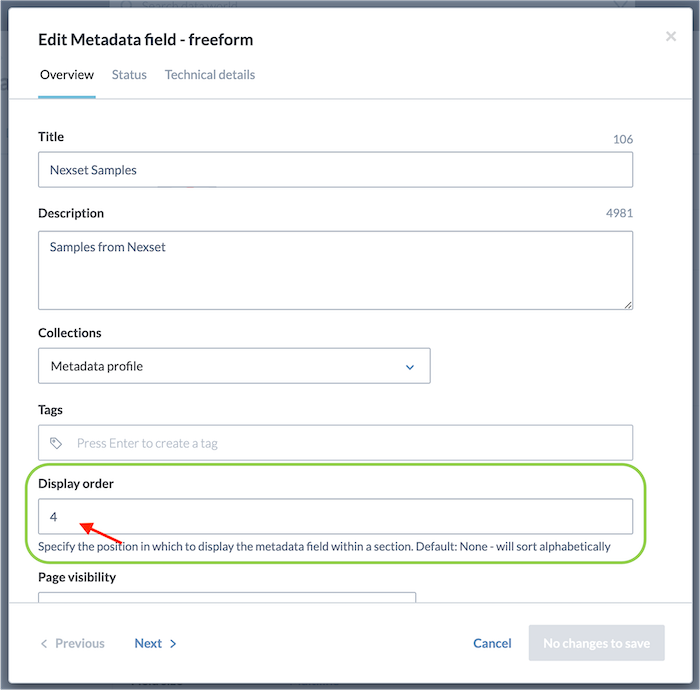
In the resource editing form, enter "Samples from Nexset" in the Description field.
-
Enter "4" in the Display Order field.
-
Select "Accessible through API" from the External Access pulldown menu.
-
Select "Multiline" from the Field Size pulldown menu.
-
Select the Technical Details tab.
-
Click
, and select "Presentation Template". -
Enter
```{{$1}}}```in the Presentation Template input field. -
Click "Save" in the bottom right corner of the resource editing form to save the settings.
-
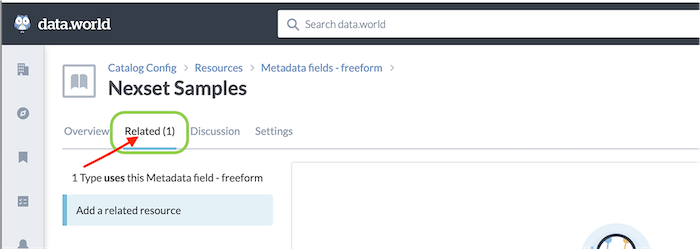
In the Catalog Config Overview page, select Types, and locate the newly created Nexset Samples entity. This new entity will be linked to the Nexla Nexset type.
-
Select the Related tab.
-
Click
to add a new related resource. -
In the popup form, type and select "Nexla Nexset" in the Related Type field.
-
Ensure that "Uses this Metadata field" is populated in the Relationship Type field.
-
Click
to add the new relationship. -
Click "Save" in the bottom right corner of the popup form to save the settings.
The rule "Nexla Nexset uses Nexset Samples" has now been defined.
-
F. Validate the Settings
Before applying the metadata profiles to the desired organization, these steps will ensure that all relationships and fields have been properly configured.
Ensure that the names of each property exactly match the listings below.
-
In the Catalog Config Overview page, select Types.
-
Locate and select Nexla Nexset in the displayed list view.
-
In the Nexla Nexset detail page, select the Related tab.
-
In the displayed table, ensure that 1 entry is listed with the resource type "is a parent of".
-
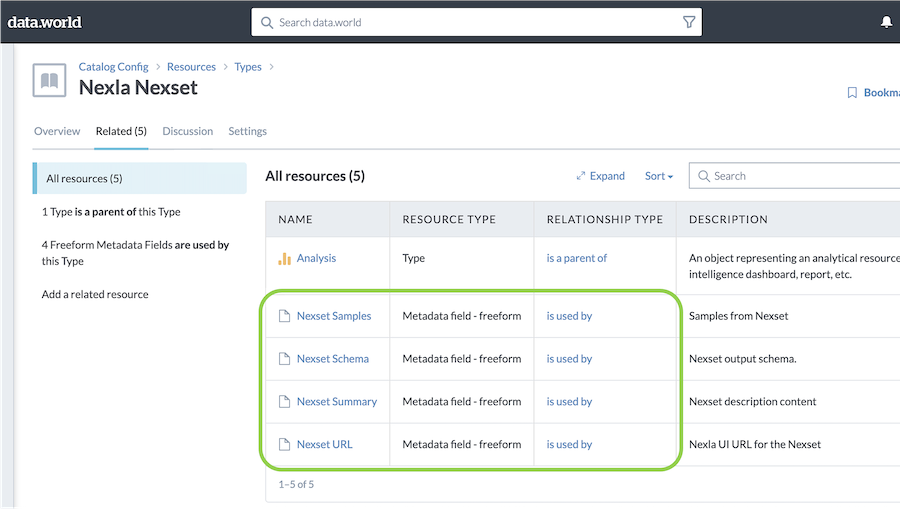
Ensure that 4 entries are listed for each of the following resource types:
- Nexset URL is used by
- Nexset Summary is used by
- Nexset Schema is used by
- Nexset Samples is used by
1.2 data.world: Apply the Metadata Profiles to the Organization
In this section, the newly created metadata fields will be applied to the organization in which Nexsets will be created.
The steps in this section must be performed in the data.world UI by a data.world administrator.
Important Note: In the example in this sequence, the changes will be applied to the Catalog Sandbox organization. When following these instructions, replace Catalog Sandbox with the desired organization.
-
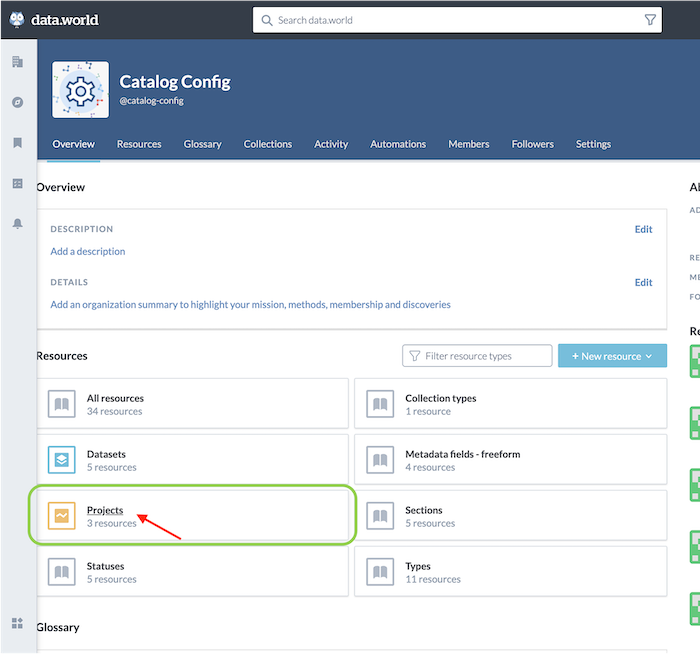
In the Catalog Config organization, select Projects.
-
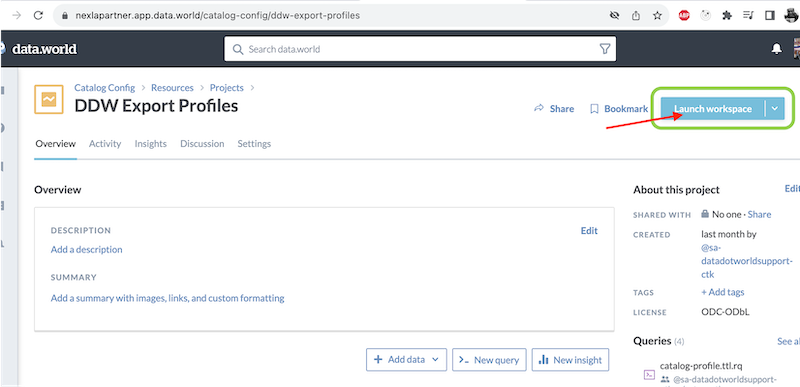
Select the DDW Export Profiles project.
DDW Export Profiles is the project used to export metadata profiles to different organizations.
-
In the Project screen, click
 .
.
-
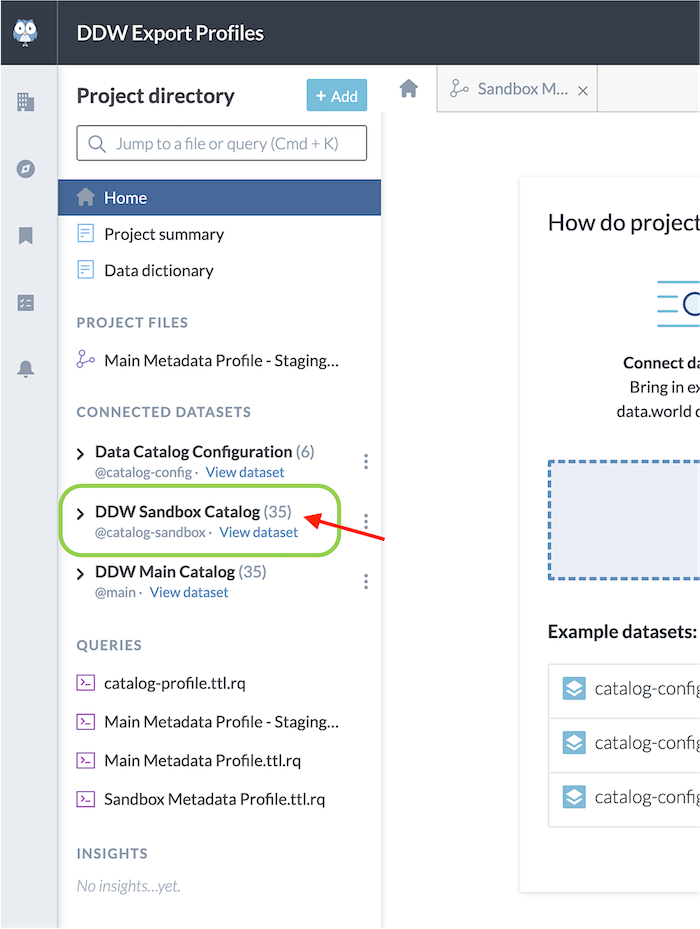
In the Project Directory editor, expand the categories Connected Datasets > DDW Sandbox Catalog.
Replace "DDW Sandbox" with the organization in which Nexsets will be created.
-
In the expanded view, locate and click on the Metadata Profile.ttl file.
In the example image below, the this file is titled Sandbox Metadata Profile.ttl.

-
Click
 on the top right side of the screen.
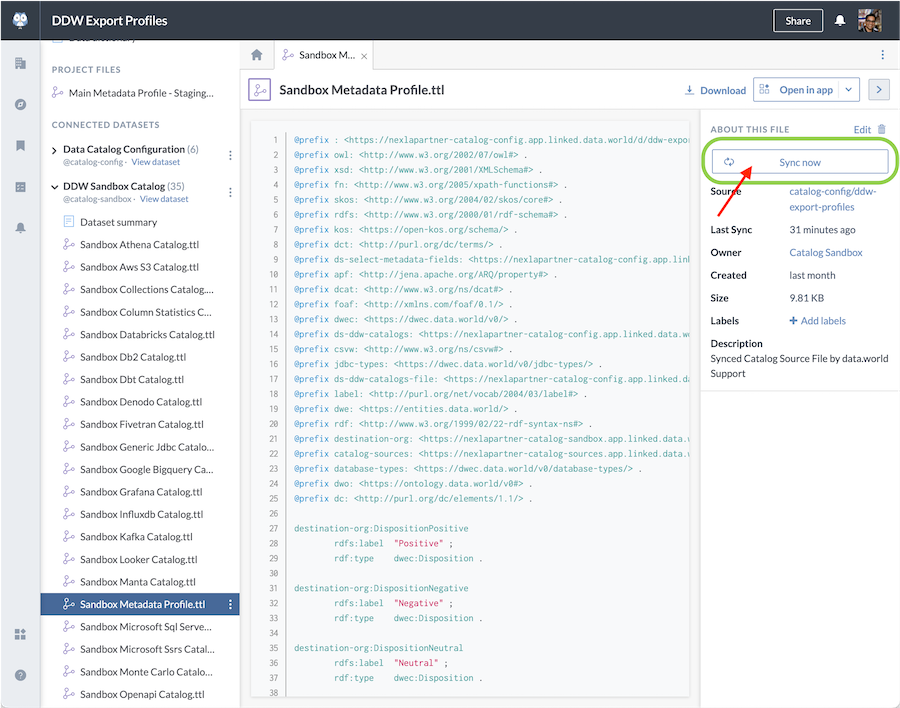
-
Verify that the settings were correctly applied by navigating to the Overview page of the organization and confirming that a Nexla Nexset tile is now displayed in the resource list.
1.3 data.world: Create a Service Account in the Organization
In this section, a Service Account for authentication will be created in the organization in which Nexsets will be created.
The steps in this section must be performed in the data.world UI by a data.world administrator.
Important Note: In the example in this sequence, the service account will be created in the Catalog Sandbox organization. When following these instructions, replace Catalog Sandbox with the desired organization.
-
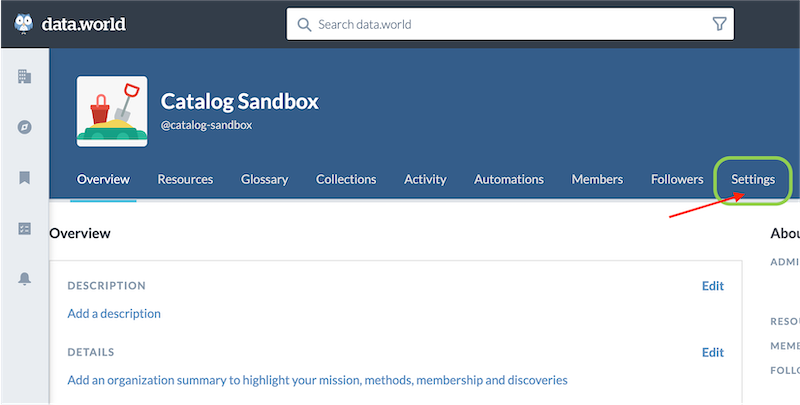
On the Catalog Sandbox account Overview page, select the Settings tab.
-
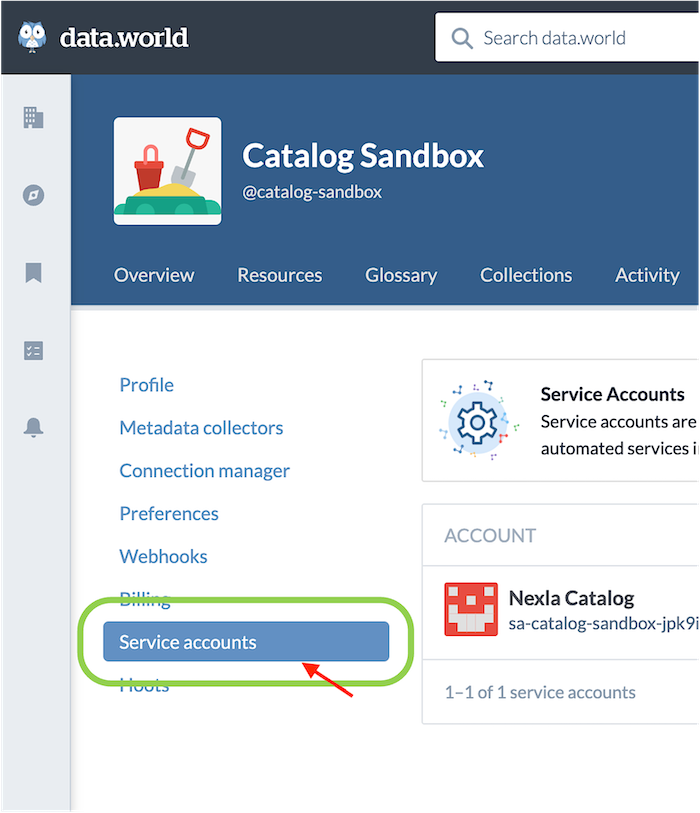
Select Service Accounts from the menu on the left.
-
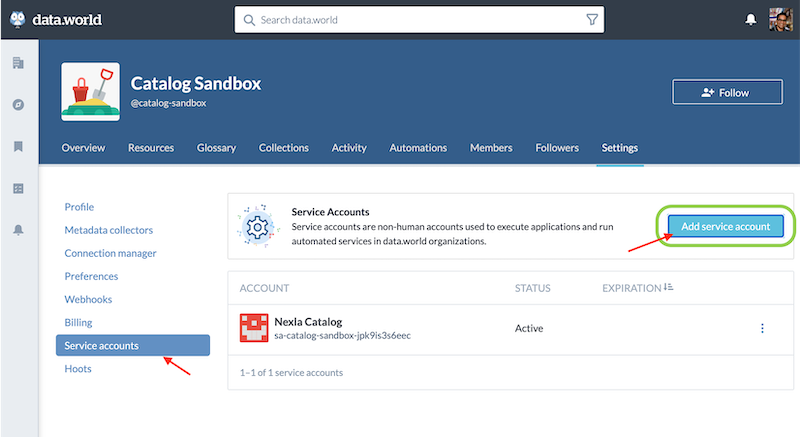
Click the
 button.
This will open the "Create a new service account" popup form.
-
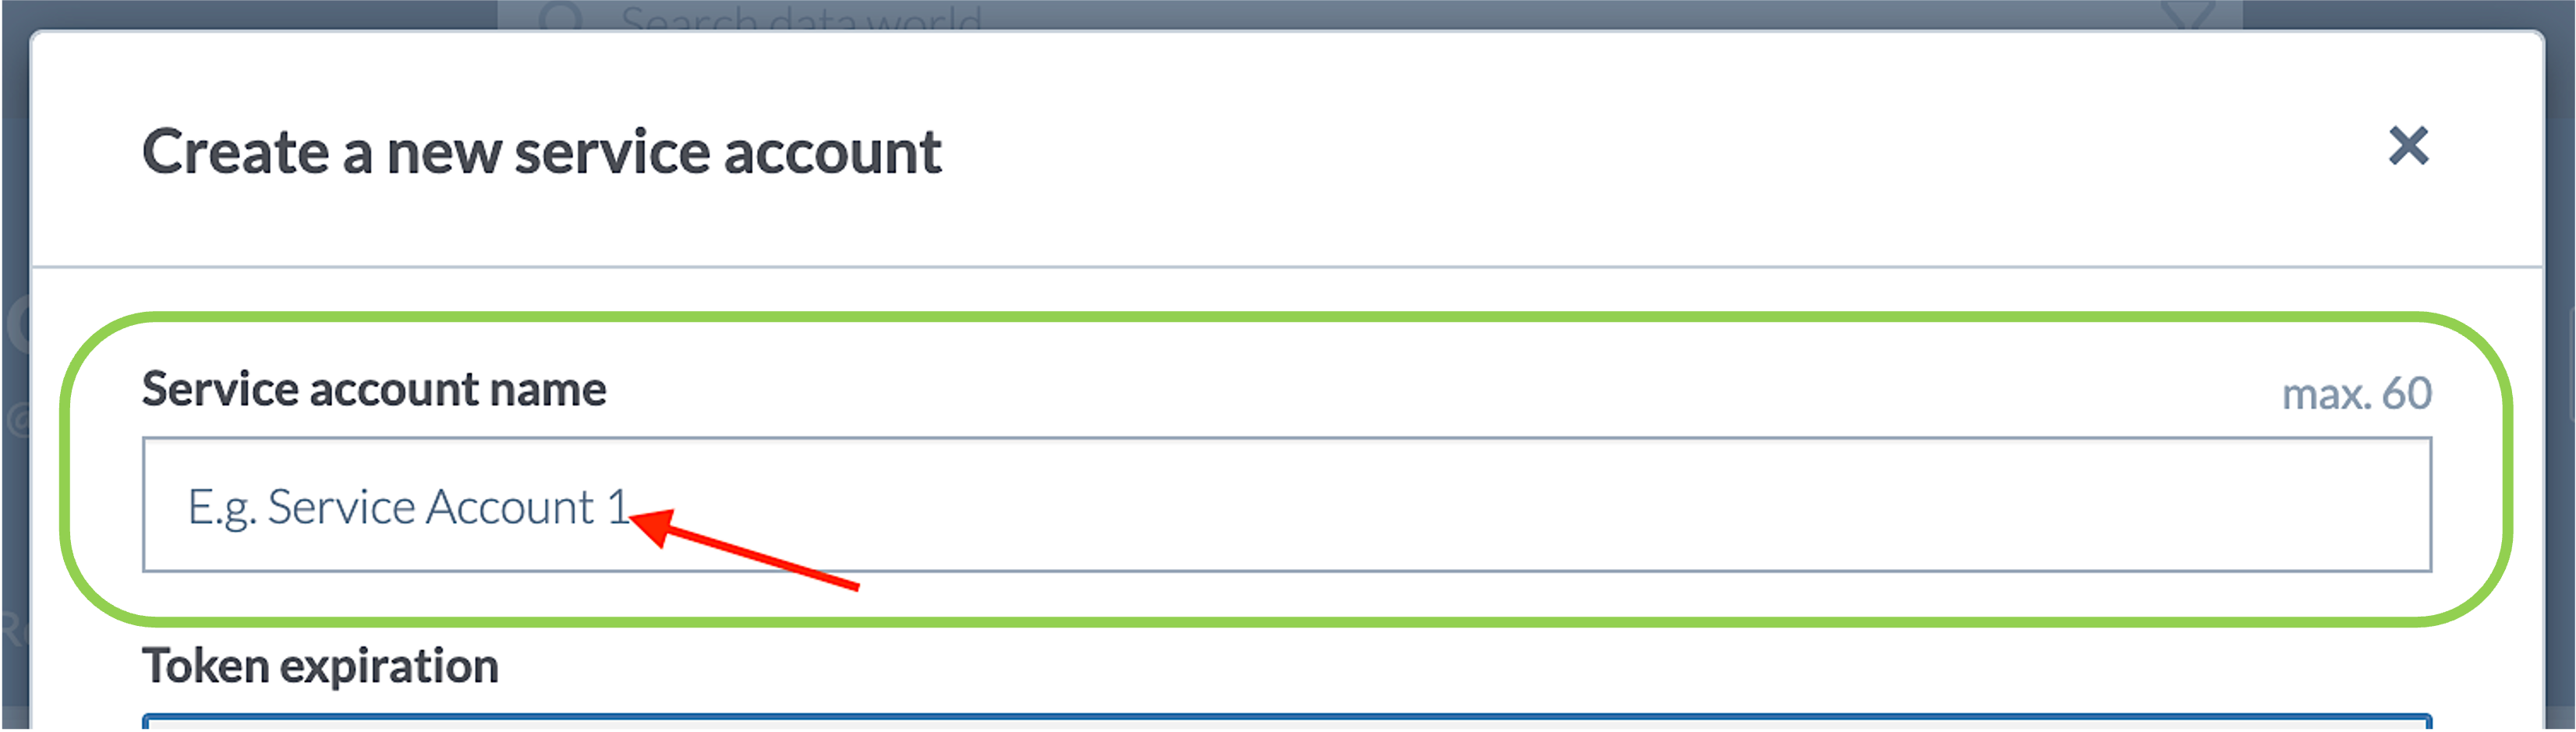
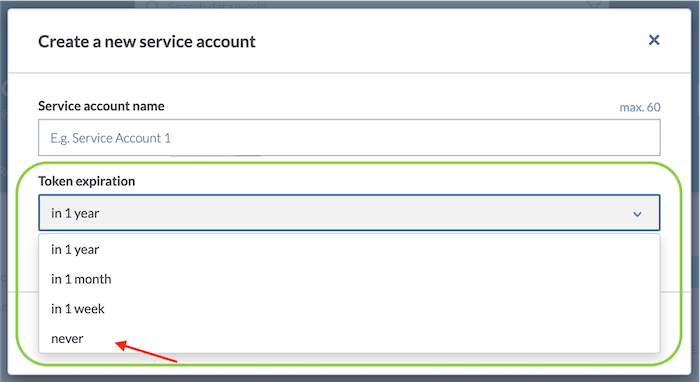
In the service account creation form, enter a meaningful name for the service account in the Service Account Name field.
The recommended name is Nexla Nexset Integration Service Account.
-
Select the expiration date for the service account from the Token Expiration pulldown menu.
Setting the expiration date to never is recommended.
-
Click "Save" to save the generated token.
This token will be used to configure the app integration in the Nexla UI.
1.4 data.world: Create a Collection in the Organization
In this section, a new Collection that will be used to group all Nexsets will be created in the organization.
The steps in this section must be performed in the data.world UI by a data.world administrator.
Important Note: In the example in this sequence, the collection will be created in the Catalog Sandbox organization. When following these instructions, replace Catalog Sandbox with the desired organization.
-
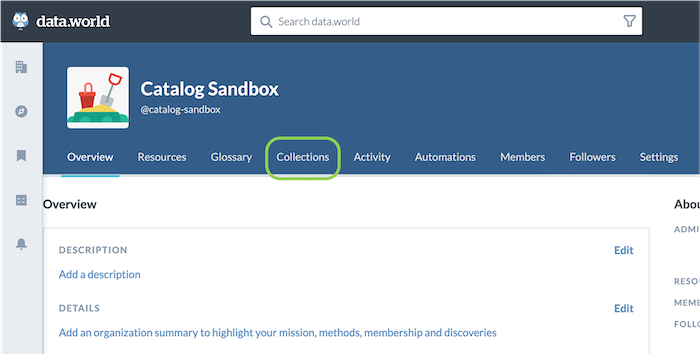
On the Catalog Sandbox account Overview page, select the Collections tab, and click New.
This will open the "Create new collection" popup form.
-
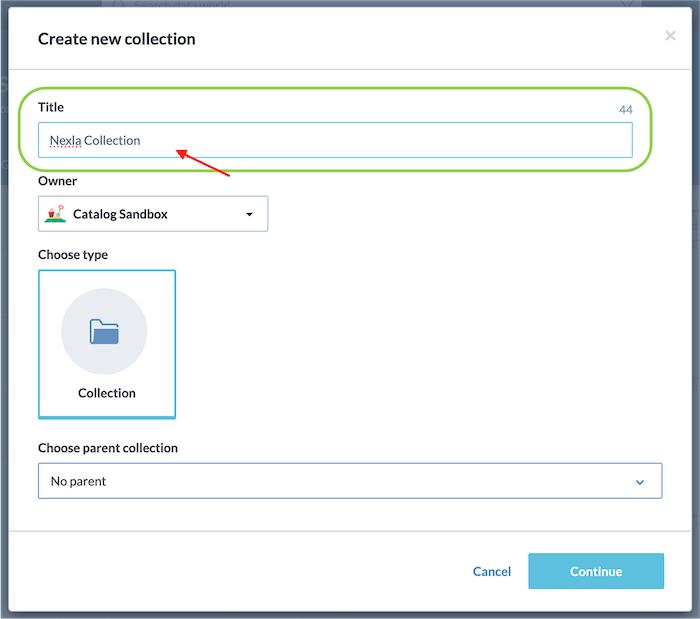
In the collection addition form, enter a name for the collection in the Title field.
The recommended collection name is Nexla Collection.
-
Click
in the bottom right corner of the collection addition form to create the new collection.
1.5 data.world: Collect Information for Nexla UI Setup
The steps in this section must be performed in the data.world UI by a data.world administrator.
Note the following information from the data.world app for use in setting up app integration in the Nexla UI (Sections #-#):
- Name of the organization in which Nexsets will be created – In this tutorial, the organization name is Catalog Sandbox.
- Name of the collection created in Section 1.4 – In this tutorial, the collection name is Nexla Collection.
- Name of the Analysis resource type created in Section 1.1A – In this tutorial, the Analysis resource name is Nexla Nexset.
- Token for the service account created in Section 1.3
1.6 Nexla: Create a data.world Credential
The steps in this section must be performed in the Nexla UI by a Nexla administrator.
-
Log into Nexla as an organization administrator.
-
Select
 from the toolbar on the left.
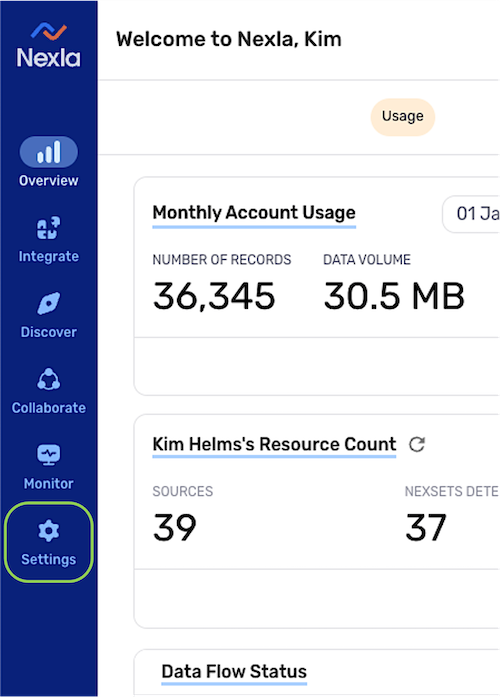
-
Select
 from the Settings toolbar.
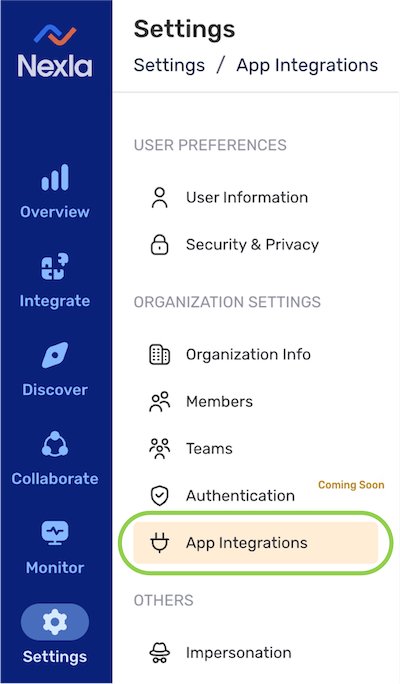
-
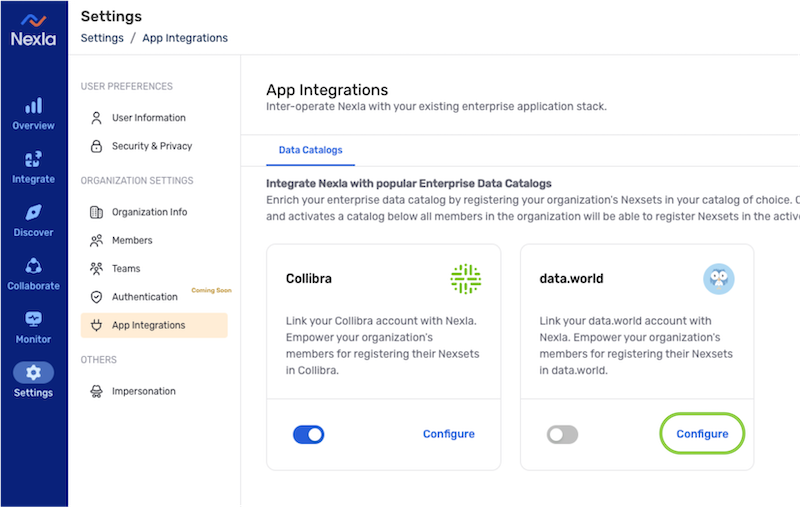
Click
 on the data.world tile under Data Catalogs. This will open a configuration drawer on the right.
This will open an app integration configuration drawer on the right.
-
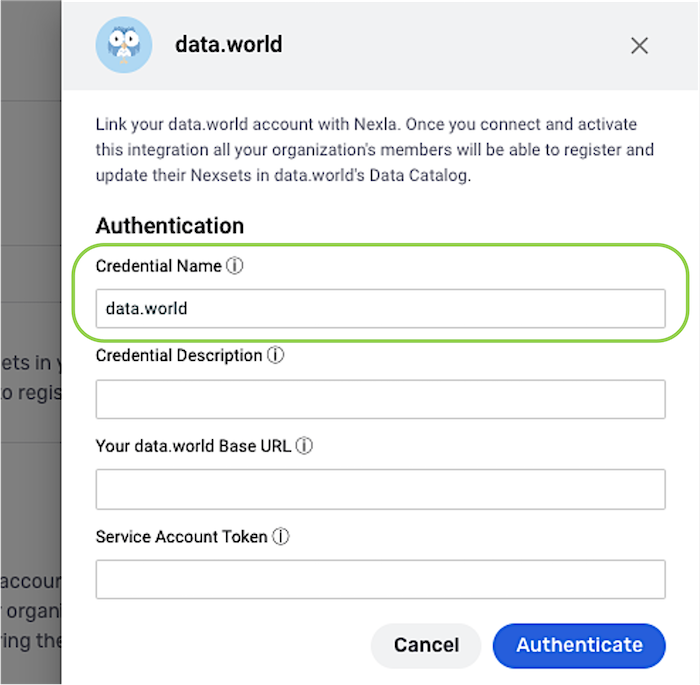
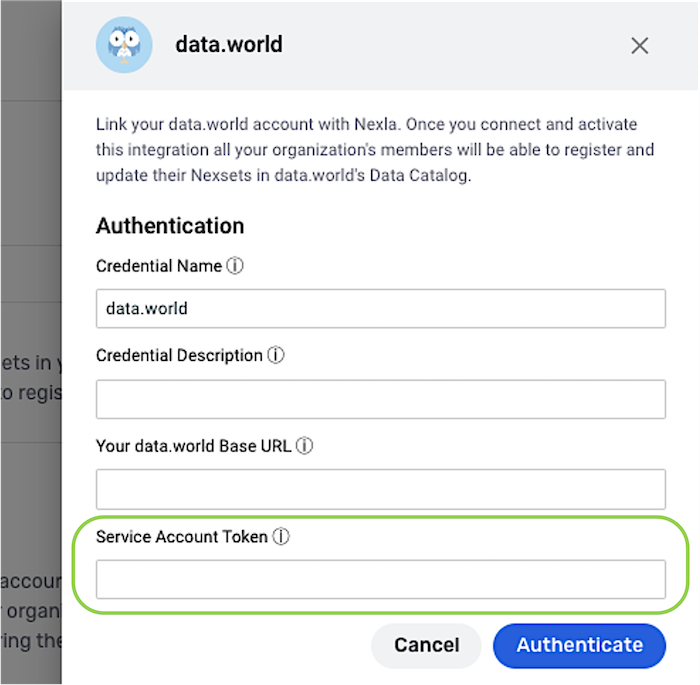
In the configuration drawer, under the Authentication heading, enter the following information:
-
Enter a meaningful credential name for bookkeeping in the Credential Name field.
-
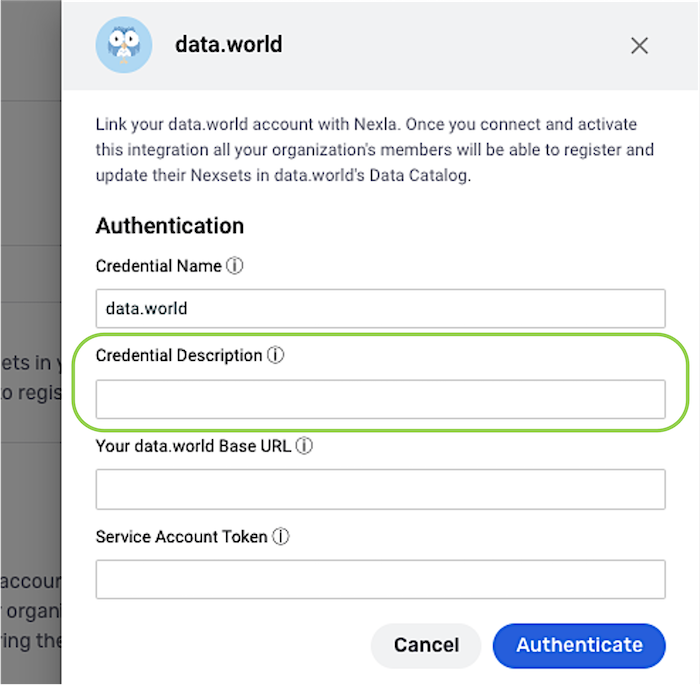
Enter a meaningful short description of the credential in the Credential Description field.
-
Enter the main URL of the data.world installation with which Nexla will be integrated in the Your data.world Base URL field.
The base URL can be found in the browser URL upon logging into data.world—for example,
https://nexlapartner.app.data.world.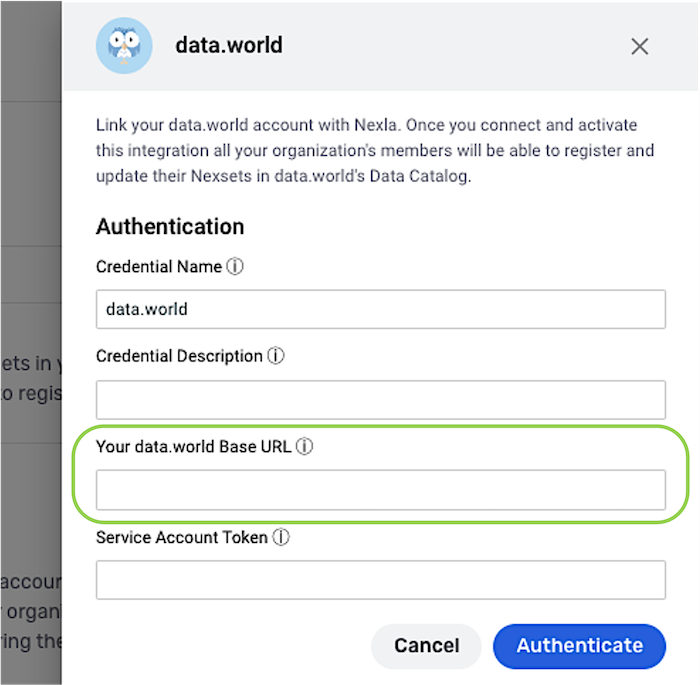
-
Enter the data.world service account token saved in Section 1.5 in the Service Account Token field.
-
-
Click
 to authenticate the credential information.
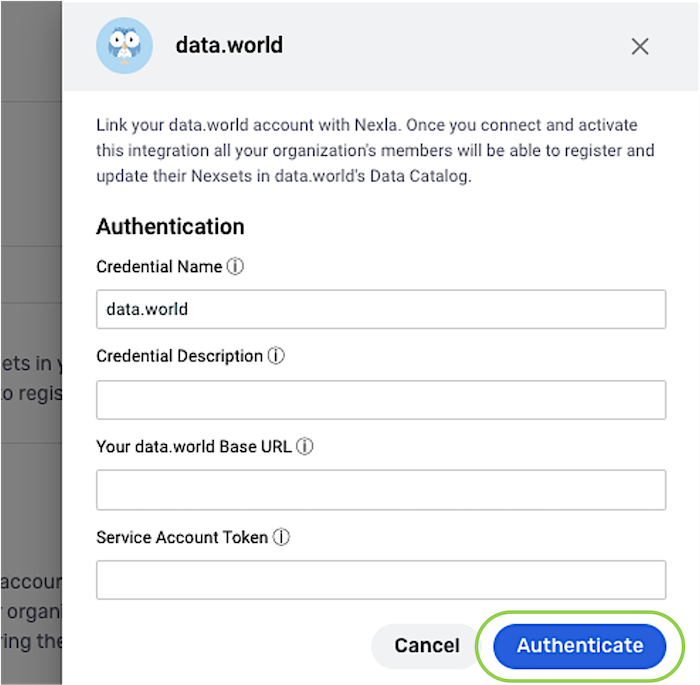
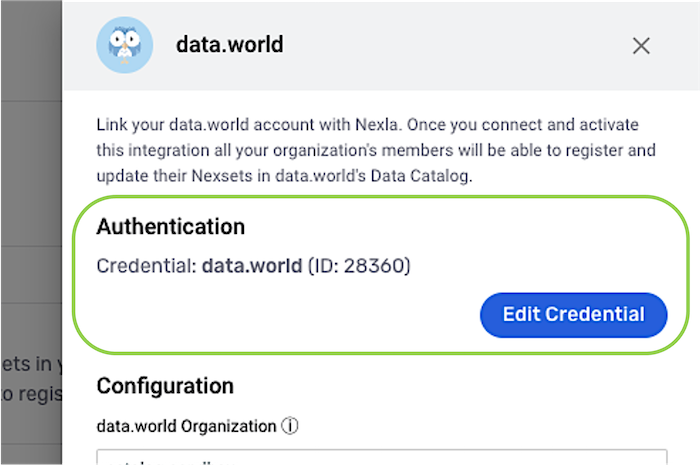
-
If the entered information is correct, authentication should result in the creation of a new credential with name and description entered in the previous step, along with a button providing the option to edit the credential.
-
1.7 Nexla: Configure data.world Metadata Properties
The steps in this section must be performed in the Nexla UI by a Nexla administrator.
-
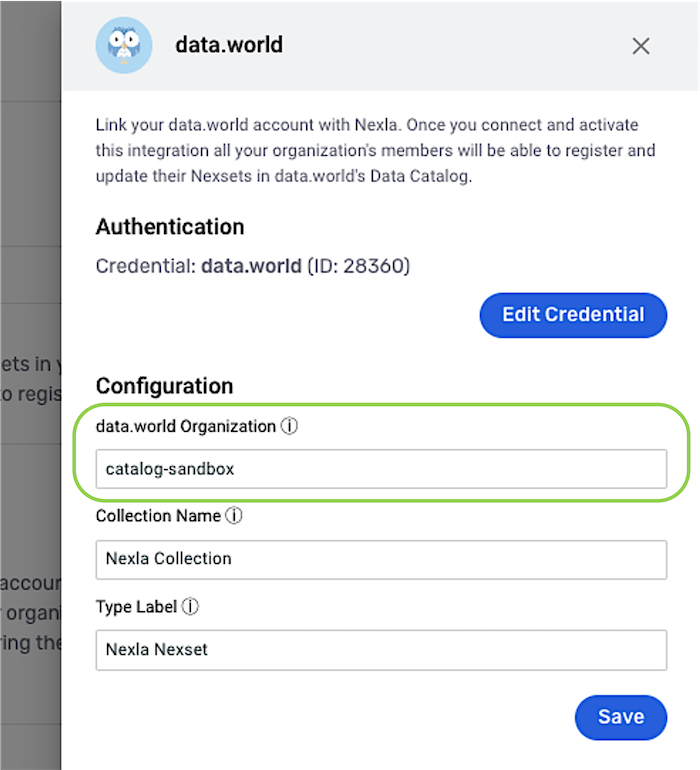
Under the Configuration heading in the configuration drawer, enter the name of the organization to which metadata was applied in Section 1.2 in the data.world Organization field.
-
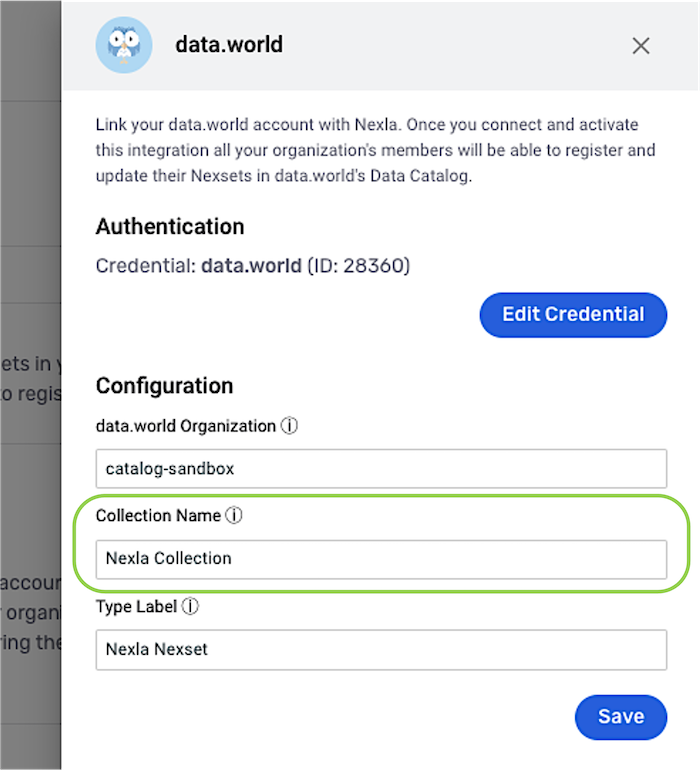
Enter the name of the collection created in Section 1.4 in the Collection Name field.
-
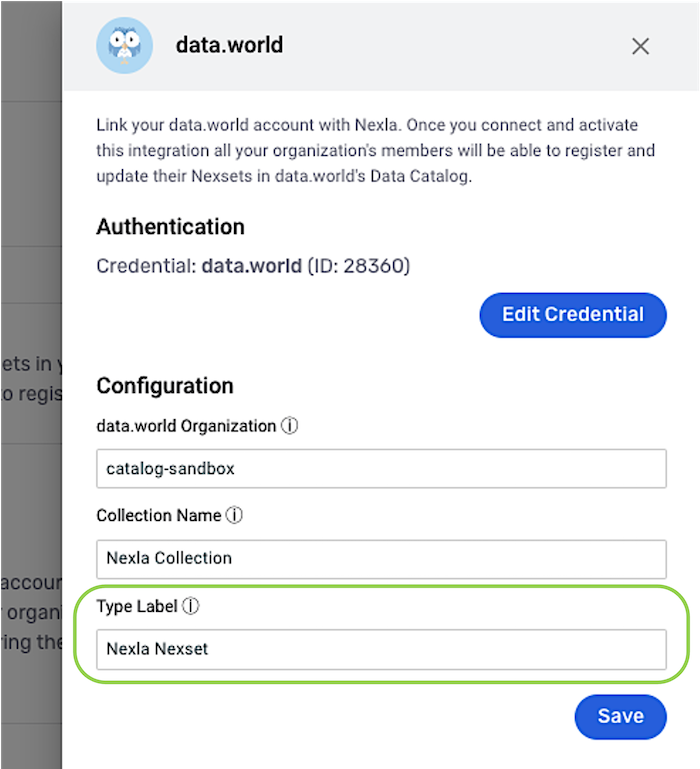
Enter the title of the metadata analysis type created in Section 1.1A in the Type Label field.
-
Click
 to save the configuration settings.
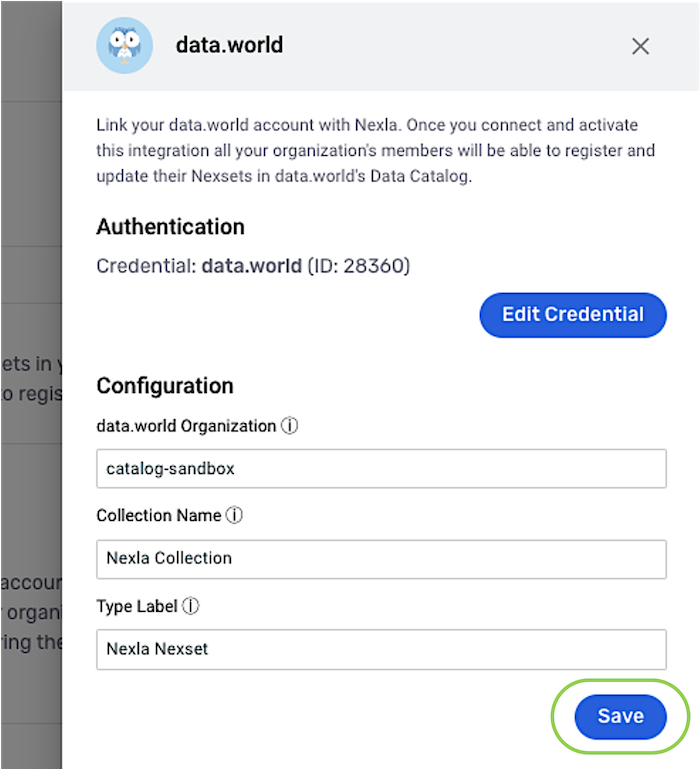
1.8 Nexla: Activate and Validate the Integration
The steps in this section must be performed in the Nexla UI by a Nexla administrator.
-
Click the
 in the top right corner of the configuration drawer to close it.
 -
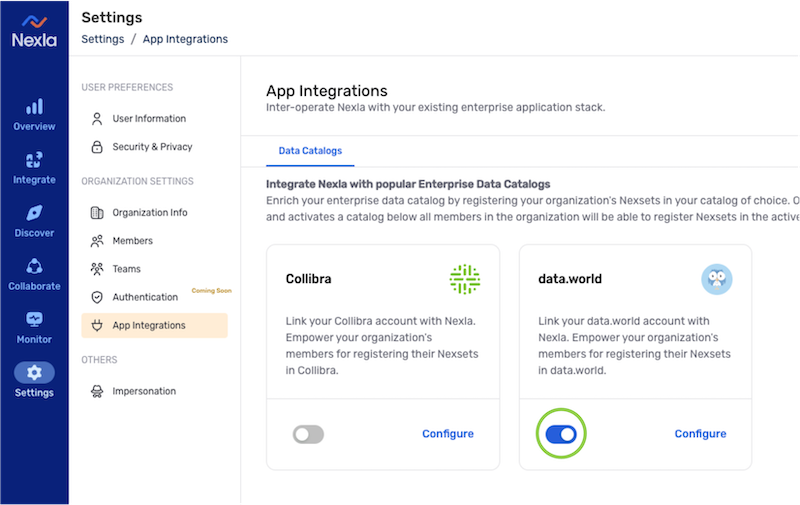
Turn on the toggle switch on the data.world tile to activate data.world app integration for the Nexla account.
data.world integration with the Nexla account can be paused at any time by turning off this switch.
-
To validate that data.world integration is active, complete the steps in Section 2, and ensure that the Nexsets are registered and visible in data.world.
2. Register a Nexset in the Connected data.world Account
Once the organization administrator has configured and activated the App Integration for data.world, all organization members will be able to register their Nexsets to data.world.
-
Click the
 icon on a Nexset to view the Nexset information drawer.
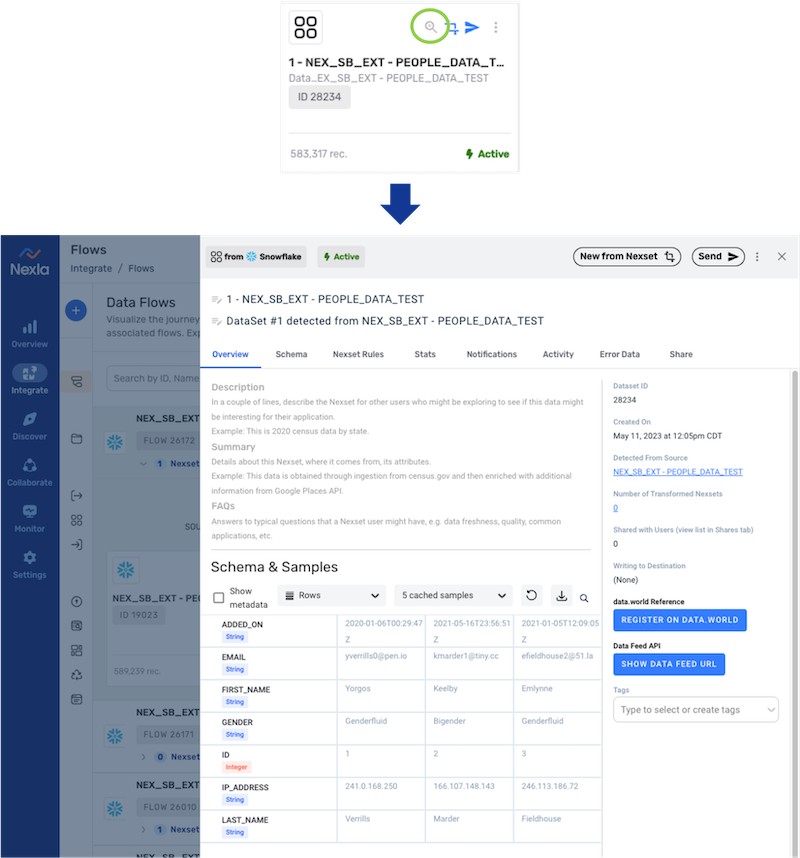
-
Click
 to begin registering the Nexset on data.world.
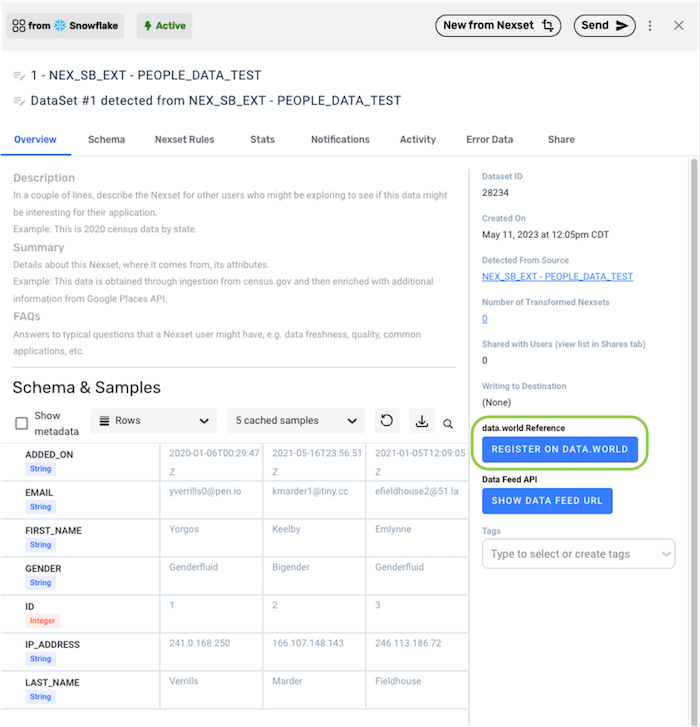
-
Registration may take a moment to complete. Click the
 icon next to the registration button to view the registration progress.
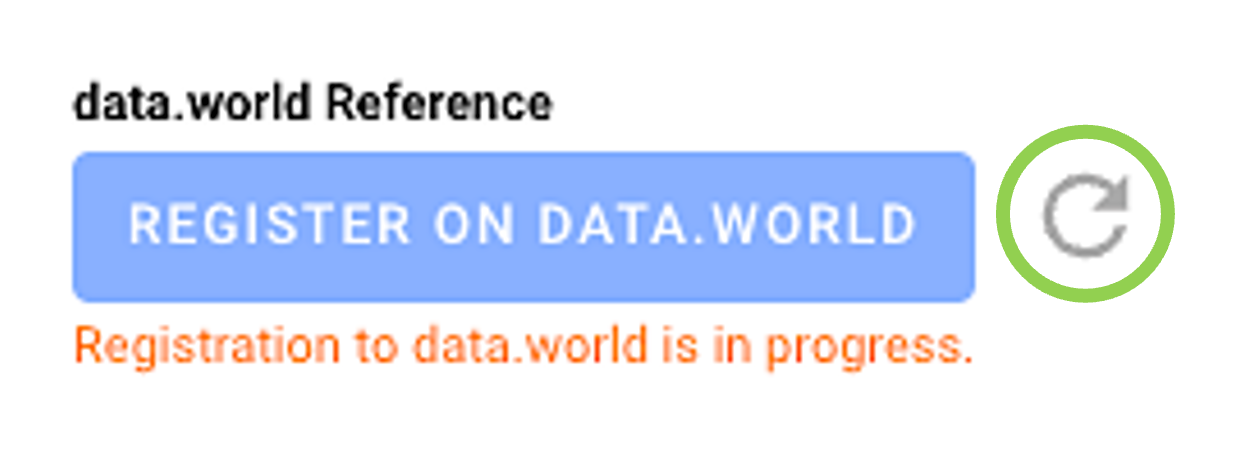
-
-
Once registration is complete, a link to the data.world resource corresponding to the registered Nexset will be displayed.
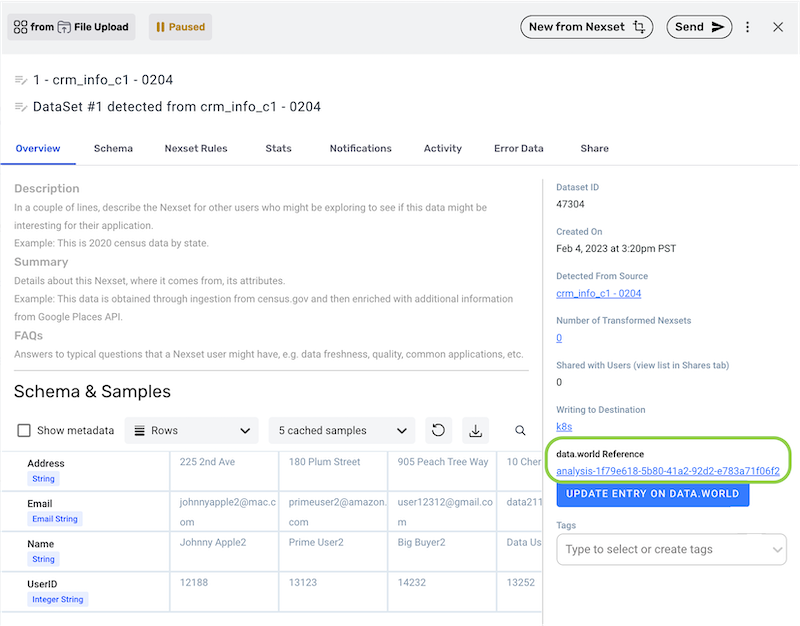
-
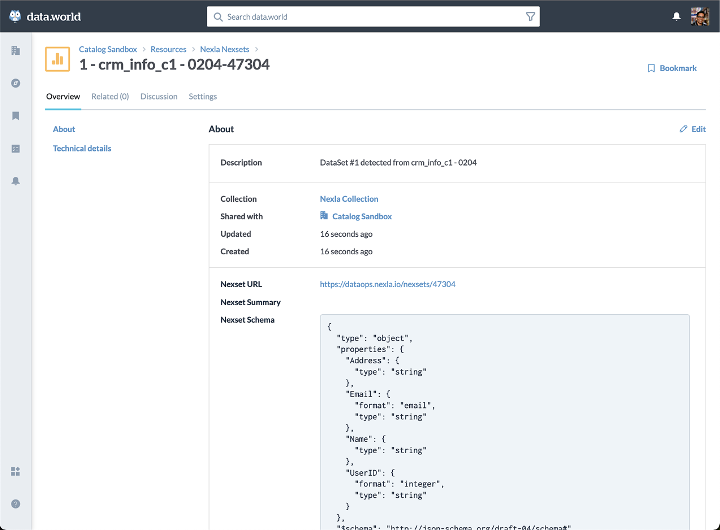
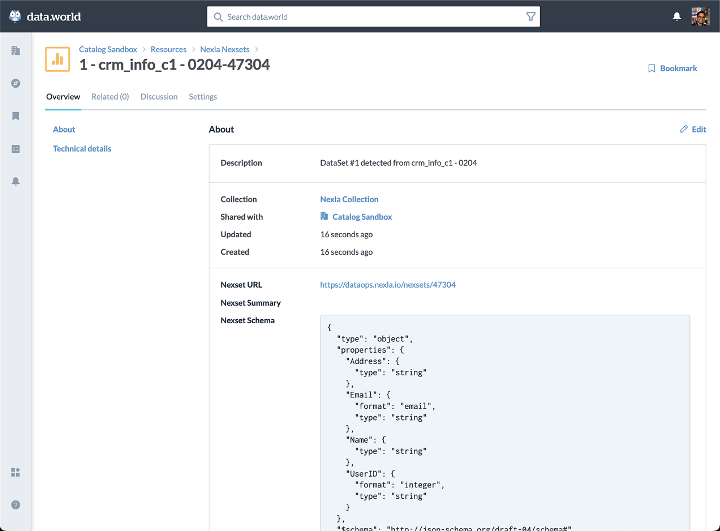
Click the provided link to launch and view the Nexset in data.world.
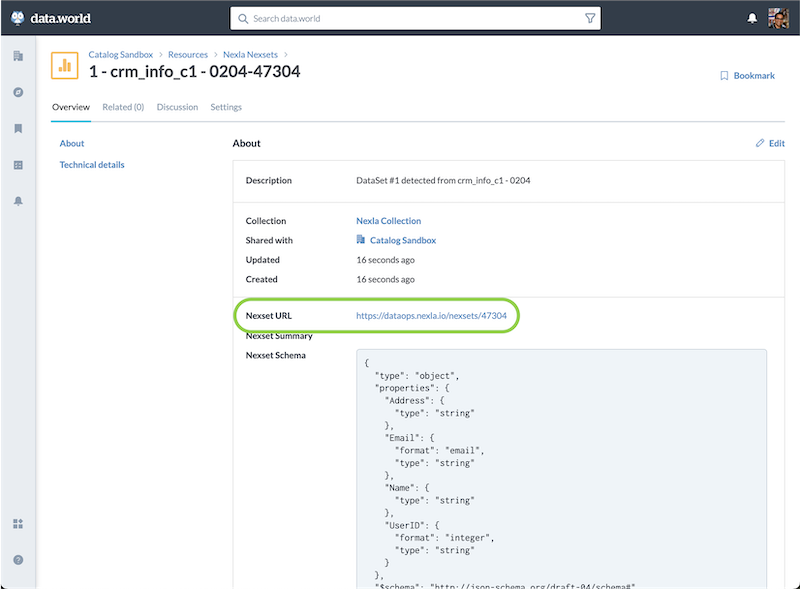
The data.world window displays the documentation for this Nexset, its schema and samples, and a link to the Nexset in the Nexla UI.
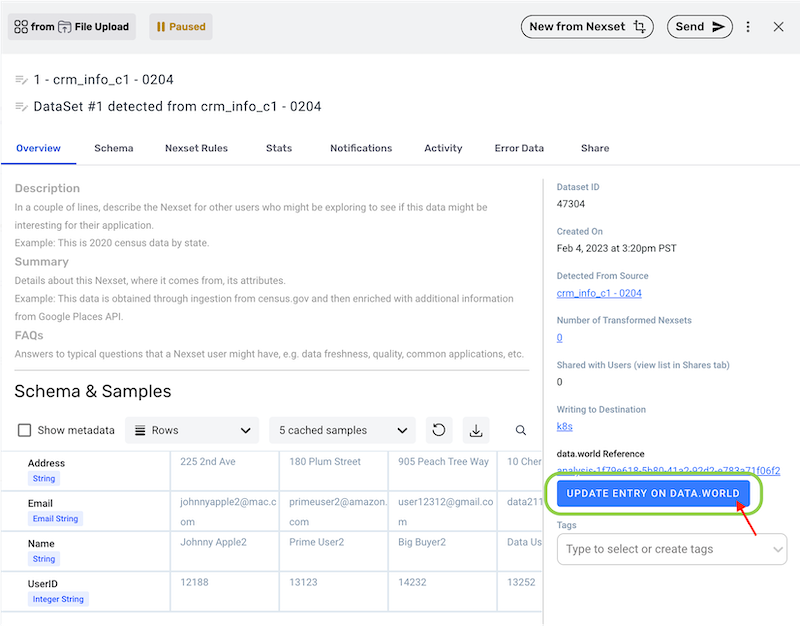
3. Update a Nexset in data.world
Once a Nexset is registered on data.world, the Nexset can easily be updated with any new Nexset information and/or records.
-
In the Nexset information drawer, click the
 button to update the Nexset listing in data.world with the latest Nexset data.
This function will use the current Nexset name, description, documentation, schema, and samples in Nexla to update the relevant sections of the relevant sections of the linked data.world resource corresponding to this Nexset.
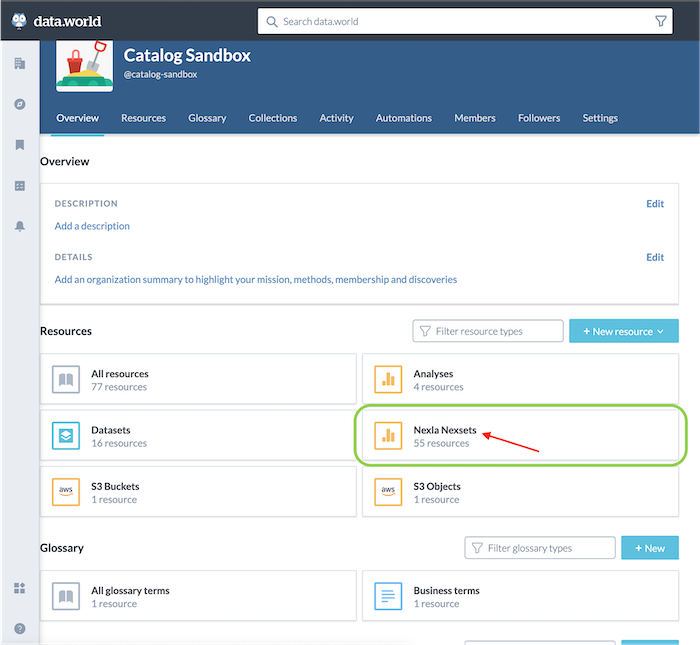
4. View All Nexsets in data.world
In addition to viewing individual Nexsets in data.world using the resource link in the Nexset information drawer, all Nexsets registered in the data.world account can be viewed directly within data.world.
-
In the data.world organization Overview page, click on the Nexla Nexsets resource type.
-
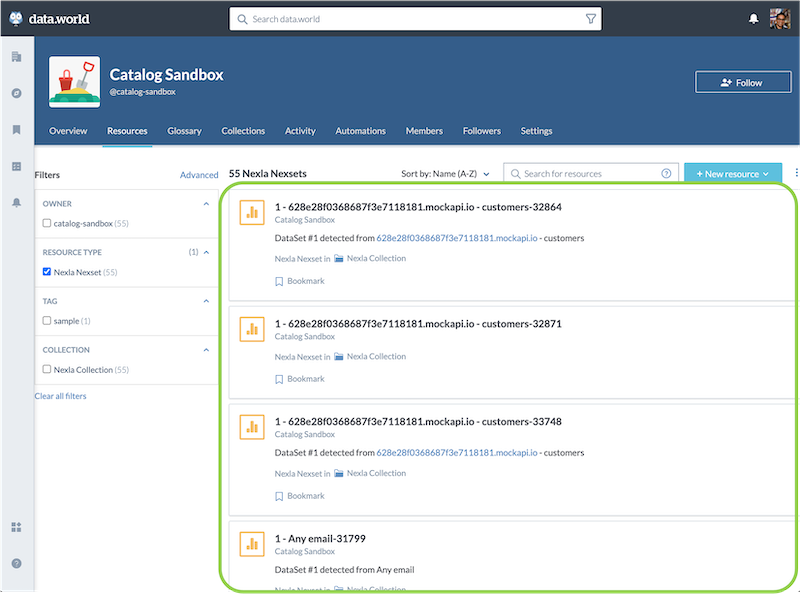
Select the Resources tab to view a list of all Nexsets currently registered in the data.world organization.
-
Click on any listed Nexset to open a detailed view of the Nexset resource.
-
To view a listed Nexset in the Nexla UI, click the Nexset URL link displayed in the detailed Nexset view.