Integrate Nexla with Collibra
Enrich your Collibra data catalog by using Nexla's App Integration with Collibra.
Once an organization member with Nexla administrator status links and activates Nexla's Collibra App Integration, all members of the organization will have the ability to register any of their Nexsets within the connected Collibra account.
This article describes how organization members can maintain links between Nexsets and Collibra resources. The article also provides instructions for the one-time integration setup steps to be performed by an organization administrator.
1. Set Up and Activate Collibra App Integration
This integration process creates a link between Nexsets within the organization's Nexla account and corresponding schema tables in Collibra.
Two main setup steps must be executed to configure this integration. Both steps can be completed by an organization administrator within a few minutes.
Step 1 (Section 1.1 – Section1.2): In the Collibra UI, create a new Schema in Collibra. This step is optional, as any schema can be used, but creating a new schema solely for Nexsets is recommended for better management of Collibra assets.
Step 2 (Section 1.3 – Section 1.5): In the Nexla UI, configure Nexla's Collibra App Integration with the relevant credentials and property names for entities created in Step 1.
1.1 Collibra: Create a New Schema (Optional)
The steps in this section must be performed by a Collibra administrator.
Nexla's integration with Collibra requires a schema ID to which all Nexsets will be registered. An existing data domain and schema can be used, or a new data domain and schema can be created for this purpose.
-
In the Collibra account, click the
 icon on the navigation bar at the top of the screen to launch a popup form for creating new resources.
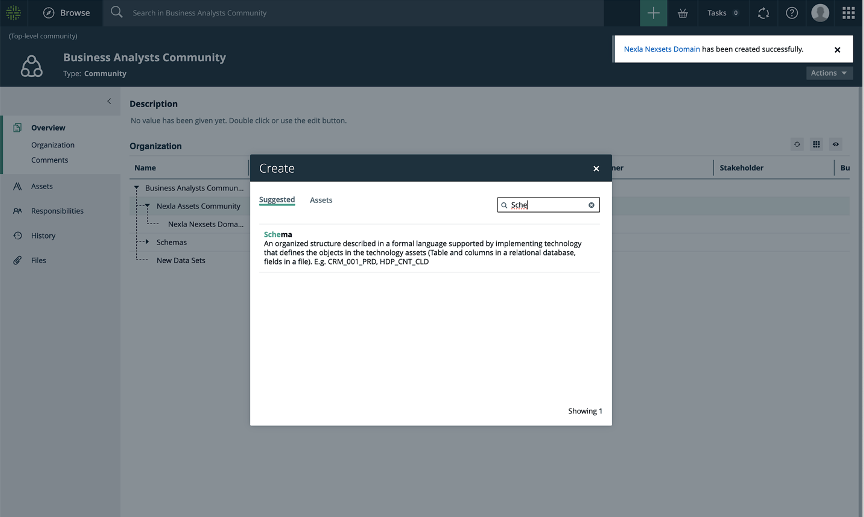
-
Search for
Schema, and click on the result to open a schema creation form.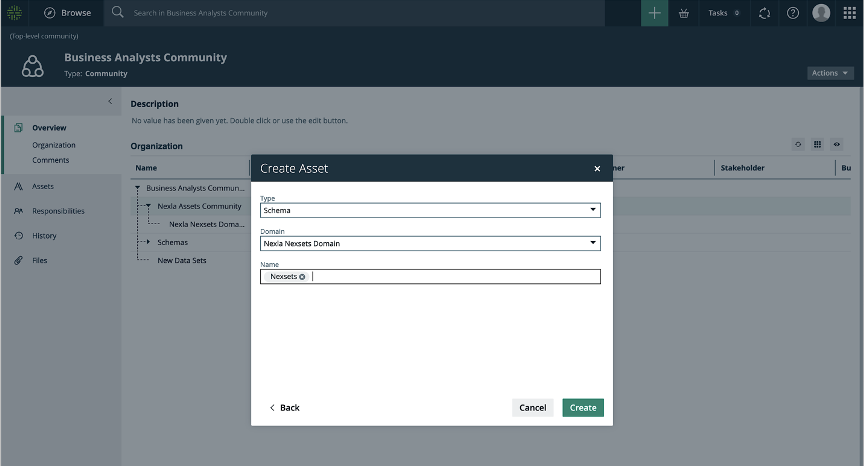
-
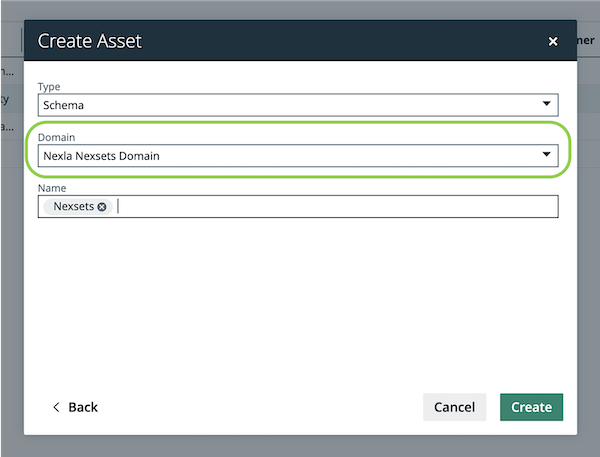
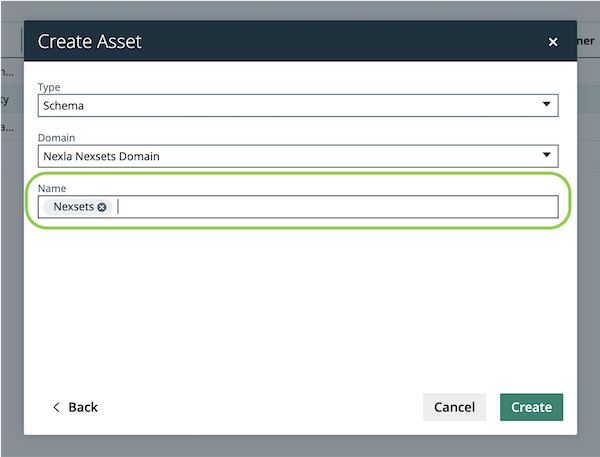
Ensure that the asset type is set to
Schemausing the Type pulldown menu.
-
Select the desired domain using the Domain pulldown menu.
-
Enter the desired name for the schema in the Name field.
-
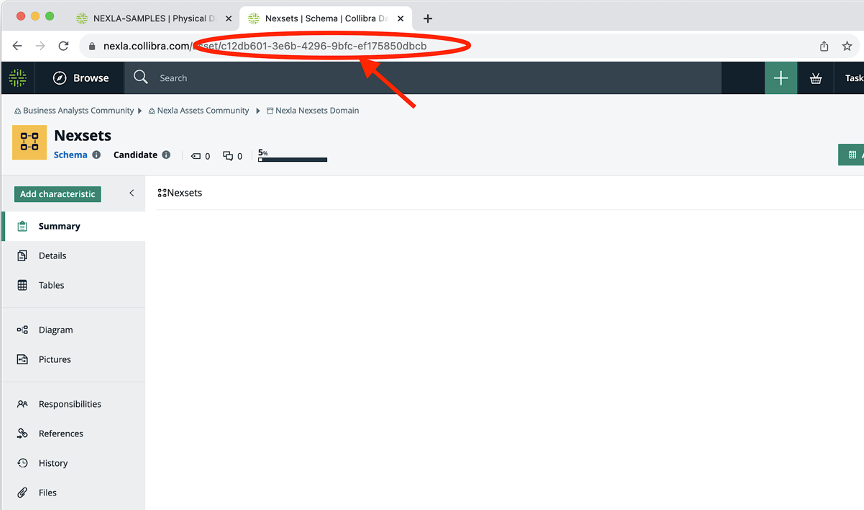
Click on the detailed view of the generated schema, and copy the schema ID from the URL.
1.2 Collibra: Create a New User (Optional)
The steps in this section must be performed by a Collibra administrator.
To complete the setup steps in the following subsections, an existing user's credentials can be used; however, creating a new user solely for this integration is recommended, so that all entities created in Collibra are appropriately attributed to this user.
-
Create a new user in Collibra.
-
Copy the following information for use in Section 1.3:
- Schema ID – This could be the ID of the newly created schema or the ID of an existing schema.
- Username and password for account authentication – This could be the username & password information for an existing user or that of the newly created user. The user must have administrative permissions for the schema that will be used during integration.
1.3 Nexla: Create a Collibra Credential
The steps in this section must be performed by a Nexla organization administrator.
-
Log into Nexla as an organization administrator.
-
Select
 from the toolbar on the left.
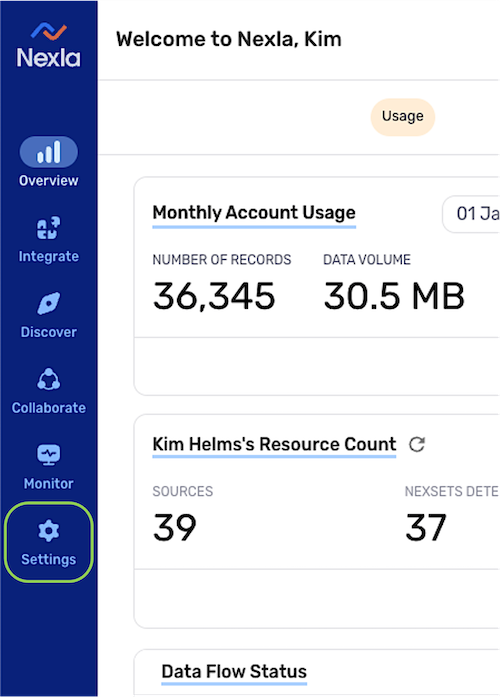
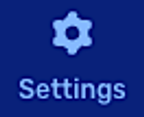
-
Select
 from the Settings toolbar.
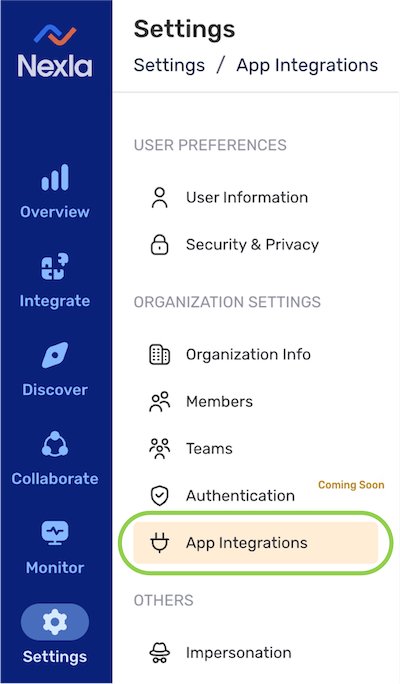
-
Click
 on the Collibra tile under Data Catalogs.
This will open an app integration configuration drawer on the right.
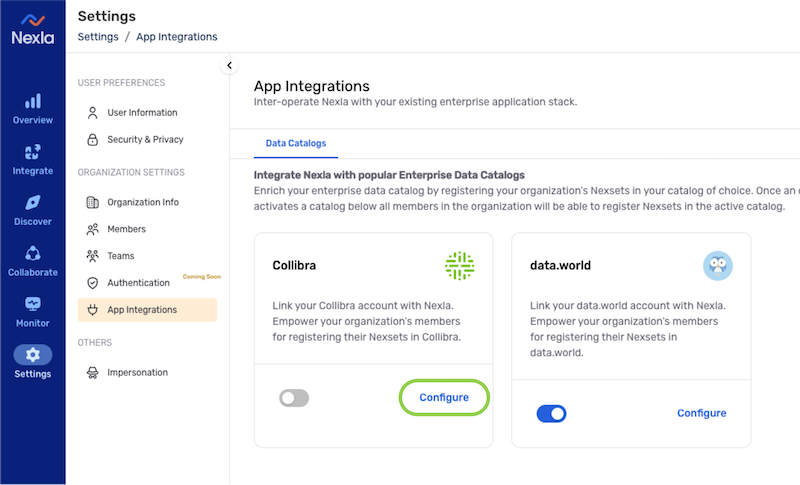
-
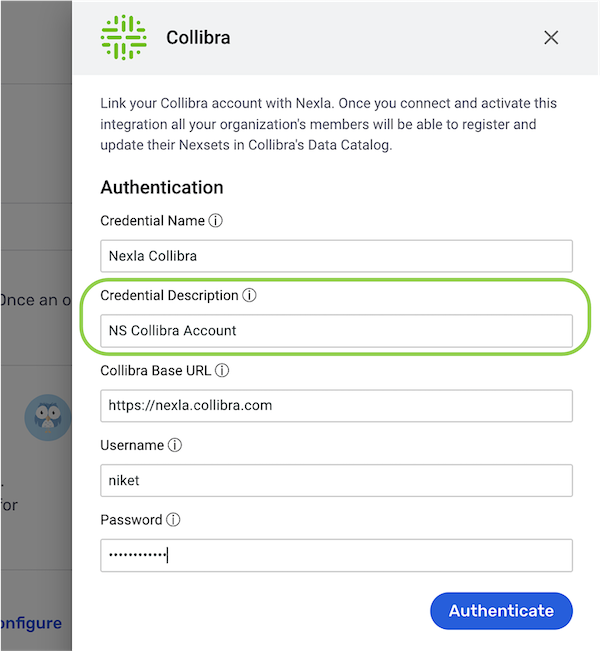
In the configuration drawer, under the Authentication heading, enter the following information:
-
Enter a meaningful credential name for bookkeeping in the Credential Name field.

-
Enter a meaningful short description of the credential in the Credential Description field.
-
Enter the main URL of the Collibra installation with which Nexla will be integrated in the Collibra Base URL field.
The base URL can be found in the browser URL upon logging into Collibra—for example,
https://nexla.collbra.com.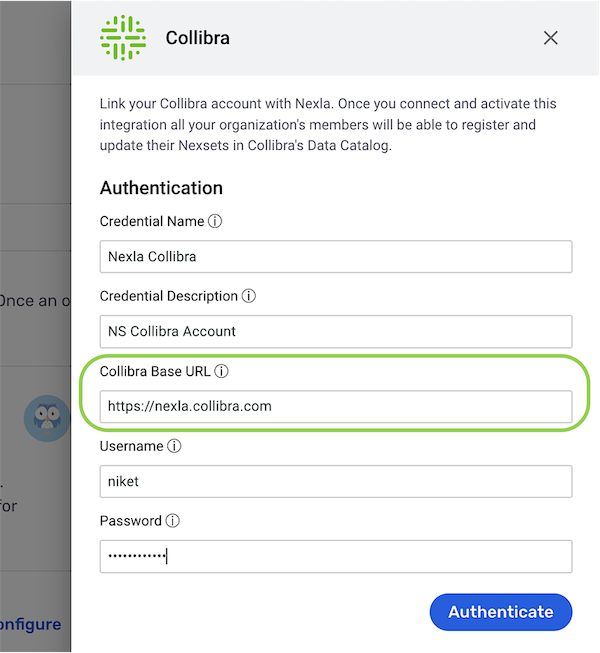
-
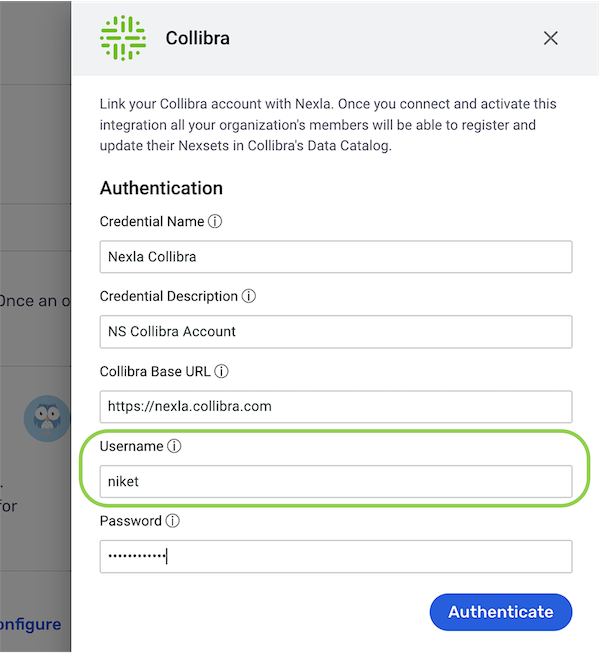
Enter the Collibra account username saved in Section 1.2 in the Username field.
-
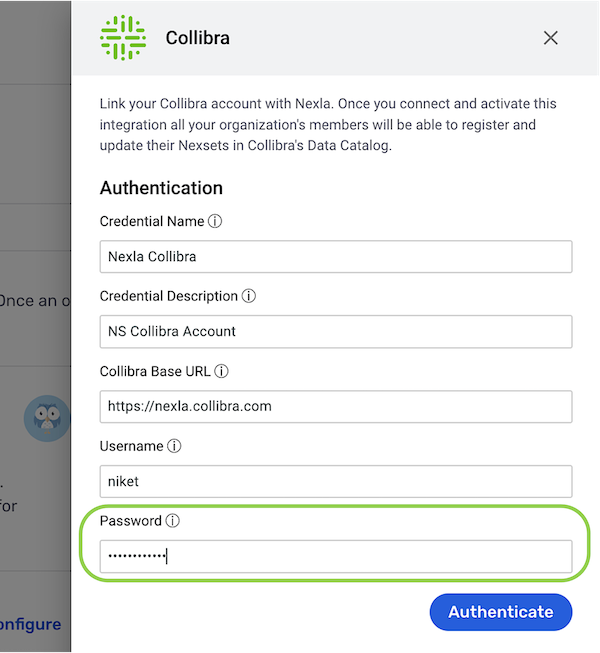
Enter the Collibra account password saved in Section 1.2 in the Password field.
-
-
Click
 to authenticate the credential information.
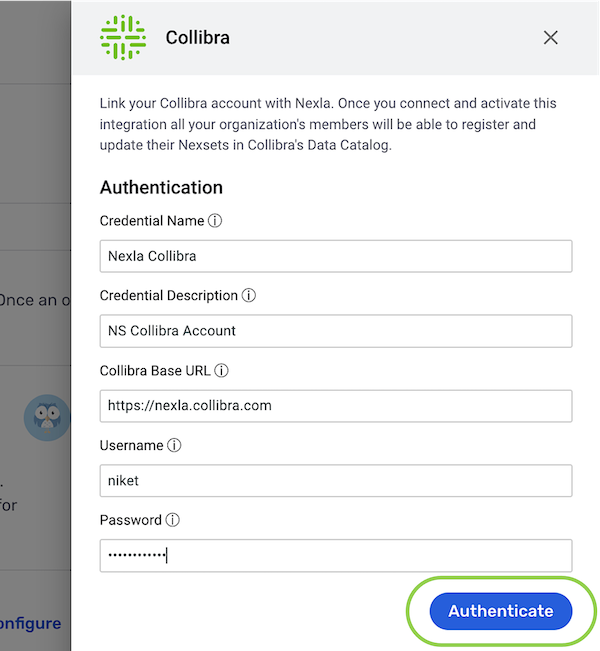
-
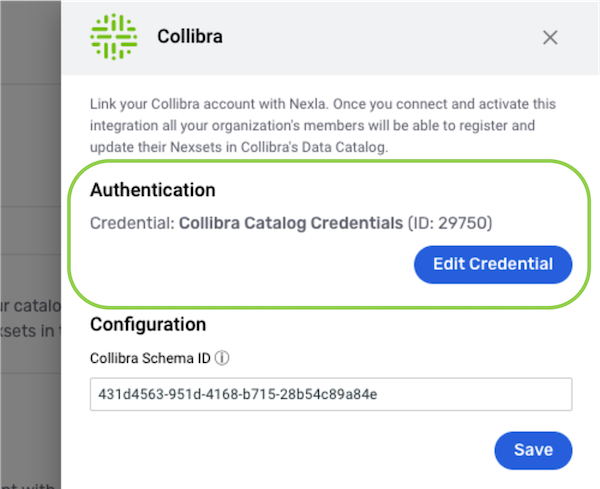
If the entered information is correct, authentication should result in the creation of a new credential with name and description entered in the previous step, along with a button providing the option to edit the credential.
-
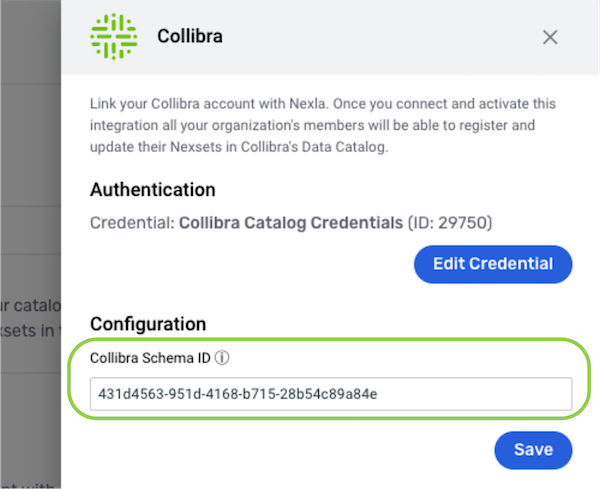
1.4 Nexla: Configure Collibra Properties
The steps in this section must be performed by a Nexla organization administrator.
-
Under the Configuration heading in the configuration drawer, enter the Collibra schema ID saved in Section 1.2 in the Collibra Schema ID field.
-
Click
 to save the configuration setting.
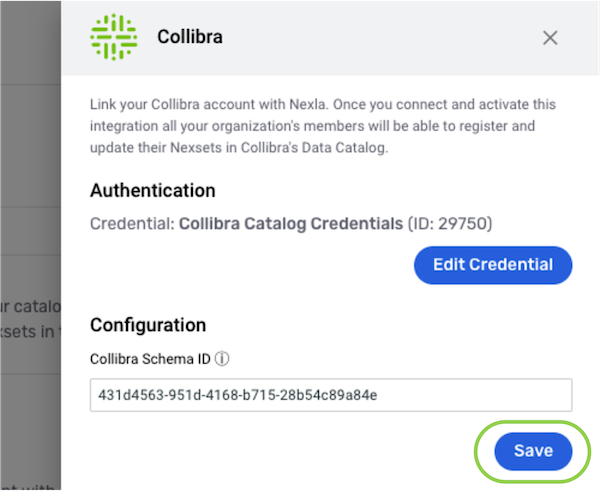
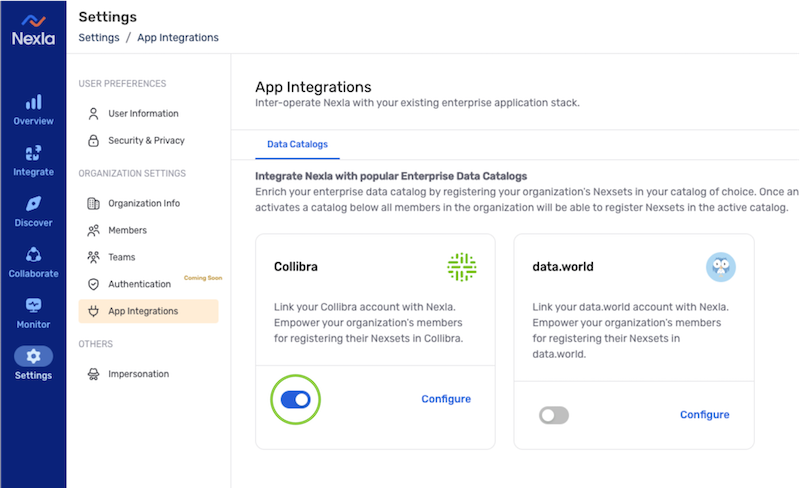
1.5 Nexla: Activate and Validate the Integration
-
Click the
 in the top right corner of the configuration drawer to close it.
 -
Turn on the toggle switch on the Collibra tile to activate Collibra app integration for the Nexla account.
Collibra integration with the Nexla account can be paused at any time by turning off this switch.
-
To validate that Collibra integration is active, complete the steps in Section 2, and ensure that the registered Nexset is visible in Collibra.
2. Register a Nexset in a Connected Collibra Account
Once the organization administrator has configured and activated the App Integration for Collibra, all organization members will be able to register their Nexsets in Collibra.
-
Click the
 icon on a Nexset to view the Nexset information drawer.
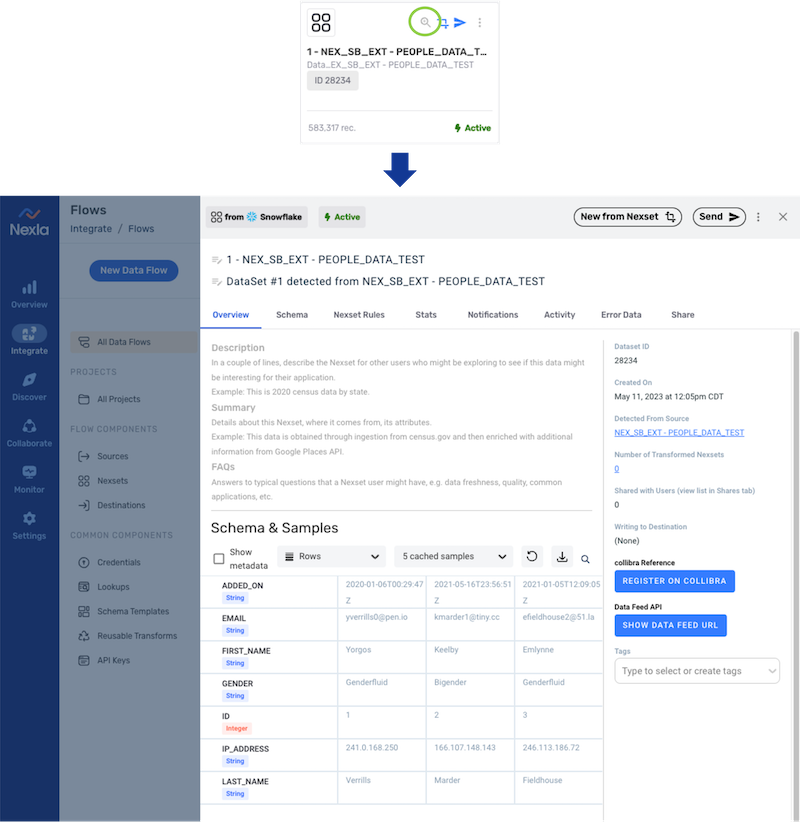
-
Click
 to begin registering the Nexset in Collibra.
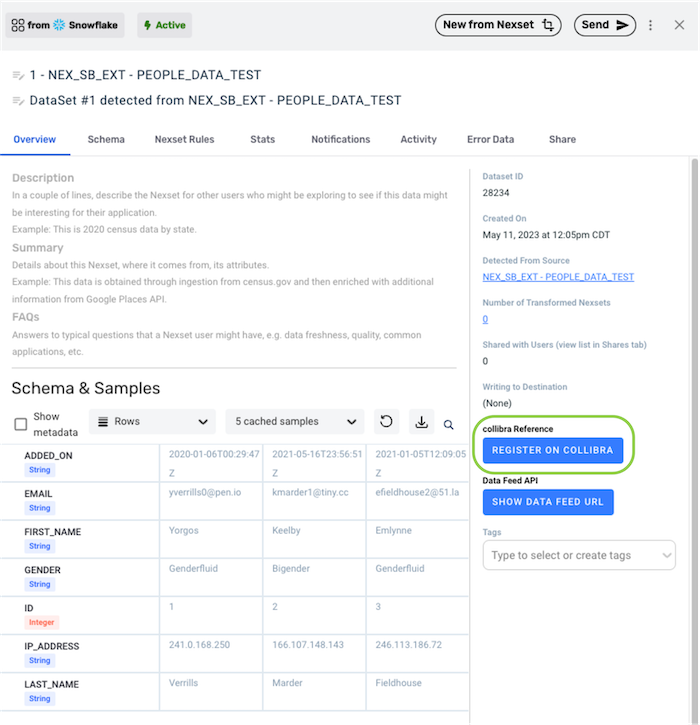
-
Registration may take a moment to complete. Click the
 icon next to the registration button to view the registration progress.
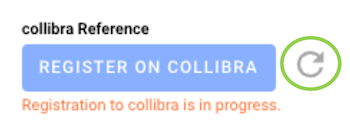
-
-
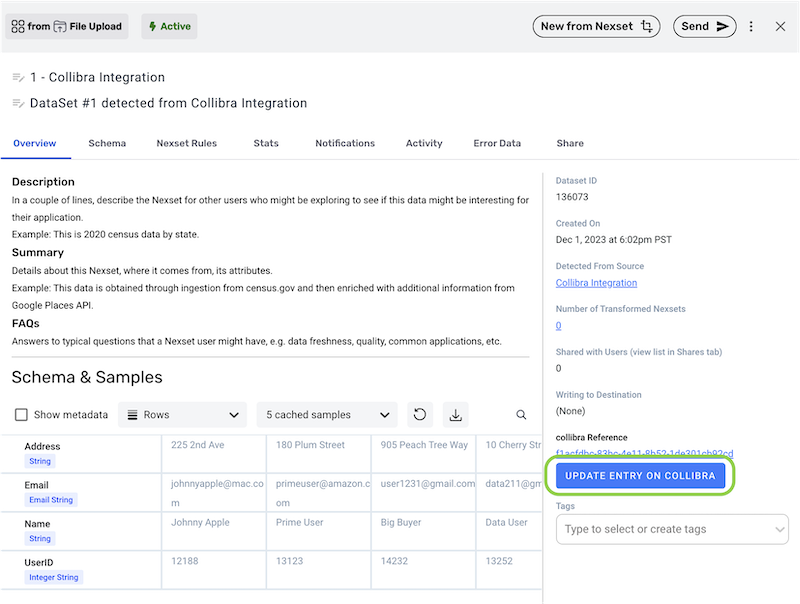
Once registration is complete, a link to the Collibra resource corresponding to the registered Nexset will be displayed.
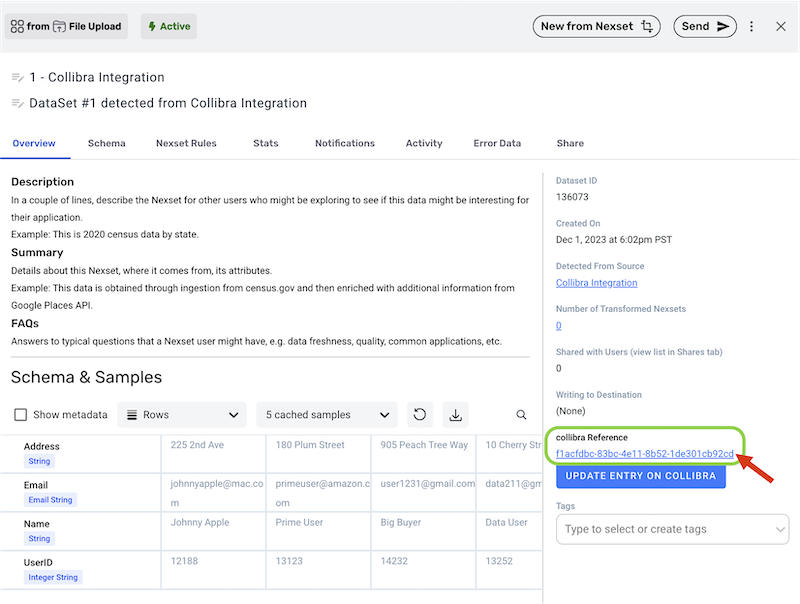
-
Click the provided link to launch and view the Nexset in Collibra.
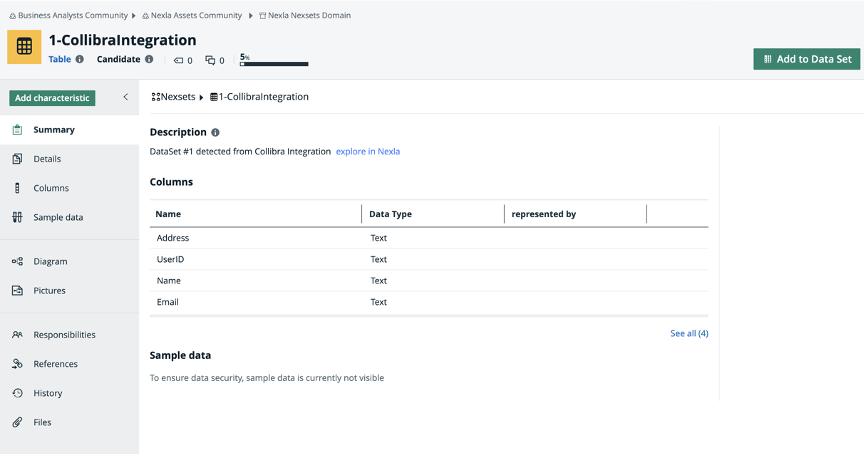
The Collibra window displays the documentation for this Nexset, its schema and samples, and a link to the Nexset in the Nexla UI.
3. Update a Nexset in Collibra
Once a Nexset is registered in Collibra, the Nexset can easily be updated with any new Nexset information and/or records.
-
In the Nexset information drawer, click the
 button to update the Nexset listing in Collibra with the latest Nexset data.
This function will use the current Nexset name, description, documentation, schema, and samples in Nexla to update the relevant sections of the relevant sections of the linked Collibra resource corresponding to this Nexset.
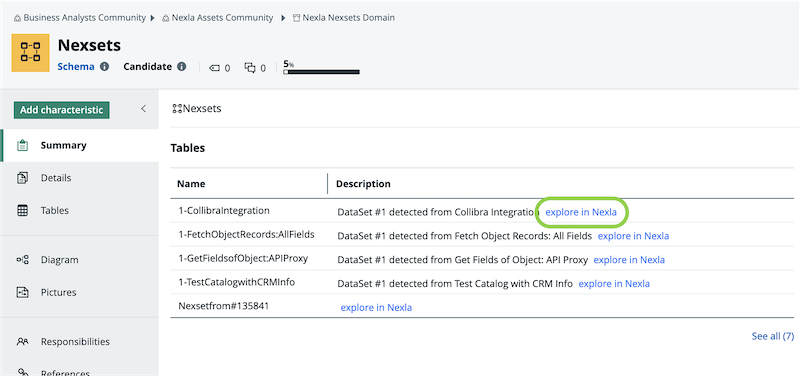
4. View All Nexsets in Collibra
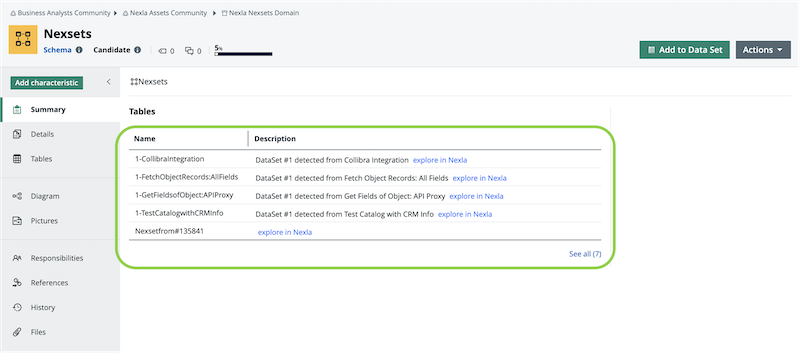
In addition to viewing individual Nexsets in Collibra using the resource link in the Nexset information drawer, all Nexsets registered in the Collibra account can be viewed directly within Collibra.
-
In Collibra, the Summary screen for the Collibra domain to which Nexsets are registered displays a list of all Nexsets currently registered to the Collibra account.
-
To view a listed Nexset in the Nexla UI, click the "explore in Nexla" link to the right of the Nexset description.