Integrate Nexla with Google AI
Enrich resource documentation catalog by integrating Google AI with Nexla.
Once an organization member with Nexla administrator status links and activates Google AI App Integration in Nexla, all members of the organization will have the ability to efficiently add thorough AI-generated documentation to Nexsets and data flows.
This article provides instructions for the one-time integration setup process performed by an organization administrator in Section 1. Section 2 covers how to use OpenAI to generate resource documentation in Nexla.
1. Set Up & Activate Google AI App Integration
Integrating Google AI and Nexla creates a link between the organization's Nexla account and the Google AI API. Once this integration is enabled, organization members can utilize Google AI to easily generate recommended documentation for Nexsets and data flows with the click of a button.
The steps in Sections 1.1-1.4 must be completed by an organization administrator.
1.1 Google AI Configuration Information
The following information about the organization's Google AI account is needed to configure Google AI integration in Nexla.
This information must be obtained from the Google AI UI by a Google AI account administrator.
-
Google AI Token – This is the API key for the organization Google AI account.
- See this Google AI article to learn how to generate an API key in the organization's Google AI account.
-
Google API Version – This is the Google AI API version that will be used in the integration.
-
Google AI Model – Determine the Google AI text-generation model that will be used to generate resource documentation in the Nexla account.
1.2 Create a Google AI Credential in Nexla
The steps in this section must be performed in the Nexla UI by a Nexla organization administrator.
-
Log into Nexla as an organization administrator, and select
 from the toolbar on the left.
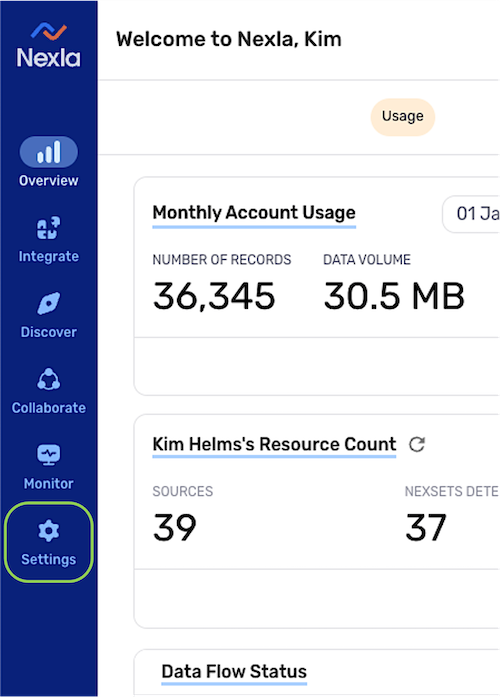
-
Select
 from the Settings toolbar.
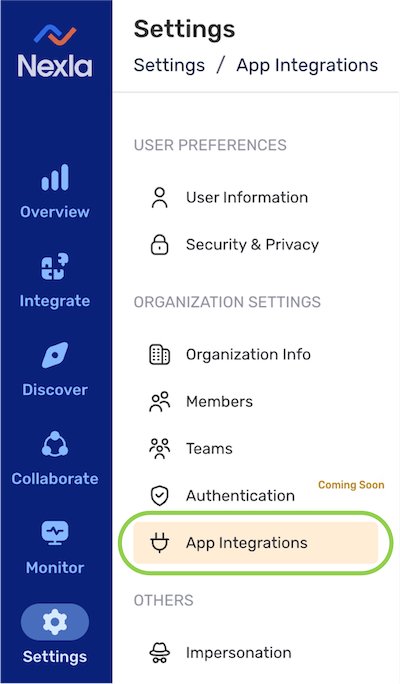
-
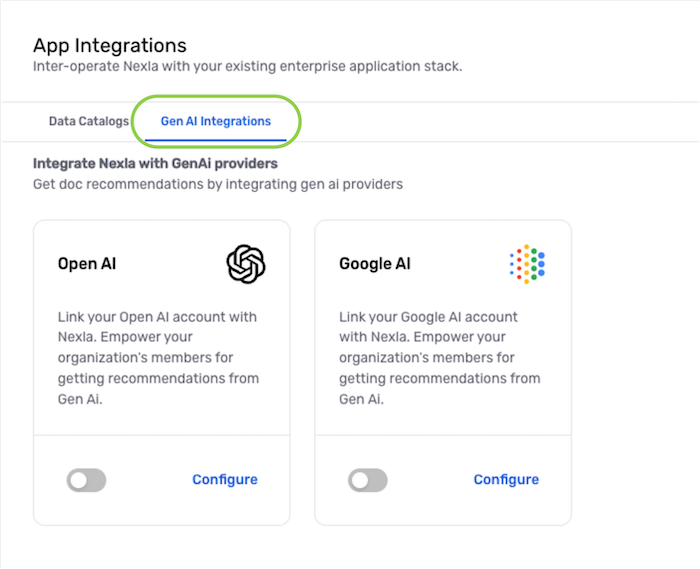
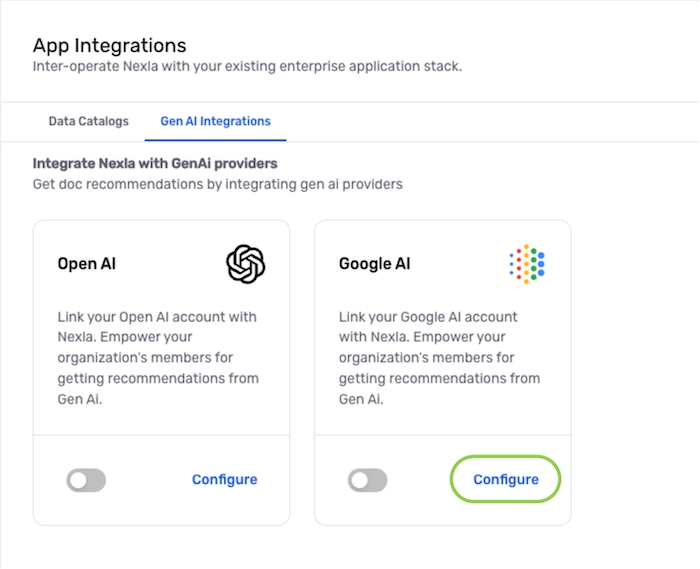
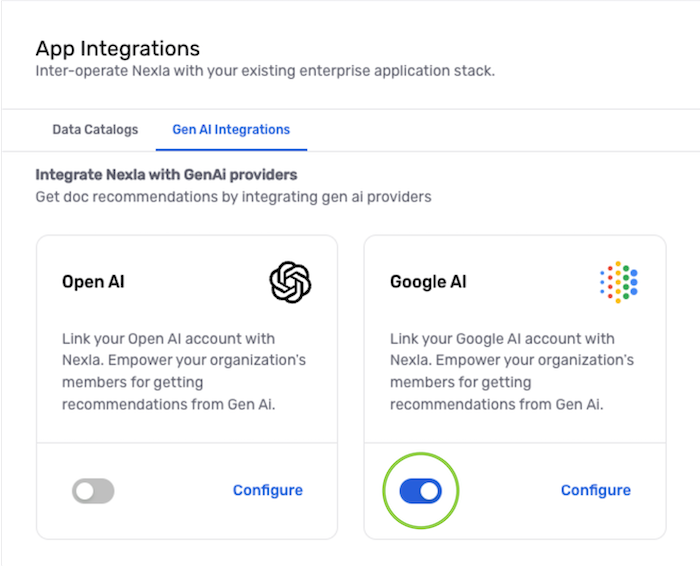
In the App Integrations screen, select the Gen AI Integrations tab.
-
Click Configure on the Google AI tile to open the integration configuration drawer.
-
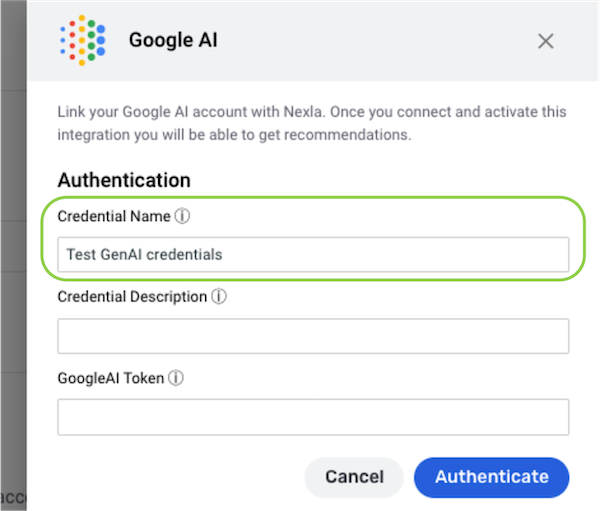
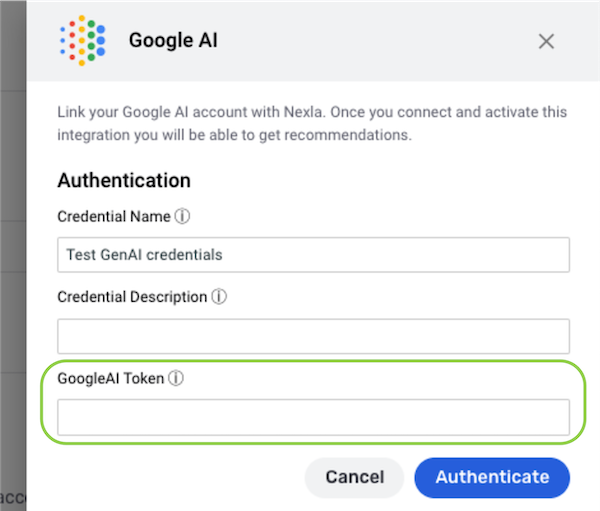
In the configuration drawer, enter a name for the Google AI credential that will be used to authenticate the Google AI account in the Credential Name field.
- A credential name that will be meaningful for bookkeeping is recommended.
-
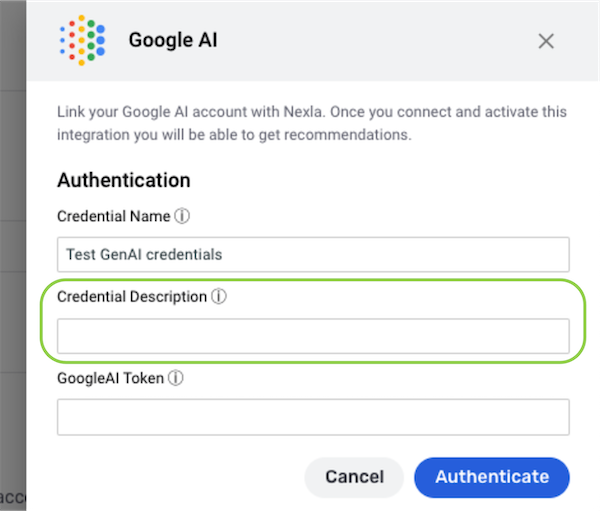
Enter a meaningful short description of the credential in the Credential Description field.
-
Enter the API key for the Google AI account obtained in Section 1.1 in the Google AI Token field.
-
Click
 to authenticate the credential information.
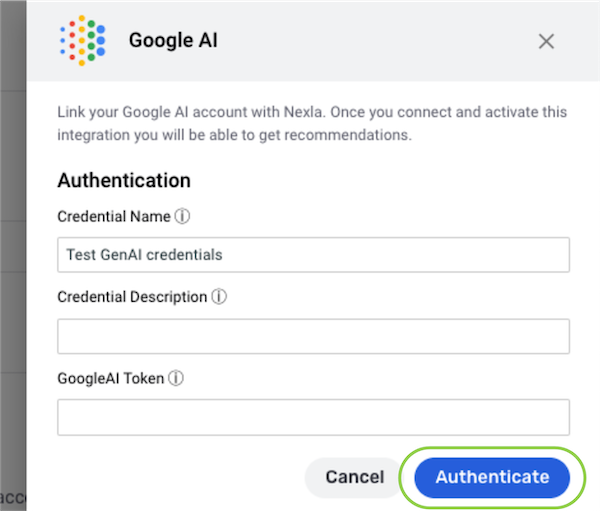
-
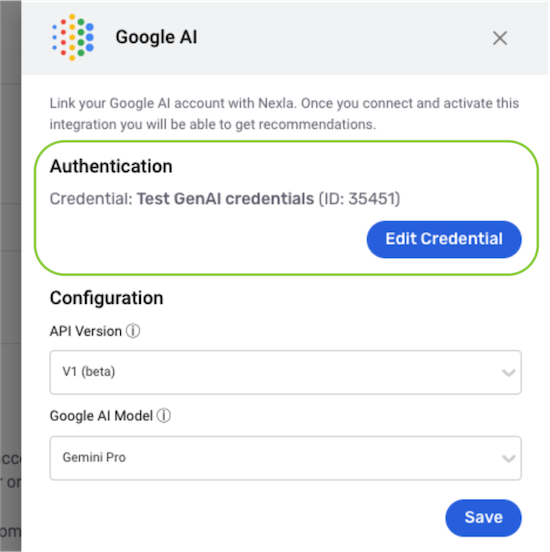
If the entered information is correct, authentication should result in the creation of a new credential with name and description entered in the previous step, along with a button providing the option to edit the credential.
-
1.3 Configure Google AI Model Settings
The steps in this section must be performed in the Nexla UI by a Nexla organization administrator.
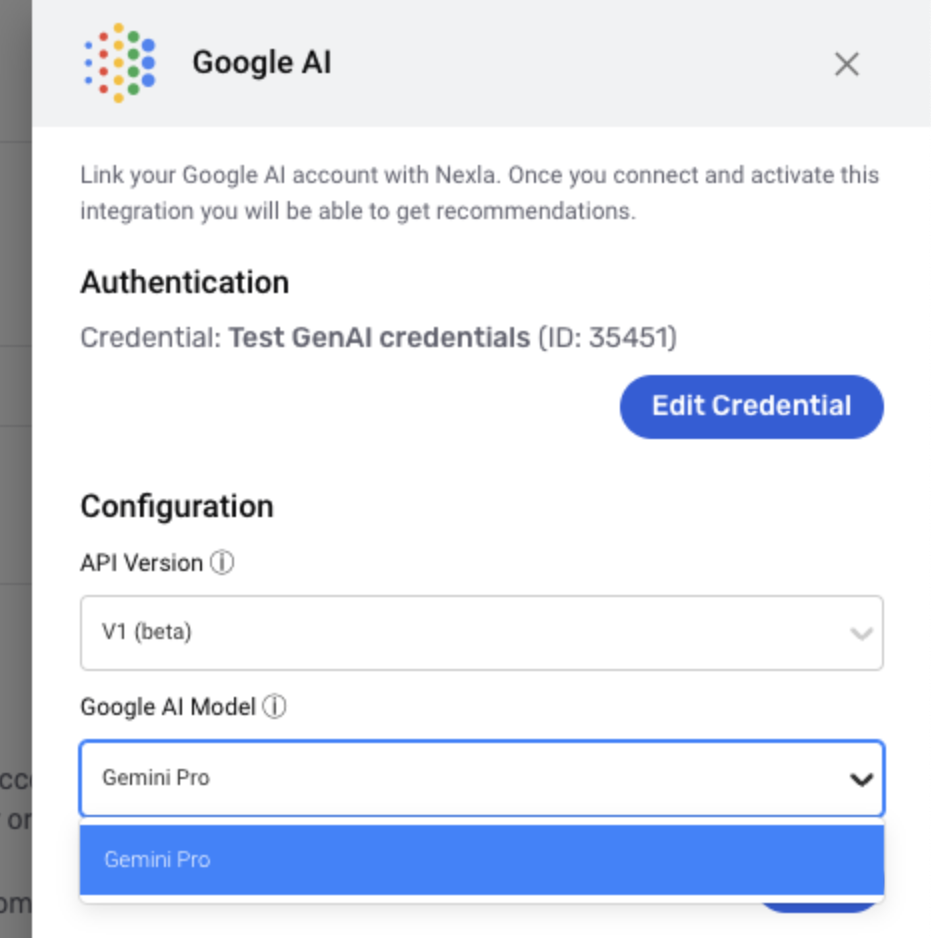
Any of the Google AI text-generation models available to the Google AI account corresponding to the credential created in Section 1.2 can be used to generate resource documentation in Nexla.
-
Select the Google AI API version that will be used with Nexla from the API Version pulldown menu.

-
Select the model that will be used to generate resource documentation text in organization accounts from the Google AI Model pulldown menu.
 note
noteThe selected model will be used to generate resource documentation when the Generate option is used by any member of the organization.
This selection can be changed by a Nexla account administrator from within the configuration drawer at any time.
1.4 Activate the Google AI Integration
The steps in this section must be performed in the Nexla UI by a Nexla organization administrator.
-
Click the
 in the top right corner of the configuration drawer to close it.
 -
Turn on the toggle switch on the Google AI tile to activate Google AI app integration for the organization's Nexla account.
- Google AI integration with the Nexla account can be paused at any time by turning off this switch.
2. Generate Documentation with Google AI
Once the organization administrator has configured and activated Google AI app integration in Nexla, all organization members will be able to generate resource documentation using Google AI by following the instructions in this section.
-
Access the information drawer of the resource.
-
Data Flows: Click the
 icon on the data flow listing.
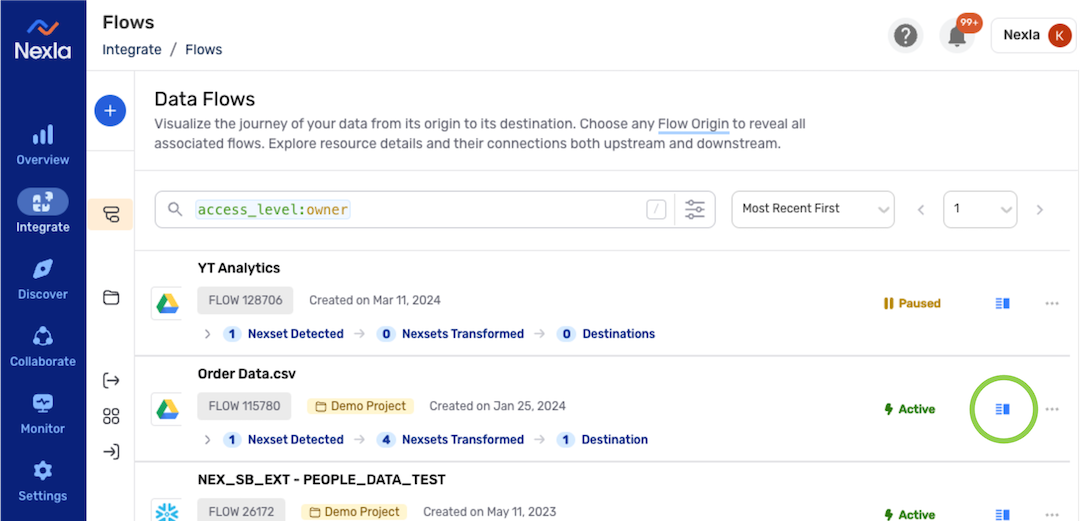
-
Nexsets: Click the
 icon on the Nexset.
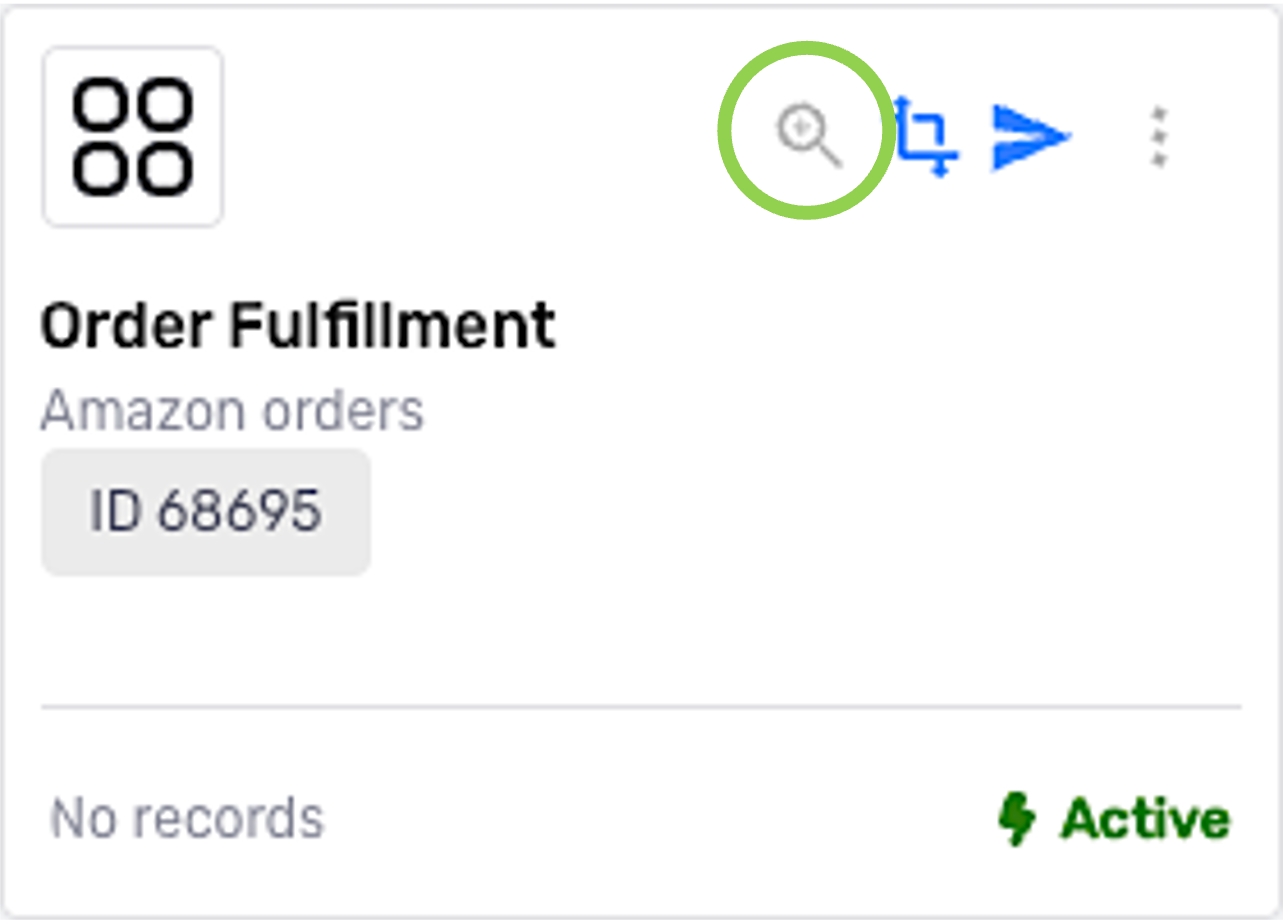
-
-
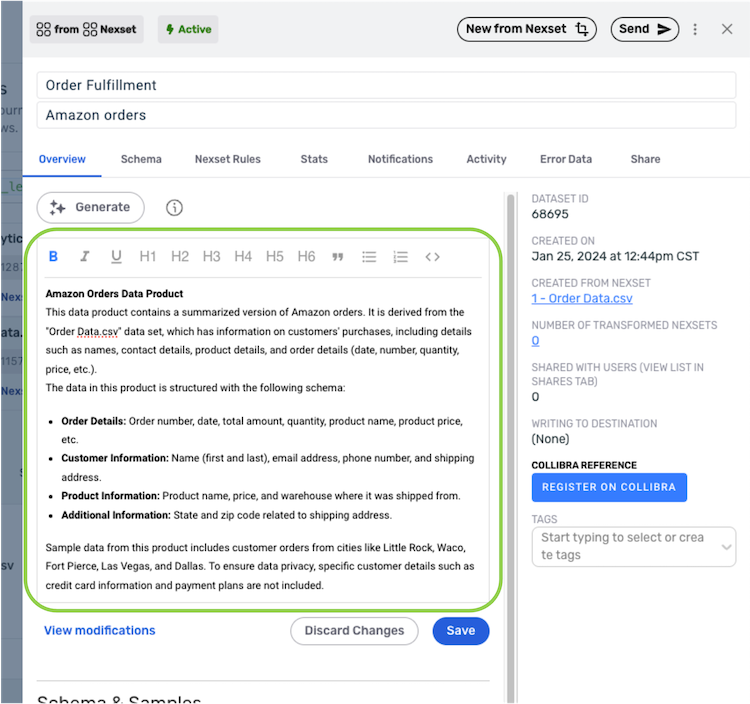
The resource documentation field is located at the top of the Overview tab. Click the
 button to generate documentation for the resource using OpenAI.
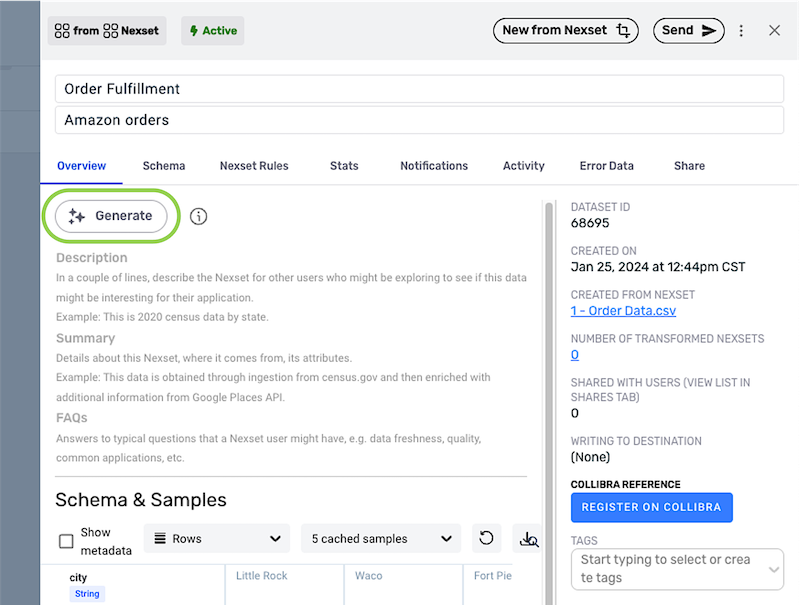
-
A preview of the generated text is displayed within the documentation field. Any needed changes to the text can be made in this field before saving.
-
To view a side-by-side comparison of text modifications, click
 in the bottom-right corner below the text field.
-
To reject all changes to the text:
-
In the resource information screen, click the
 button in the bottom-right corner below the text field.
 -
In the side-by-side comparison screen, click
 in the bottom-right corner of the pop-up.
-
-
-
To save the resource documentation text:
-
In the side-by-side comparison screen, click the
 button in the bottom-right corner of the pop-up.
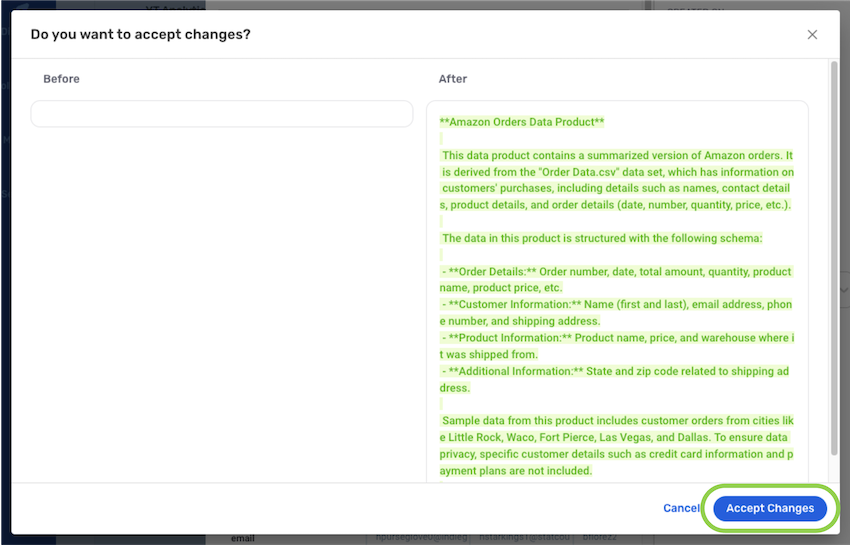
-
In the resource information screen, click
 on the bottom-right corner below the text field.
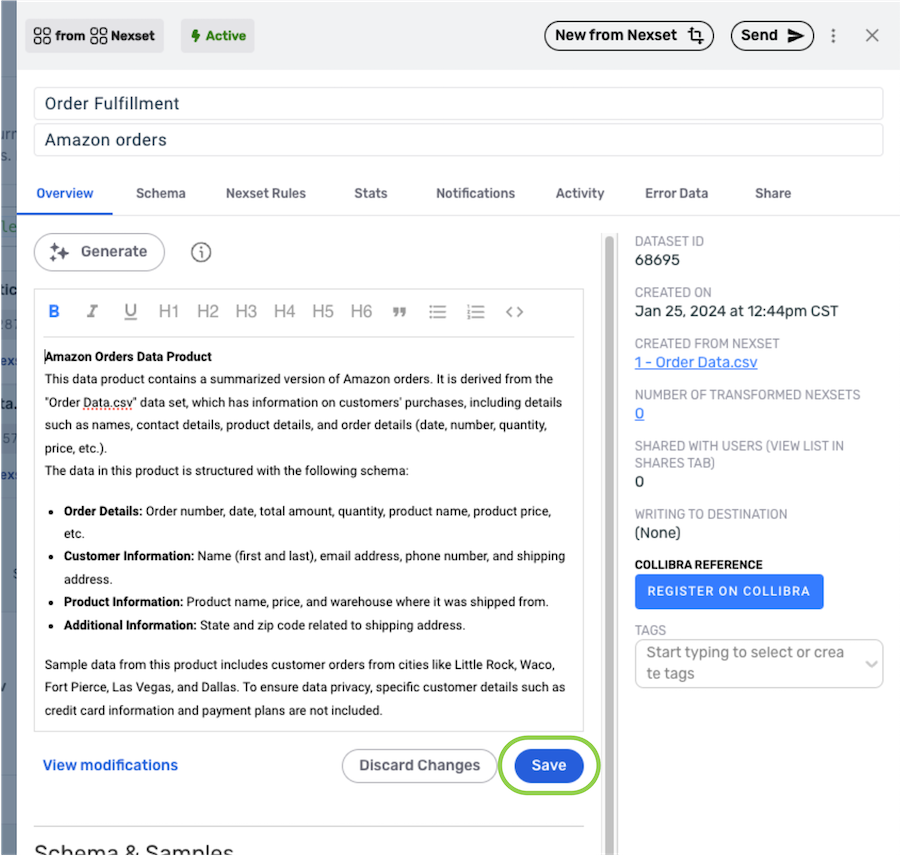
-