View & Manage Credentials
In Nexla, credentials are used each time a data source or destination is created. Credentials allow users to connect to and exchange data with external data systems through the platform.
Like any other Nexla resource type, credentials can be easily viewed, managed, and shared with other users.
For general information about credentials and how they are used in Nexla, see Credentials in Nexla.
1. View Accessible Credentials
To view all credentials accessible to the user's account, navigate to the Integrate section using the toolbar on the left, and select Credentials from the section menu.
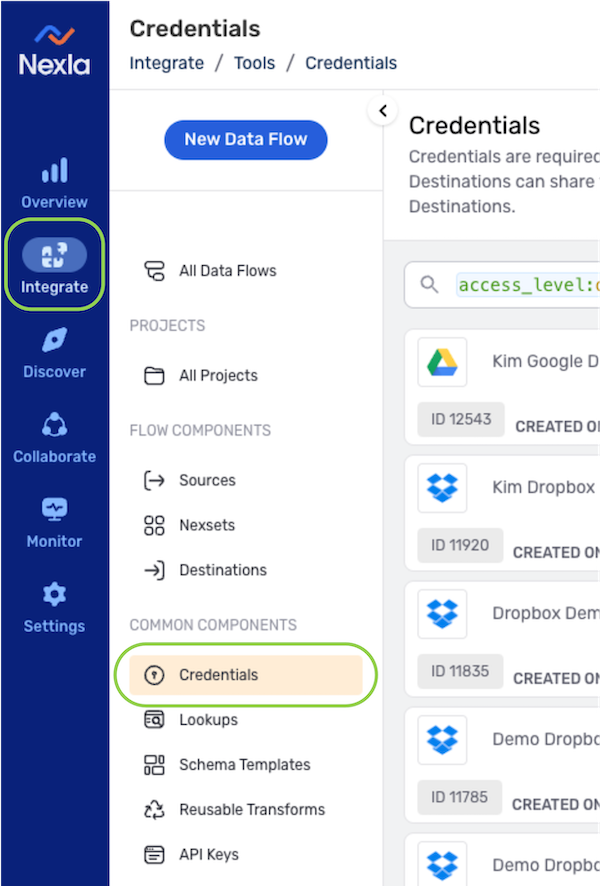
- Credentials are listed in this screen according to the selected search parameters.
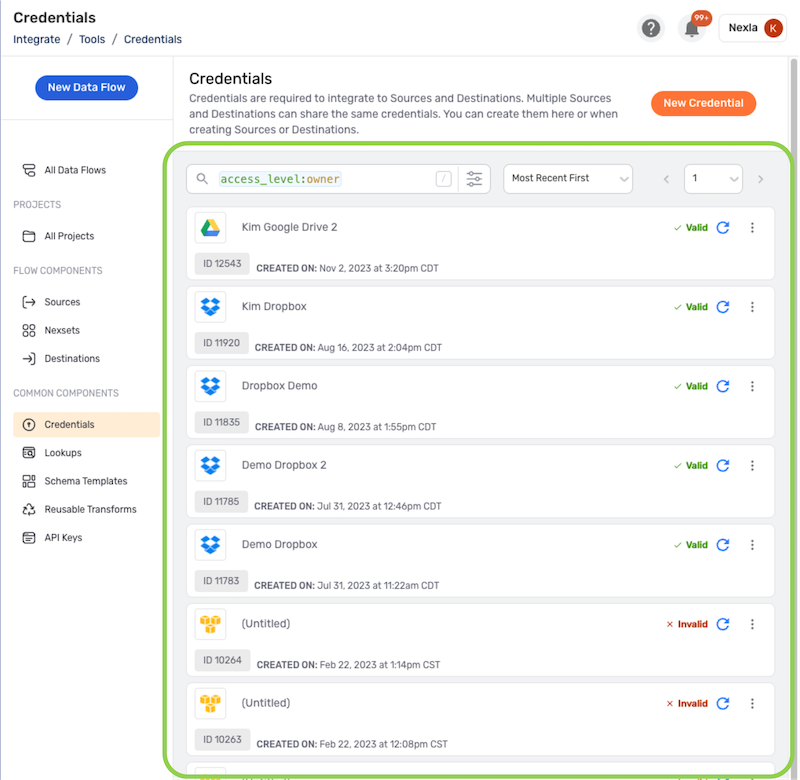
- By default, Nexla displays credentials owned by the user upon navigating to the **
Credentials** screen. To view shared credentials, click the
access_levelkeyword in the search bar, and change its value tocollaborator.
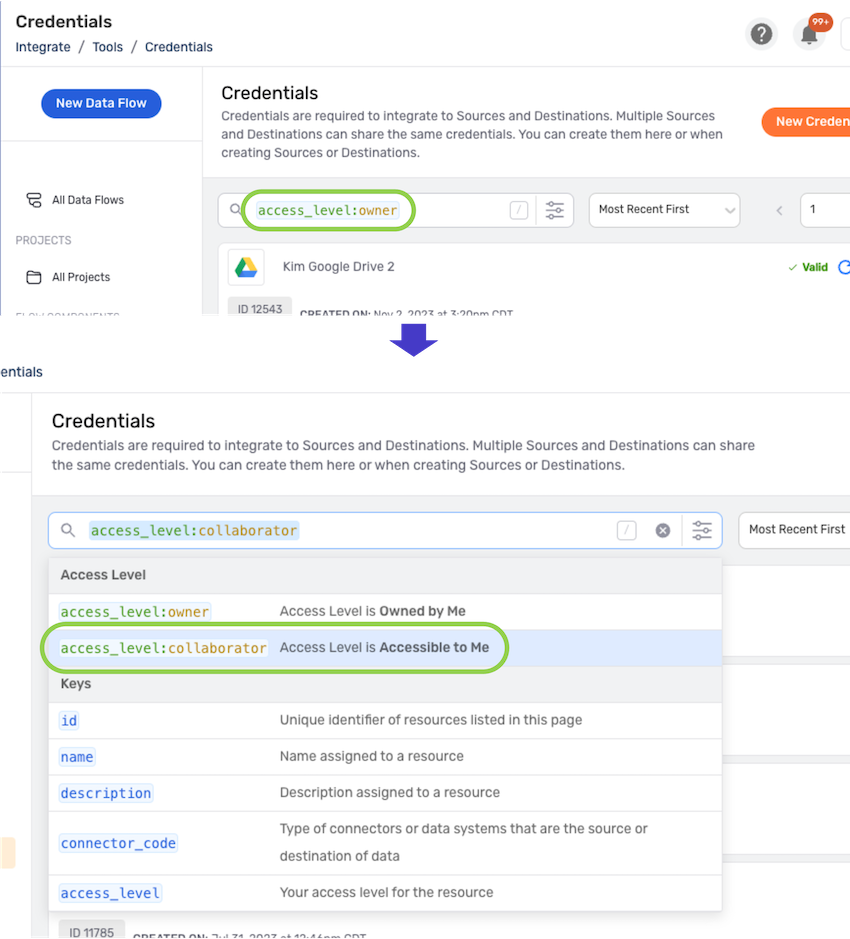
Credentials can be searched using any applicable keywords—for more information about search keywords and to learn how to use Nexla's resource search feature, see Resource Search Interface.
- Credentials can be edited, deleted, checked for validity, and shared with other users from the Credentials screen. The following sections provide information about and step-by-step instructions for each of these operations.
2. Credential Information Screen
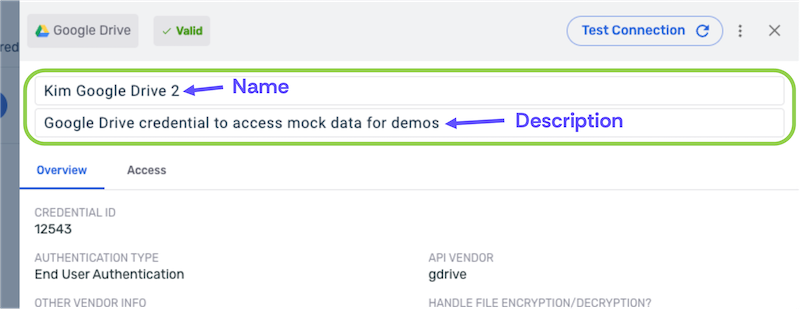
The credential information screen displays the credential name and description as well as additional overview and access information about each credential in Nexla.
Click on a listing in the Credentials screen to open the information screen for that credential.
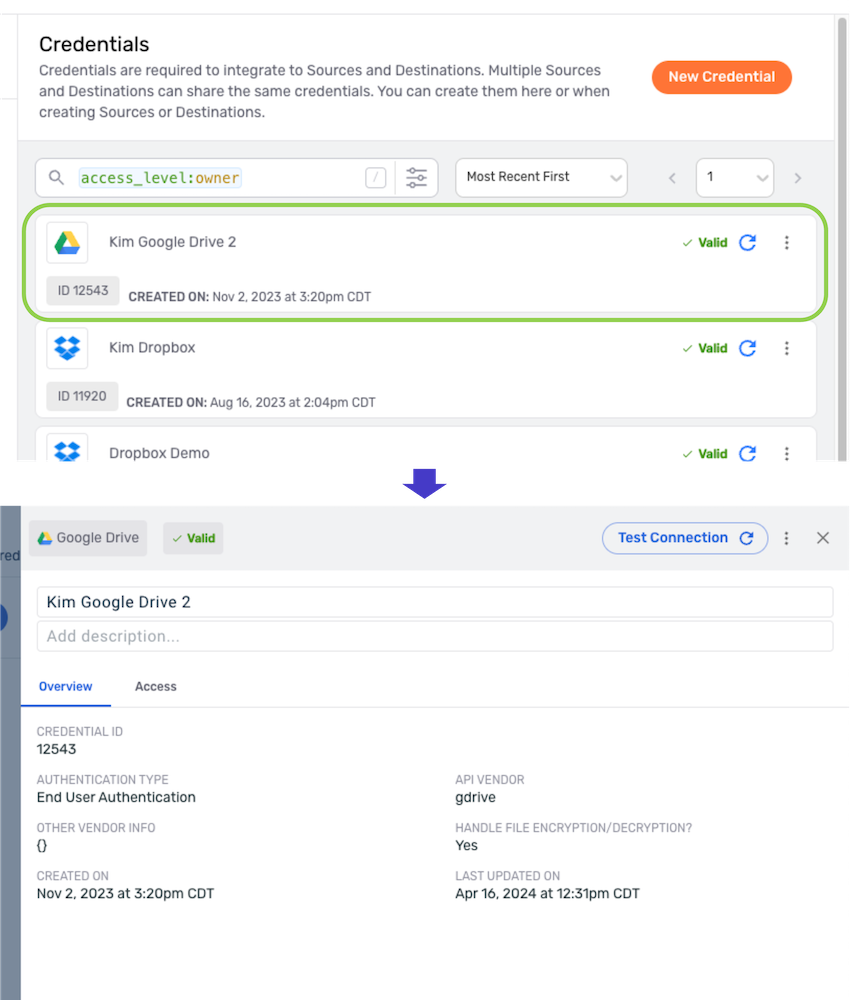
- The top panel of the information drawer displays the credential name and description, which can be edited directly within these fields. Any changes are automatically saved upon clicking outside of the field.
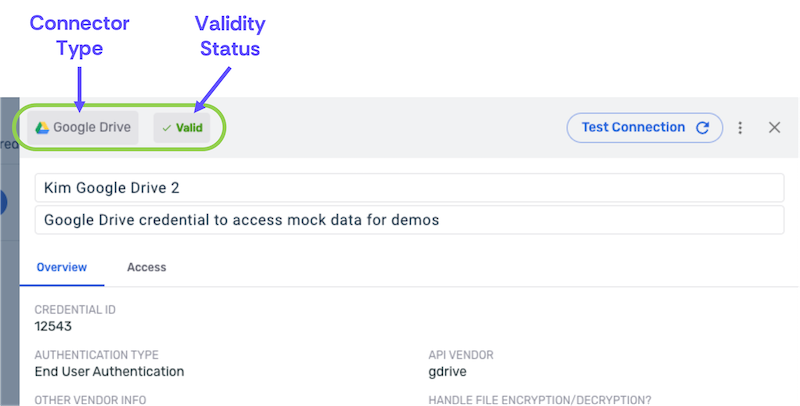
- Tiles at the top-left of the panel indicate the connector type with which the credential is used and its last detected validity status.
2.1 Overview Tab
The Overview tab displays a summary of general information about the credential.

The listed properties vary based on the credential type and configured settings. Information about common credential properties that may be listed in the Overview tab is displayed below:
- Credential ID – Unique ID assigned to the credential in Nexla
- Created On – Date and time at which the credential was created
- Last Updated On – Date and time of the most recent update to the credential
- Authentication Type – Authentication method selected for the credential
- Credential Validation: URL – URL used to test the validity of the credential
- Credential Validation: API Method – API method executed when validating the credential (GET/POST)
- Credential Validation: Content Type – Expected type & format of content retrieved from the validation URL
- Enable JWT Authentication? – Indicates whether or not JSON Web Token authentication is enabled for the credential
- Sign Requests with Certificates – Indicates whether or not requests sent using the credential are signed with certificates
- Ignore SSL Certificate Validation? – Indicates whether or not the SSL certificate validation procedure will be ignored when the credential is used to connect to an external data system
- Enable HMAC Signature-Based Authentication? – Indicates whether or not HMAC signature-based authentication is enabled for the credential
- API Vendor – Vendor associated with the API endpoint for which the credential is configured
- Handle File Encryption/Decryption – Indicates whether or not the credential is configured to have Nexla handle file encryption/decryption for files ingested from or sent to external data systems using the credential
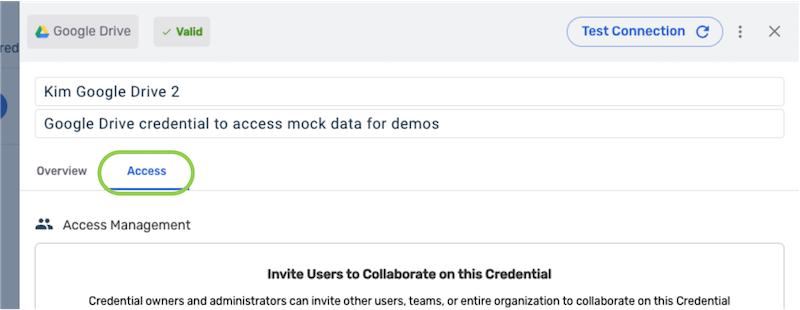
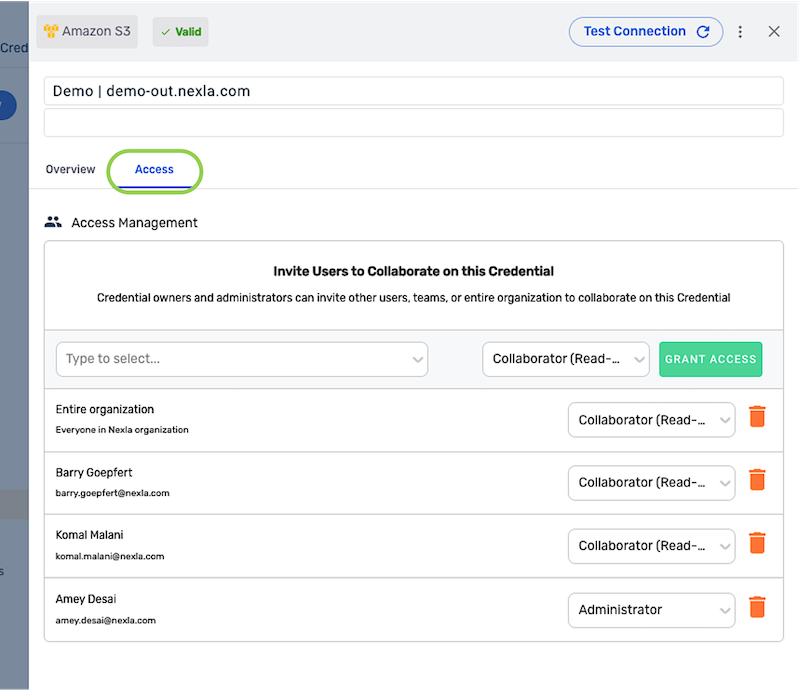
2.2 Access Tab
The Access tab provides access management information and options for the credential.
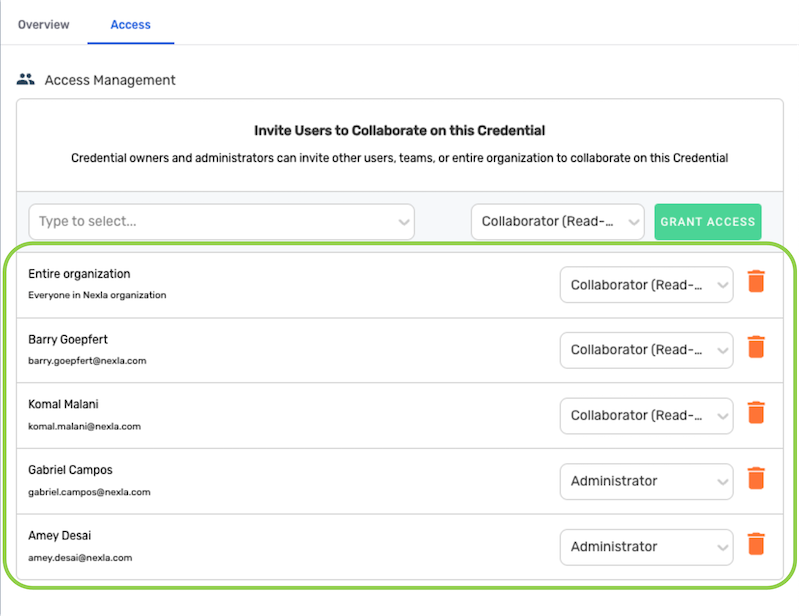
A list of all users with whom the credential has been shared is shown in this tab, along with the assigned access level(s).
Credential owners and administrators can also share the credential and manage existing accesses from within the Access tab. Information about and step-by-step instructions for these operations are provided in Section 3 below.
3. Credential Sharing & Access Management
Credential owners and administrators can easily share credentials with other users, teams, or the entire organization, as well as manage existing credential accesses, enabling efficient collaboration among users.
When a credential is shared, recipients can use the credential to create data sources and/or destinations, but they do not receive sensitive information such as passwords and access keys associated with the credential.
Follow the instructions below to open the Access tab in the credential information screen, and then proceed to one of the following sections:
- Section 3.1 – instructions for sharing the credential with other users
- Section 3.2 – information about viewing and managing credential accesses, including changing granted access levels and removing accesses
- Navigate to the Integrate section using the toolbar on the left, and select Credentials from the section menu.
-
Click on the credential to open its information drawer, and select the Access tab.
Locating & Viewing CredentialsTo learn more about locating & viewing credentials, including viewing shared credentials and searching for credentials using keywords, see Section 1 above.
3.1 Share a Credential
Credentials can only be shared by credential owners and users with administrator-level access.
- In the Access Management panel of the Access tab, select the user or group with whom the credential will be shared from the pulldown menu on the left.
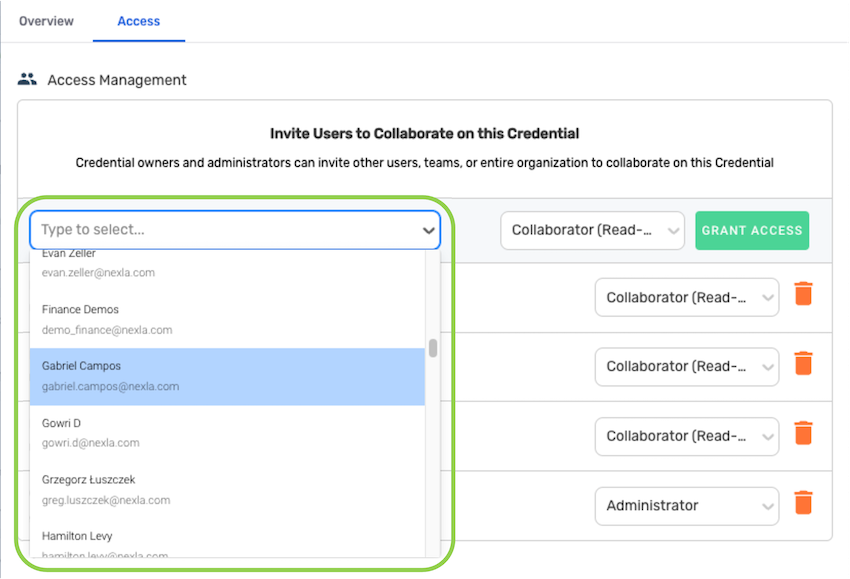
-
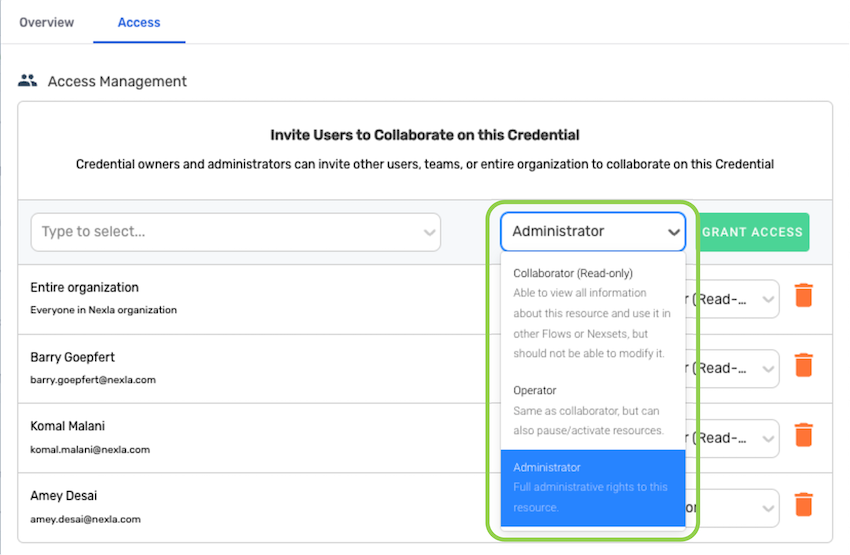
Select the access level that will be granted to the recipient(s) from the pulldown menu on the right.
Resource Access Levels in NexlaTo learn more about the resource access levels that can be granted to users in Nexla—including the resource information, functions, and features available to users with each access level—see Resource Access Levels.
- Click the
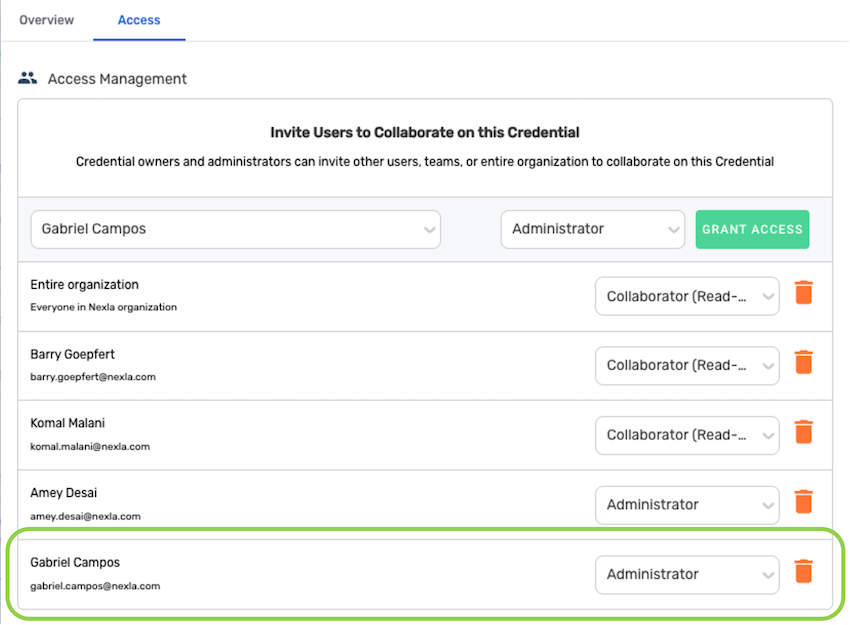
 button to share the credential with the selected user(s). The recipient user(s) will be immediately able to access and use the credential according to the assign access level.
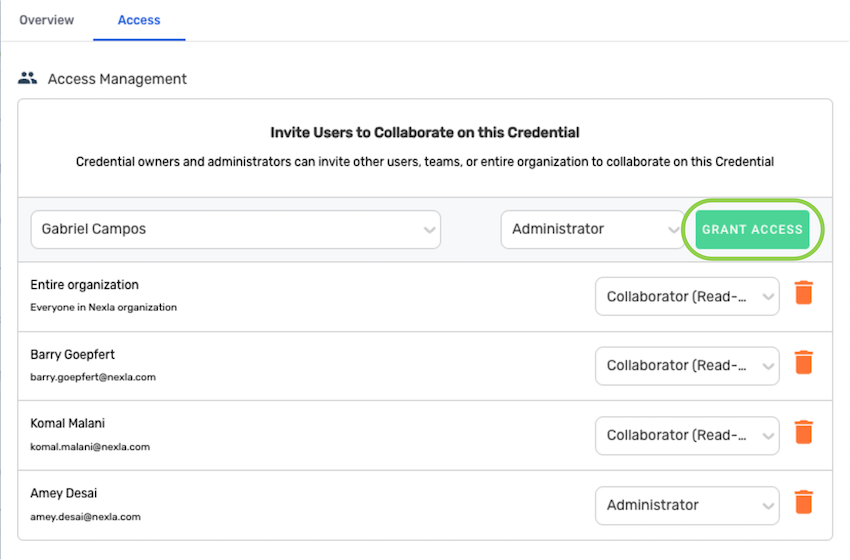
- Once credential access is granted, the list of users with access to the credential will be updated to include the new recipient(s).
3.2 Manage Credential Access
Credential accesses can only be managed by credential owners and users with administrator-level access.
- All users and/or user groups with whom the credential has been shared are listed in the Access Management panel.
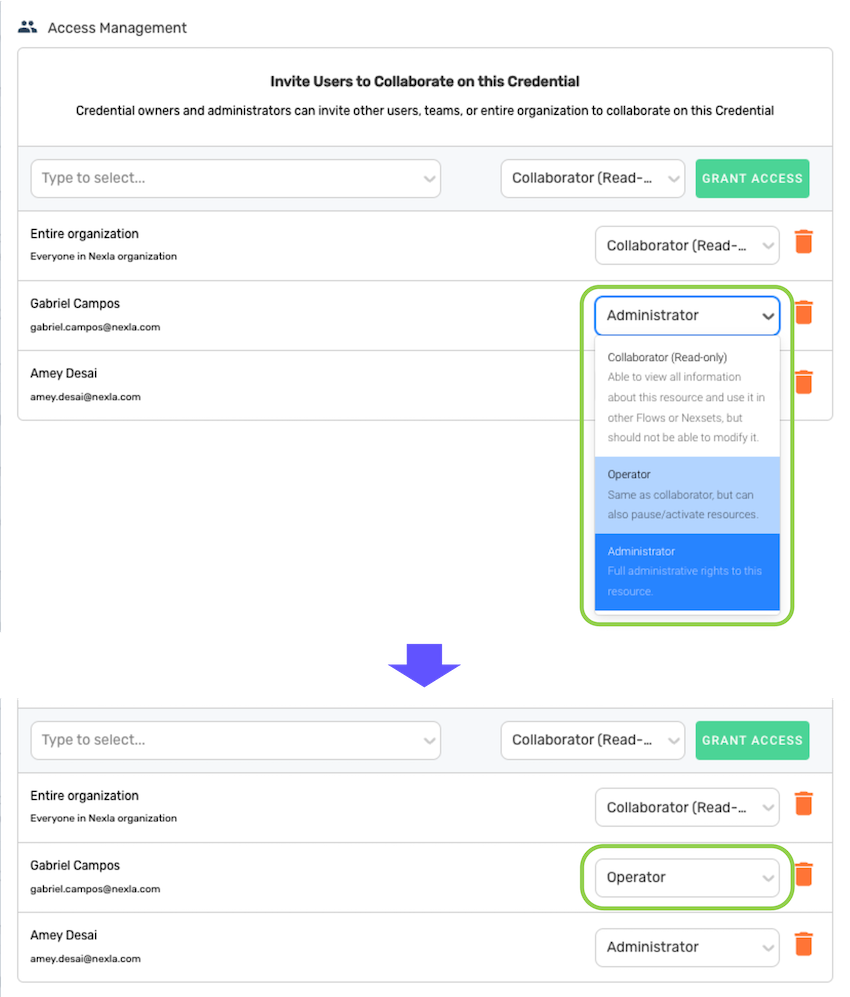
- To change the access level assigned to a user or group with existing access to the credential, select the new access level from the pulldown menu on the right in the listing. The new selection will be saved automatically.
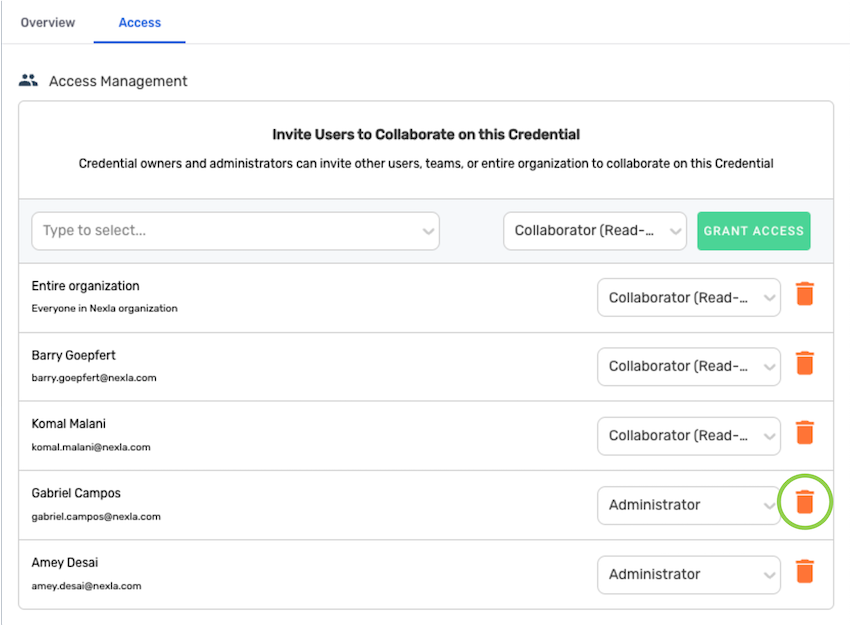
- To remove credential access from a user or group, click the
 icon on the right in the listing.
4. Edit a Credential
Credentials can only be edited by credential owners and users with administrator-level access.
Existing credentials in Nexla can be edited as needed—for example, to update login information, URLs, etc.
However, use caution when editing a credential, as changes are automatically applied everywhere the credential is in use. Ensure that any changes to the credential will not negatively affect data sources or destinations currently using the credential.
To edit an existing credential:
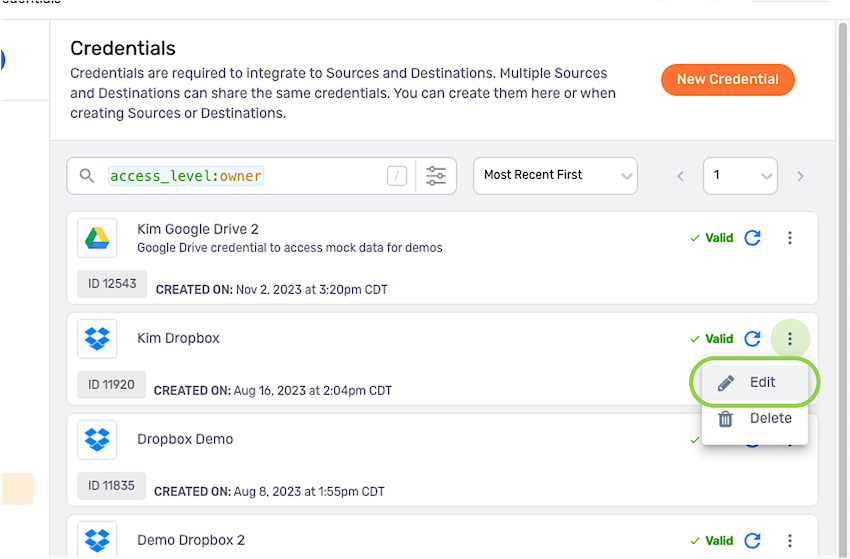
- Locate the credential listing in the Credentials screen in the Integrate section.
- Click the
 icon to the right in the listing to open the credential menu, and select
  to open the Edit Credentials screen.
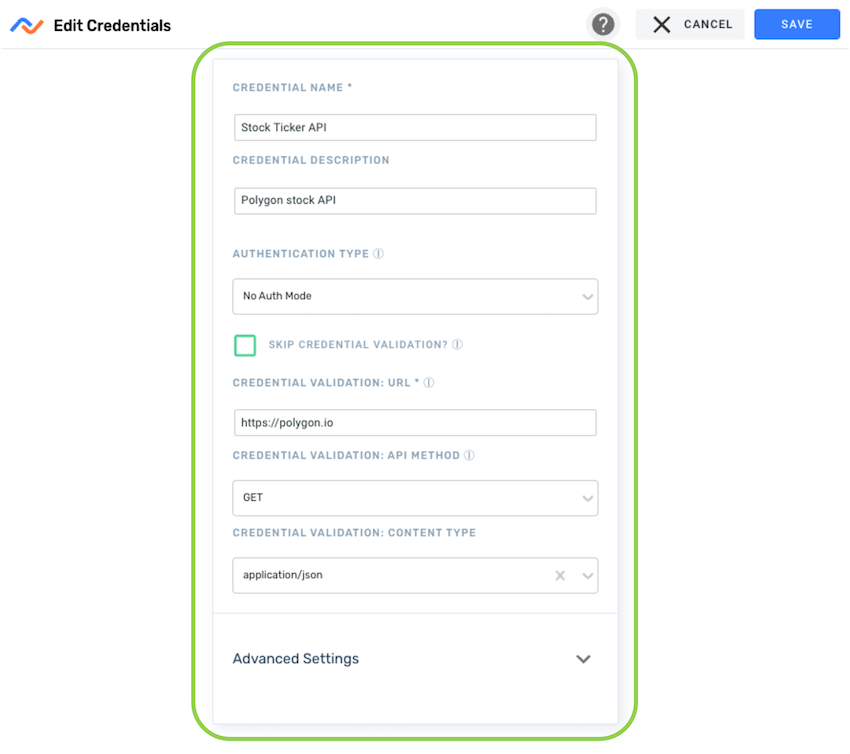
-
The Edit Credentials screen displays all available configuration options for the credential. These options vary according to the credential type and are the same as those available during credential creation, including advanced settings.
Credential Configuration OptionsFor complete information about the credential configuration options and settings available for each connector type, see the pages in the Connectors section.
- Make any needed credential configuration changes by typing directly in text fields, selecting options from pulldown menus, and/or selecting or deselecting checkboxes.
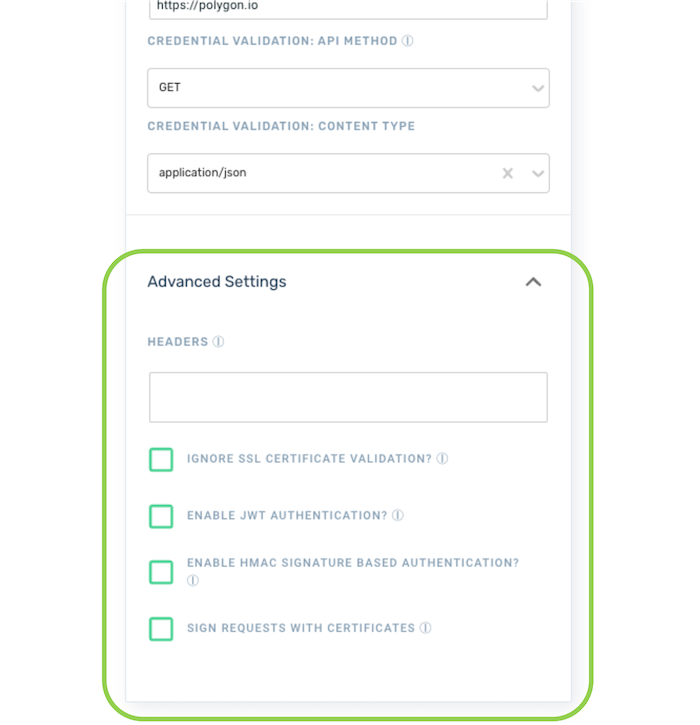
- Click Advanced Settings at the bottom of the credential information box to expand and access advanced settings for the credential, if available.
-
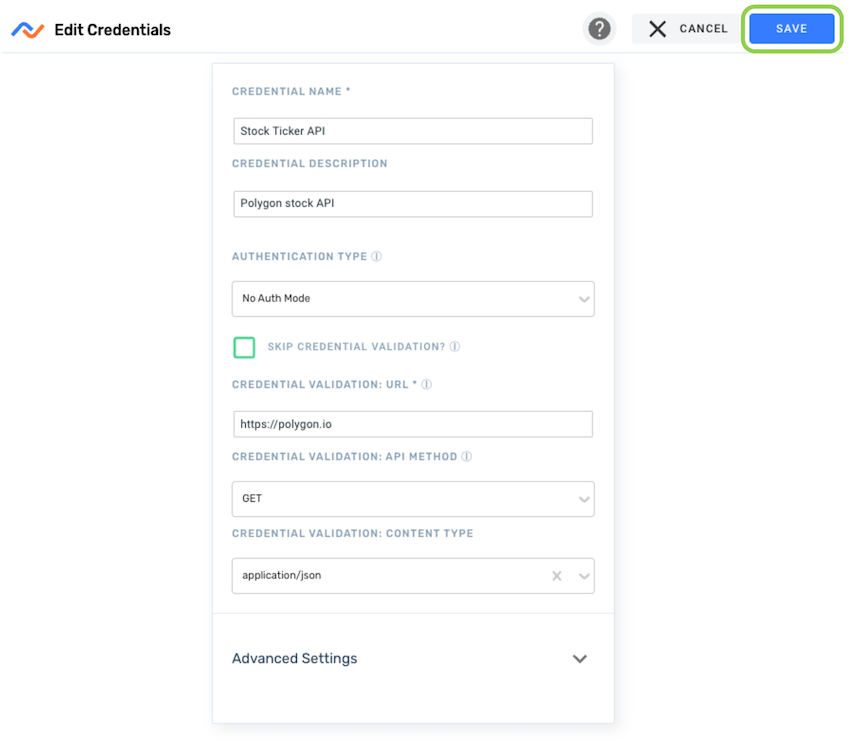
Once the needed changes have been made, click
 in the top right corner of the screen to save the changes to the credential.
5. Delete a Credential
Credentials can only be deleted by credential owners and users with administrator-level access.
Credentials that are invalid or no longer in use can be deleted to maintain resource organization and bookkeeping.
However, deleting a credential removes it from the platform entirely, removing the credential from all accounts with access to it. Use caution when deleting credentials to ensure that data sources or destinations currently using the credential are not negatively affected.
To delete a credential:
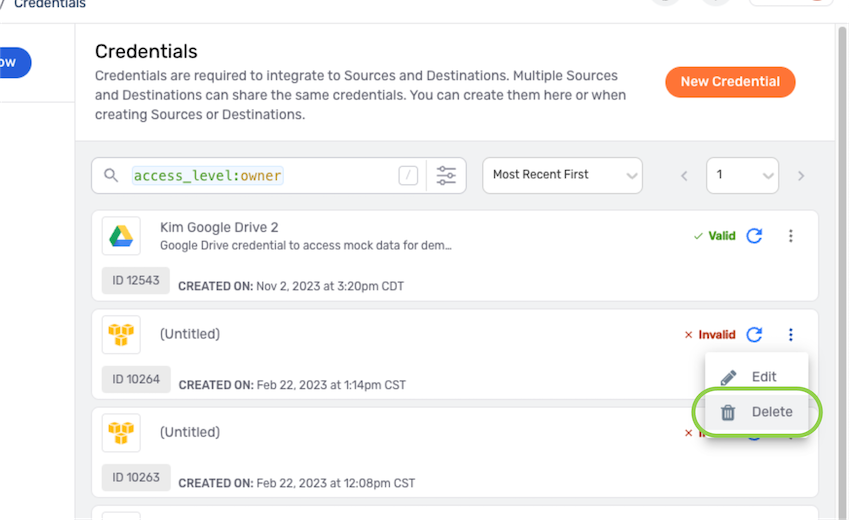
- Locate the credential listing in the Credentials screen in the Integrate section.
- Click the icon to the right in the listing to open the credential menu, and select
 .
.
- In the confirmation pop-up, click
 to permanently delete the credential.
